Do you want to capture some amazing bird photography? Do you want to be able to take bird photos just like the professionals?
Bird photography is an extremely rewarding genre of photography. And one of the great things about bird photography is that you can do it wherever you live, regardless of your location. There’s bound to be a park nearby where you can find birds–or, better yet, you can put out some backyard feeders and watch as the birds start lining up for food.
So let me start by telling you something that every aspiring bird photographer should know:
Bird photography isn’t hard.
It may seem difficult. It may seem demanding. At points, it may seem like it’s possible.
But in truth, bird photography is about applying various techniques, used by the pros for decades, to end up with close-up, detailed, sharp, visually appealing photos of birds.
And in this article, I’m going to share those techniques with you.
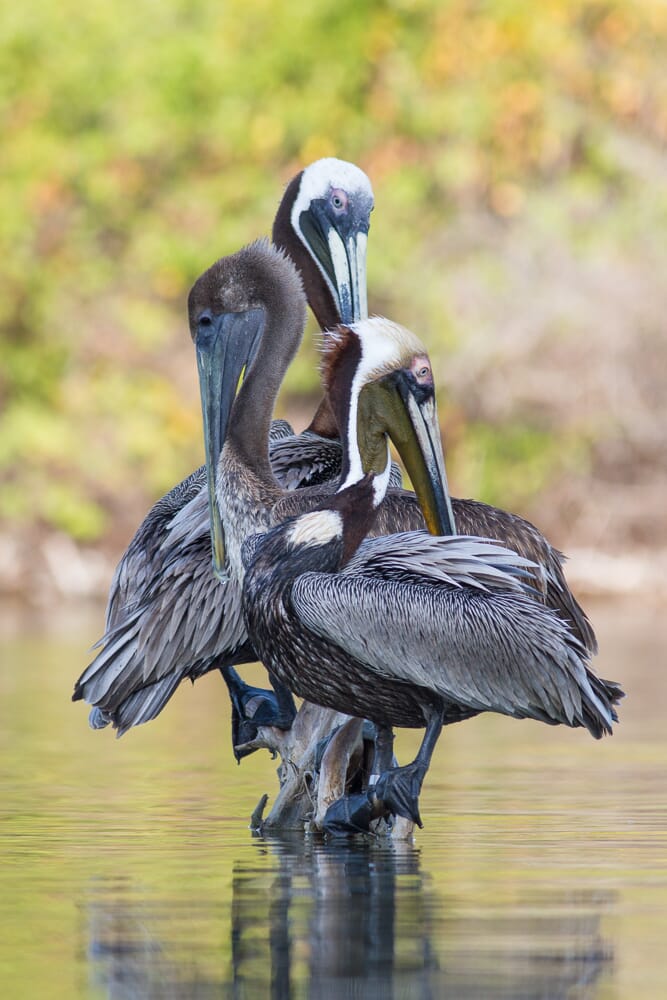
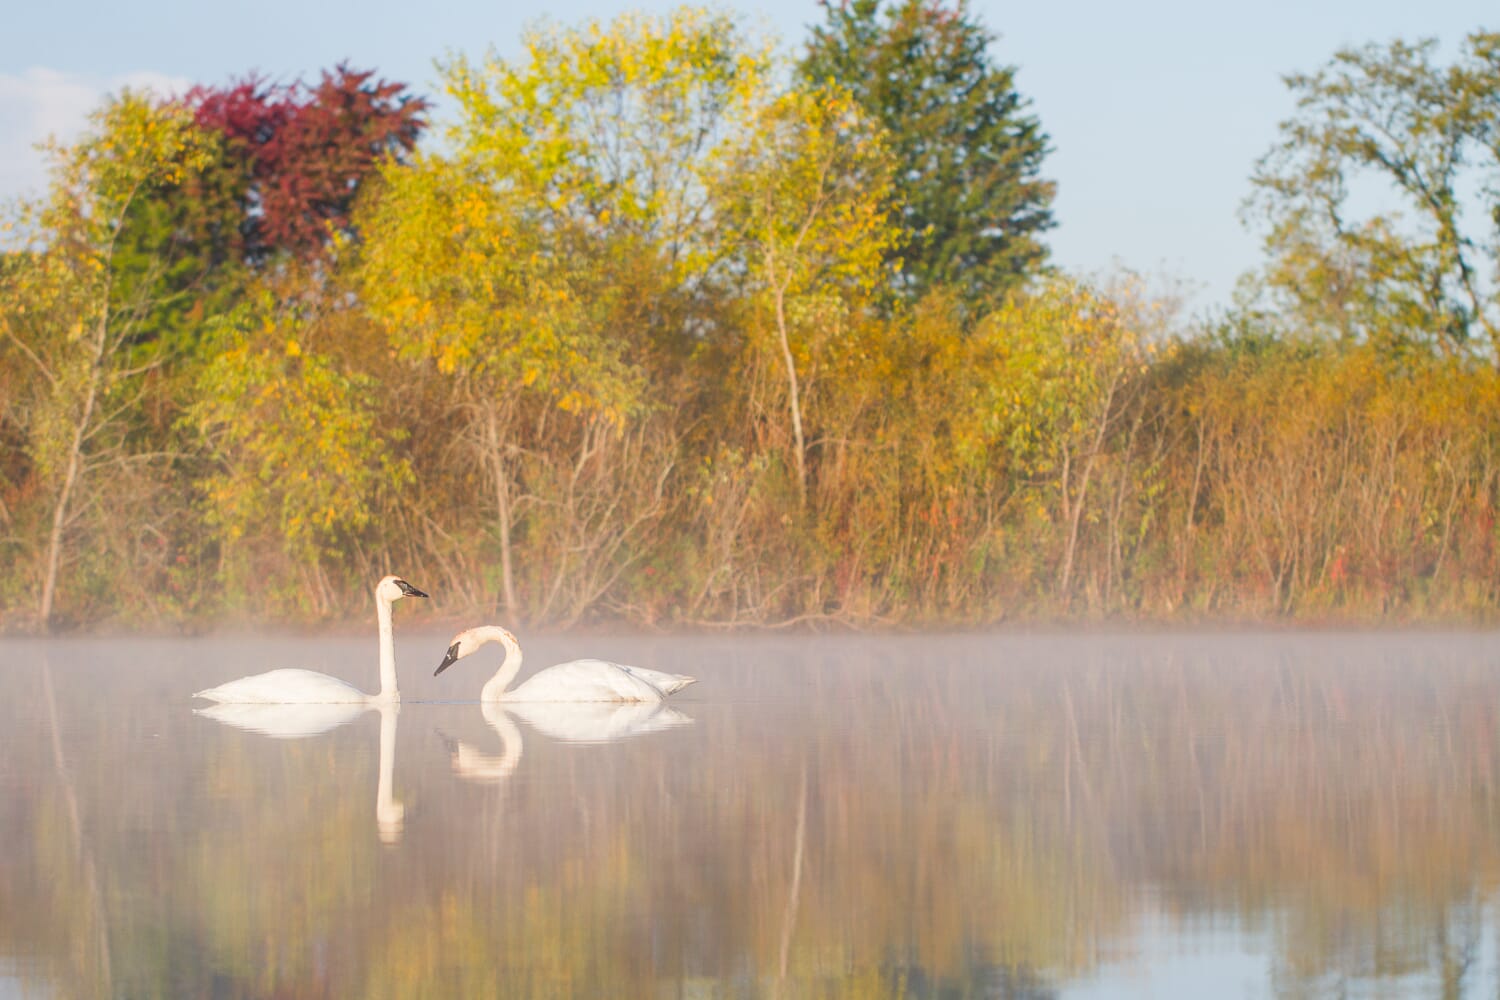
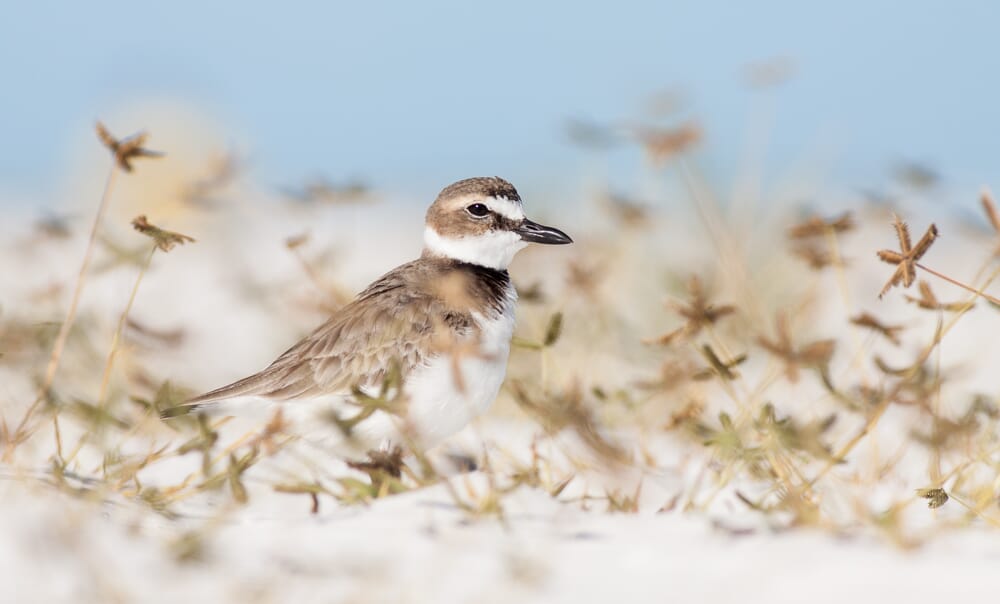
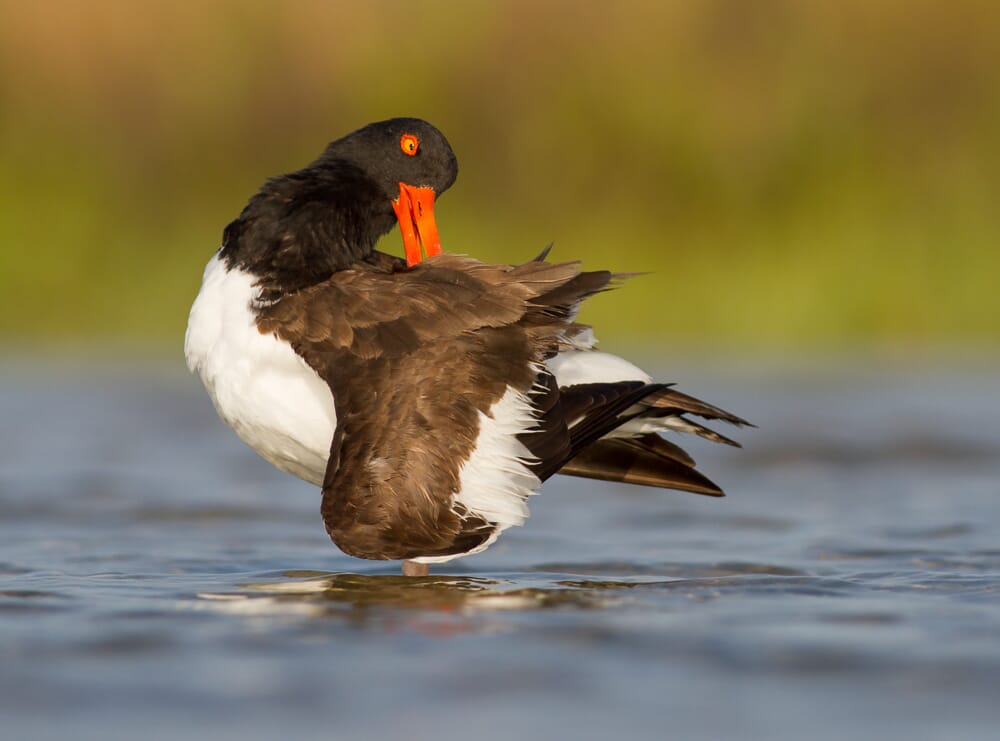
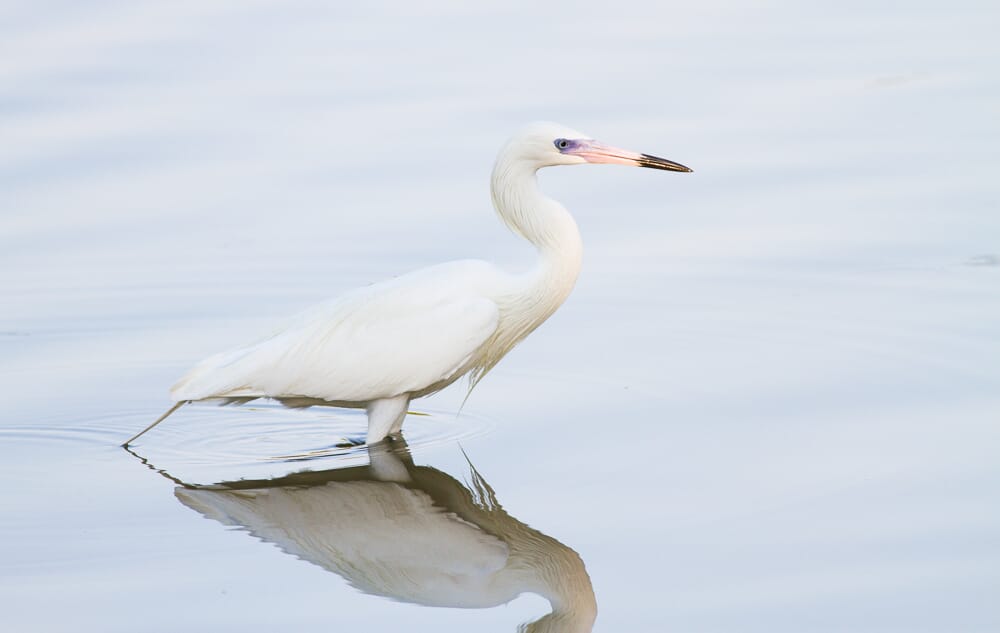
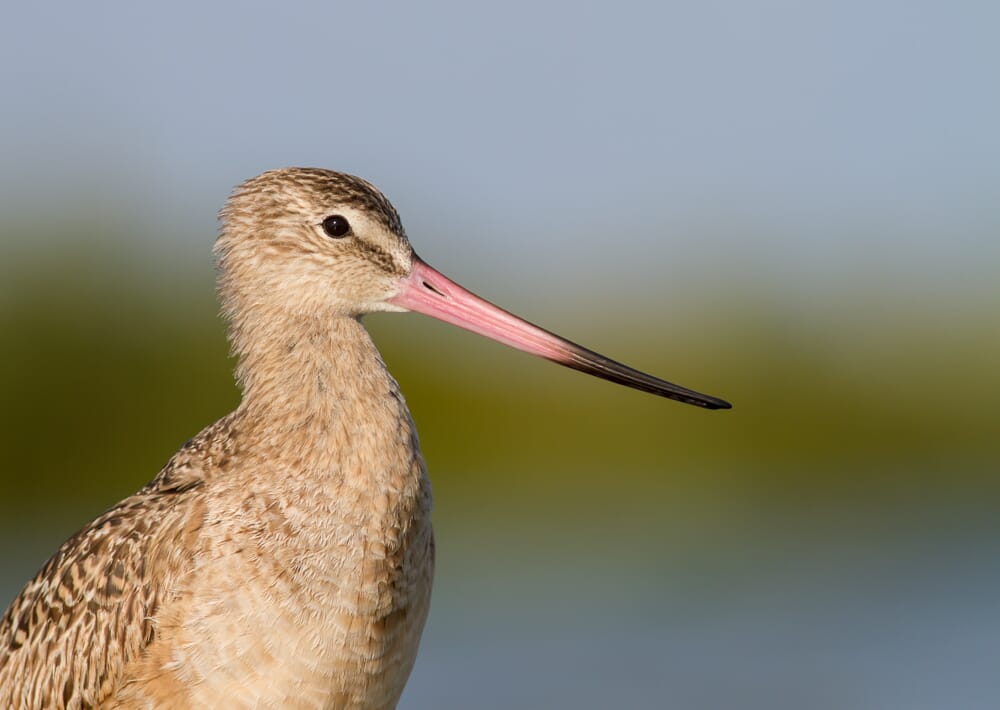
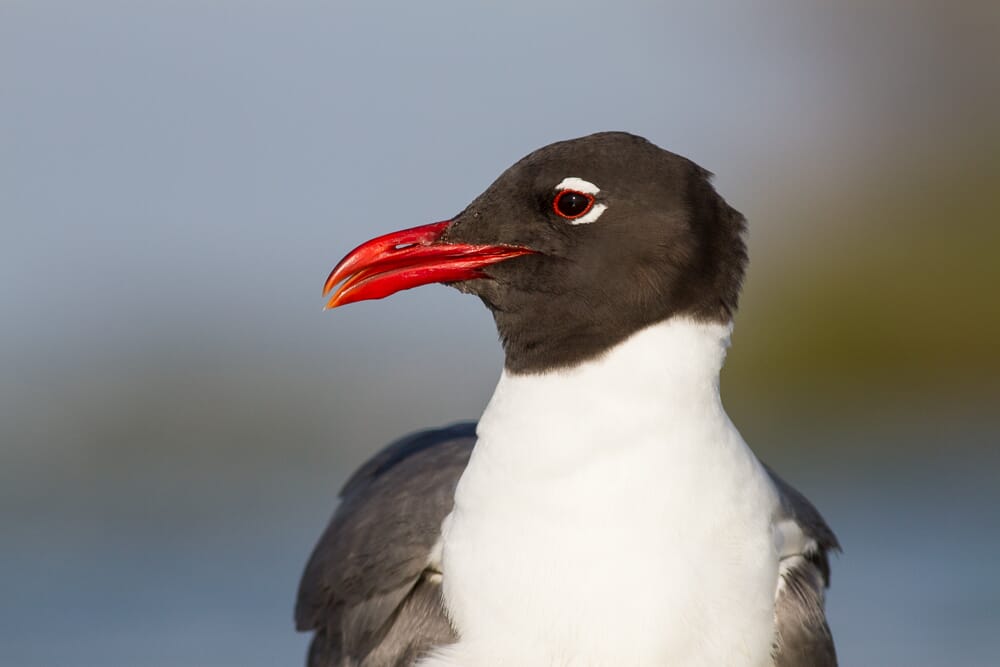
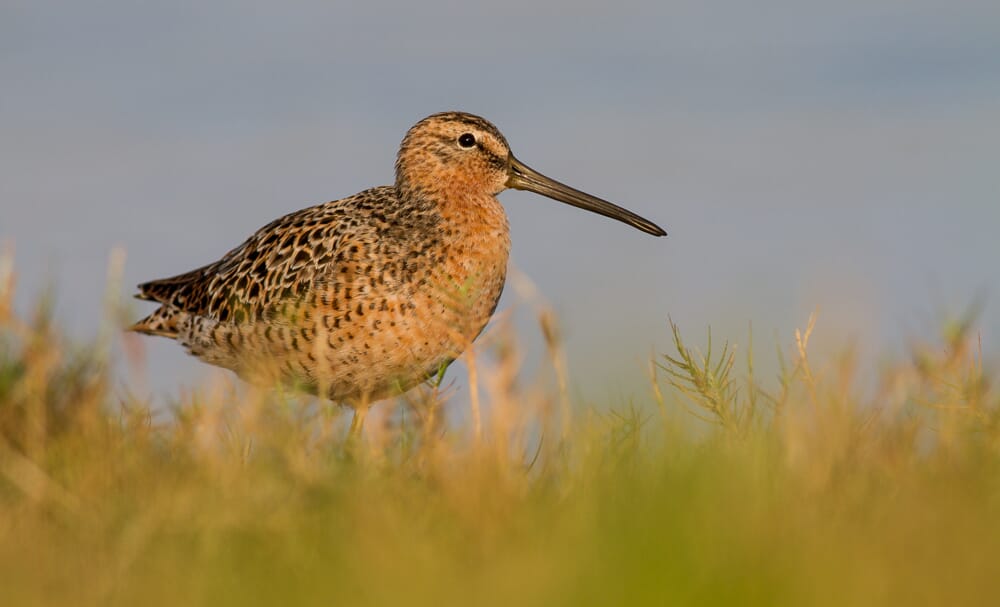
Because these basic bird photography techniques can be used to capture photos like this:
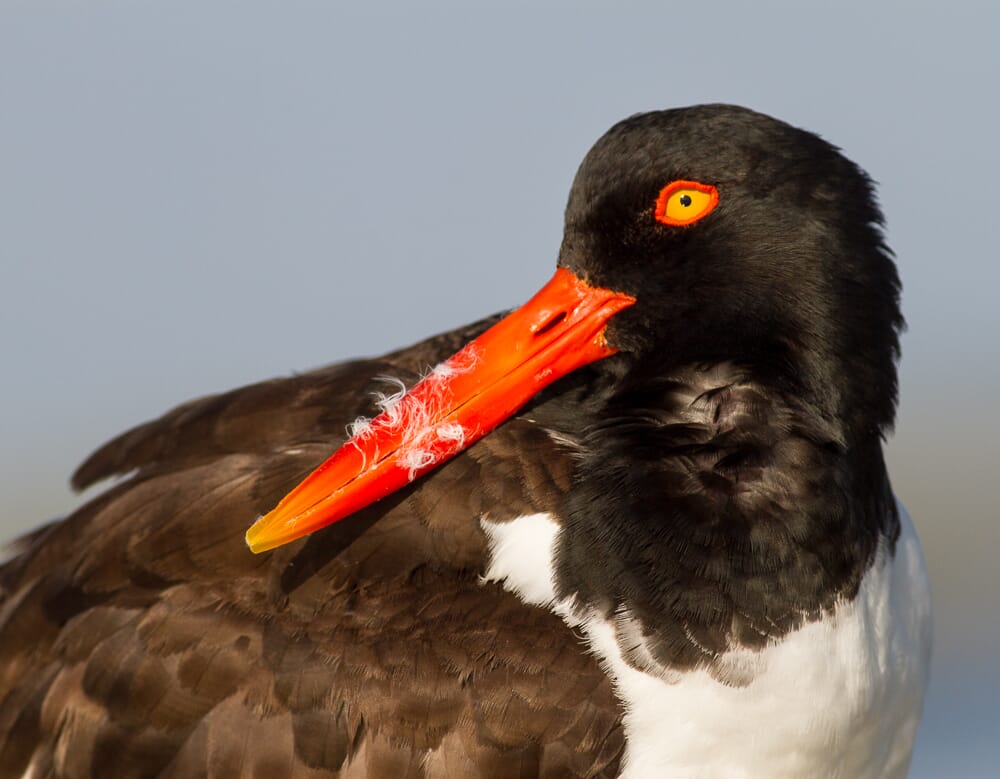
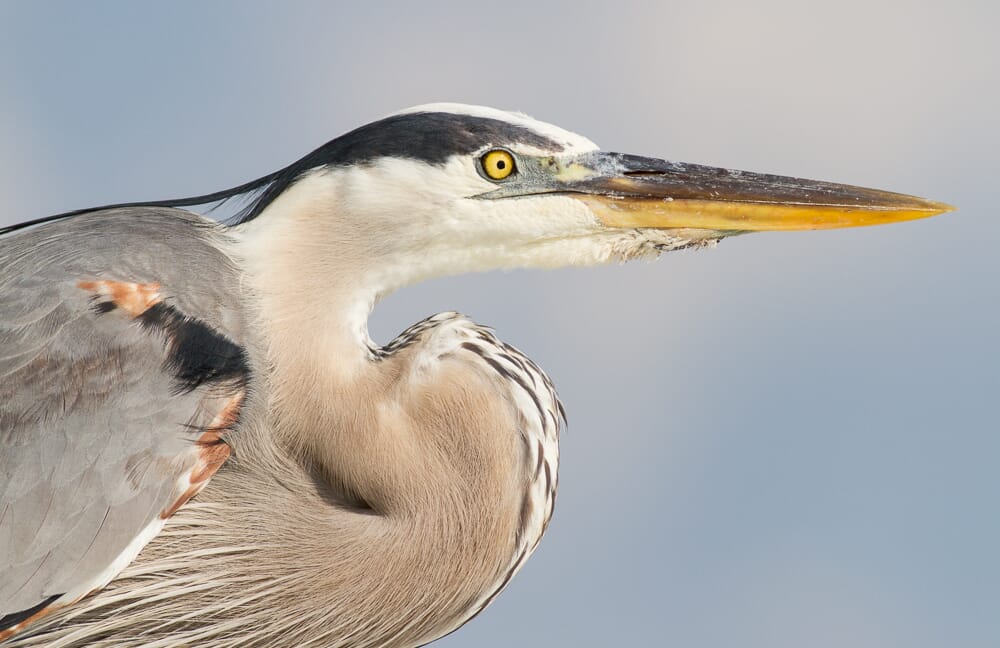
And this:

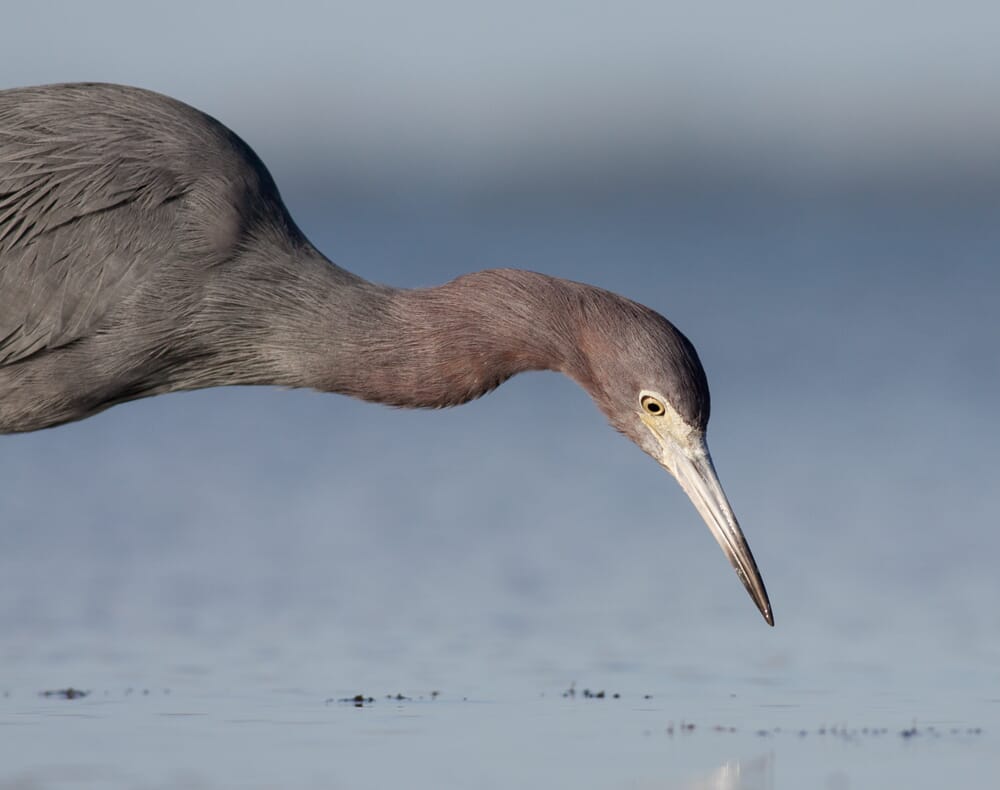
Or this:
It doesn’t take any special workshops.
It doesn’t take any special knowledge (beyond what I share in this article).
It does require some special equipment, but I’ll share with you the best bargain bird photography equipment. That way, you can keep prices to a minimum while still getting great image quality.
Sound good?
Let’s get started.
Bird Photography Tips:
What Is Bird Photography?
First things first:
What actually is bird photography?
In some ways, the answer is obvious:
Bird photography is the photography of birds.
But it’s important to recognize that bird photography is very broad. You can photograph birds with all sorts of equipment, including DSLRs, mirrorless cameras, compact cameras, smartphones, and cameras hooked up to binoculars–and it’s all still bird photography.
You can also photograph birds as part of their environment. You can photograph birds that are small in the frame, or birds that are feeding, or birds that are running along a stretch of beach.
You can photograph birds that are on the ground, or you can photograph birds in flight. These two types of bird photography require different skillsets, as I explain below.
So make sure you don’t feel constrained by the bird photography label. As long as you’re shooting birds, it’s bird photography.
Key Bird Photography Equipment: Cameras
If you want to capture amazing bird photos, you’re probably going to need a high-quality camera.
It’s possible to capture gorgeous bird photography using a compact camera. It’s possible to capture incredible bird photos using a smartphone.
But it’s far, far more difficult. And your photos won’t stand up to rigors of printing, so if you ever plan to frame or sell your images, you’re going to want to avoid these beginner-type cameras.
As of right now, the best cameras for bird photography are DSLRs, with mirrorless bodies coming in as a close second.
DSLRs have impressive autofocus capabilities so that you can quickly lock onto your subject, even if the bird is moving across the ground or through the sky.
DSLRs also feature high continuous shooting rates, which allows you to take a huge quantity of shots in a small amount of time. These continuous shooting rates range from around 3 fps (frames per second) to 16 fps, and the higher your continuous shooting speed, the better your chance of capturing a once-in-a-lifetime image.
Finally, DSLRs offer a huge lineup of bird photography lenses, many of which will get you up-close and personal to your subjects. DSLR lenses come separate from DSLRs, so you’ll need to purchase a bird photography lens separately, but it’ll be worth it.
Note that there are two broad types of DSLRs: Full-frame cameras and crop-sensor (APS-C) cameras. Full-frame cameras have larger sensors, whereas APS-C cameras have smaller sensors. In practice, APS-C cameras give you greater magnification, and this is often desirable in bird photography (the more reach, the better!). So bird photographers often use APS-C cameras.
APS-C cameras also have the benefit of being less expensive than full-frame cameras, though they do come with some drawbacks. APS-C cameras perform worse in low light compared to full-frame cameras, and they tend to have a more limited dynamic range.
For many bird photographers, especially beginner bird photographers, getting an APS-C camera is worth the tradeoff.
Now let’s take a look at the best bird photography cameras:
Canon 90D
![Canon DSLR Camera [EOS 90D] with Built-in Wi-Fi, Bluetooth, DIGIC 8 Image Processor, 4K Video, Dual Pixel CMOS AF, and 3.0 Inch Vari-Angle Touch LCD Screen, [Body Only], Black](https://m.media-amazon.com/images/I/41FS2lfxg+L.jpg)
The Canon 90D is Canon’s most recent APS-C DSLR, offering impressive resolution (32.5 megapixels), along with good low light capabilities and beautiful color rendition.
Having a high continuous shooting rate is essential in bird photography, and the Canon 90D delivers, shooting at 10 frames per second (11 when you lock the focus). This is better than almost any APS-C camera built by Canon, and offers some serious action-stopping potential.
The Canon 90D features a decent autofocus system, though tracking movement could be better, especially for photographers looking to shoot birds in flight. But given its very reasonable price and impressive capabilities, the Canon 90D stands out as one of the best bird photography cameras for beginners and enthusiasts that money can buy.
Related Post: Best Cameras for Birding (with Superzoom Lenses)
Nikon D7500
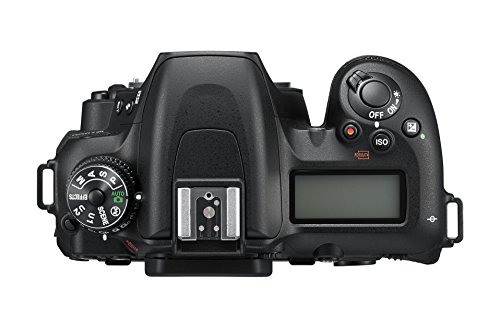
The Nikon D7500 is a major APS-C competitor for the Canon 90D lineup, which makes it a great Nikon alternative to the Canon 90D.
While the D7500’s 8 frames per second continuous shooting may not reach the heights of the 90D’s 10 fps, it’s still very respectable, and will do a good job freezing action when you need to. And the D7500’s autofocus system does a great job tracking subjects, even birds that are on the move.
Regarding resolution: The Nikon D7500 features a 20.9 megapixel sensor. No, this isn’t a lot by today’s standards, even for APS-C DSLRs. But it’s enough to create large prints if you desire, plus the Nikon D7500 is known for its high ISOcapabilities, which result in usable photos up to and past ISO 1600.
All in all, the Nikon D7500 is a great bird photography camera at a great price–one that every Nikon photographer should consider.
Nikon D500

The Nikon D500 is an APS-C, 20 megapixel camera–but don’t let that fool you.
Because it packs some serious action capabilities. The Nikon D500 is designed with action photographers in mind, and that means that it’ll do a great job shooting birds. The autofocus system is identical to the Nikon’s flagship full-frame D5, which sports 153 autofocus points for lightning-fast focus and impressive tracking. Add to that the 10 frames per second continuous shooting rate and you’ve got yourself a monster of a camera–one that’ll get you incredible bird photos, consistently.
The Nikon D500 is also very durable, which makes it great for bird photographers who don’t mind taking their gear into adverse conditions. High ISO performance is good; while you shouldn’t expect it to compete with professional bodies like the Nikon D5, you’ll definitely be able to eke out some low light photos.
The main drawback of the Nikon D500 is price, which is about 50% higher than the Nikon D7500. But if you’re serious about your bird photography and don’t want to compromise on action capabilities, then the Nikon D500 is the way to go.
Related Post: Best Cameras for Nature Photography
Canon 7D Mark II

Let’s start with an important fact:
The Canon 7D Mark II is an old camera. It debuted all the way back in 2014, with an APS-C, 20.2 megapixel sensor and dual DIGIC 6 processors (Canon is now on DIGIC 8). And Canon 7D Mark II fans have waited impatiently for an update ever since, one that’s not likely to come.
That said, the Canon 7D Mark II is not outdated in the ways that matter. It’s a camera designed for bird, wildlife, and sports photographers, and it still offers some of the best action photography capabilities that money can buy.
The Canon 7D Mark II shoots at 10 frames per second, something that only the Canon 90D can match, even 5 years later. And the camera includes a fully cross-type 65-point autofocus system, which is perfect for tracking fast-moving subjects.
And you should also know about the Canon 7D Mark II’s body, which is a rugged magnesium alloy material. Hold the camera in your hands, and you’ll know: This is a serious camera, made for serious photographers.
So the Canon 7D Mark II may be old, but you shouldn’t discount it. It offers some awesome capabilities, especially for the price.
Key Bird Photography Equipment: Lenses
Once you’ve chosen a bird photography camera, you’re going to need to pick a bird photography lens.
Unfortunately, there are few bird photography lenses that are ultra-cheap. Bird photography requires a focal length of, at minimum, 400mm–and that should really be with an APS-C camera. So if you do go full-frame, you’ll need something even longer.
Professional bird photographers shoot almost exclusively with 500mm f/4 and 600mm f/4 prime lenses.
But these lenses are ridiculously expensive, costing upwards of $7000 USD. For that reason, I have opted to include other, cheaper lenses on this list.
Note that a bird photography lens shouldn’t just be chosen on focal length alone. The best lenses for bird photography offer fast autofocus, so that they can work with the camera to track birds on the move or in flight. And the best lenses don’t skimp on image quality; they’re tack-sharp, especially at 400-600mm. This is essential for capturing high-quality bird photos.
So let’s look at your options, starting with:
Canon 100-400mm f/4.5-5.6L IS II
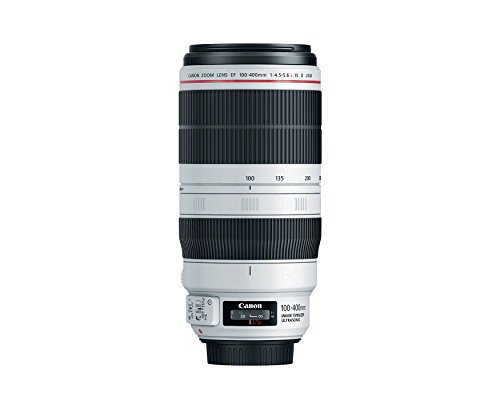
The Canon 100-400mm IS II is a recent update of the incredibly popular Canon 100-400mm IS I–both of which make for great bird photography lenses.
The 400mm focal length is perfect for shooting large birds, or small birds in tame environments. And the lens offers an impressive autofocus system, which will allow you to lock onto moving subjects with speed.
While long telephoto zooms are known for poor image quality, the Canon 100-400mm f/4.5-5.6L defies these expectations, producing sharp photos even at 400mm.
While not quite as impressive as its successor, the Canon 100-400mm f/4.5-5.6L IS I is also a viable option, especially if you’re looking to keep the price down.
Related Post: Best Nikon Telephoto Lenses
Nikon 80-400mm f/4.5-5.6G VR

If you’re a Nikon shooter, you have a few options for reasonably priced supertelephoto lenses, and the Nikon 80-400mm f/4.5-5.6G VR comes out on top.
Like the Canon 100-400mm discussed above, the Nikon 80-400mm is an upgraded version of the old Nikon 80-400. But while the old Canon 100-400mm was an optically impressive lens, the old Nikon was not–which is why I’m happy to say that the new Nikon 80-400mm f/4.5-5.6G is a tremendous improvement, making it a great first lens for bird photographers.
First of all, the autofocus on the Nikon 80-400mm f/4.5-5.6G is impressive, especially for a long zoom. It’s fast and accurate, and will perform well when shooting birds in action.
The VR (vibration reduction) is a nice touch, which lets you shoot in low light while handholding. These long lenses are often prone to camera shake, so it’s a good feature to have.
But most importantly, the Nikon 80-400mm f/4.5-5.6G performs well in terms of image quality. While sharpness does drop off toward the long end, it’s far from disappointing, offering good image quality (especially when stopped down).
So check out the Nikon 80-400mm f/4.5-5.6G.
It may be exactly what you need.
Canon 400mm f/5.6L
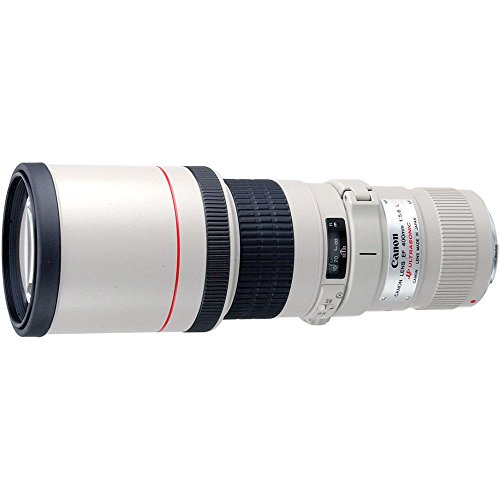
The Canon 400mm f/5.6L is the only prime lens on this list, and it’s the only lens on this list that’s pretty much exclusively meant for wildlife and bird photography.
Despite this lack of flexibility, it’s a great lens for the serious bird photographer, because it offers fast autofocusing, great build quality, and stellar optics.
Let’s take a closer look:
The autofocus on the Canon 400mm f/5.6L is impressive, especially for the cost. You’ll be able to focus quickly and accurately, even on birds in flight.
Because this is a Canon ‘L’ lens, the 400mm f/5.6 features a rugged build. It feels quite solid in your hands, which is mostly a good thing–until you carry it around all day, that is, because the lens is hardly light. In fact, it’s noticeably heavy, and definitely not a casual, walkaround-style lens. Instead, it’s a piece of kit you use for bird photography, and bird photography alone.
I said that the Canon 400mm f/5.6L is stellar optically, and there’s not much else I can say. It’s sharp wide open, and offers well-managed chromatic aberration and beautiful colors.
My biggest gripe regarding this lens is its weight and size combined with the lack of image stabilization. While it comes with a tripod collar, plenty of bird photographers prefer to shoot handheld–and if that’s you, prepare to get a real workout while handholding the 400mm f/5.6L.
Tamron 150-600mm f/5-6.3 Di VC

The Tamron 150-600mm f/5-6.3 Di VC is one of a few recent “superzooms,” offering a tremendous focal length range for a bargain price.
While Nikon shooters should also check out the Nikon 200-500mm f/5.6 VR, the Tamron 150-600mm slightly edges it out, in terms of focal length, image quality, and even autofocus.
Here’s what makes the Tamron 150-600mm such a great choice for bird photography:
First, the 600mm long end is perfect for capturing more elusive, smaller species of birds. While shooting at 400mm will get you reasonably close to bigger birds, 600mm is a bird photographer’s dream.
Of course, that wouldn’t matter if the 150-600mm couldn’t perform at the long end. But unlike most long zoom lenses, this Tamron lens manages to keep it together at 600mm and performs surprisingly well–giving you beautiful, sharp images of birds.
Regarding autofocus: The Tamron 150-600mm isn’t the fastest lens out there, but it does a good job, focusing quickly and accurately on stationary subjects. It also does surprisingly well when shooting birds in flight, which is the icing on the cake for any serious bird photographer.
Here’s the bottom line:
The Tamron 150-600mm is an all-around solid performer and offers some amazing image quality and impressive autofocusing capabilities. Plus, that 400-600mm long-end gives you a lot of flexibility in the field.
The Best Camera Settings for Bird Photographers
Now that you’re familiar with the best cameras and lenses for bird photography, it’s time to talk about getting out and shooting.
And it all starts with camera settings.
If you don’t take control of your camera, if you’re not able to choose the right settings at the right time, then you won’t be able to capture beautiful, well-exposed images when you really need to.
Bird Photography and Exposure
Great bird photography always starts with exposure.
Exposure refers simply to the level of brightness of a photo. It’s your job, as a photographer, to make sure that you capture a photo that’s not too dark (underexposed), not too light (overexposed), but just right (well-exposed).
Photos that are well-exposed include a lot of detail. A well-exposed photo includes detail in the shadows and the highlights (the brightest parts of the image).
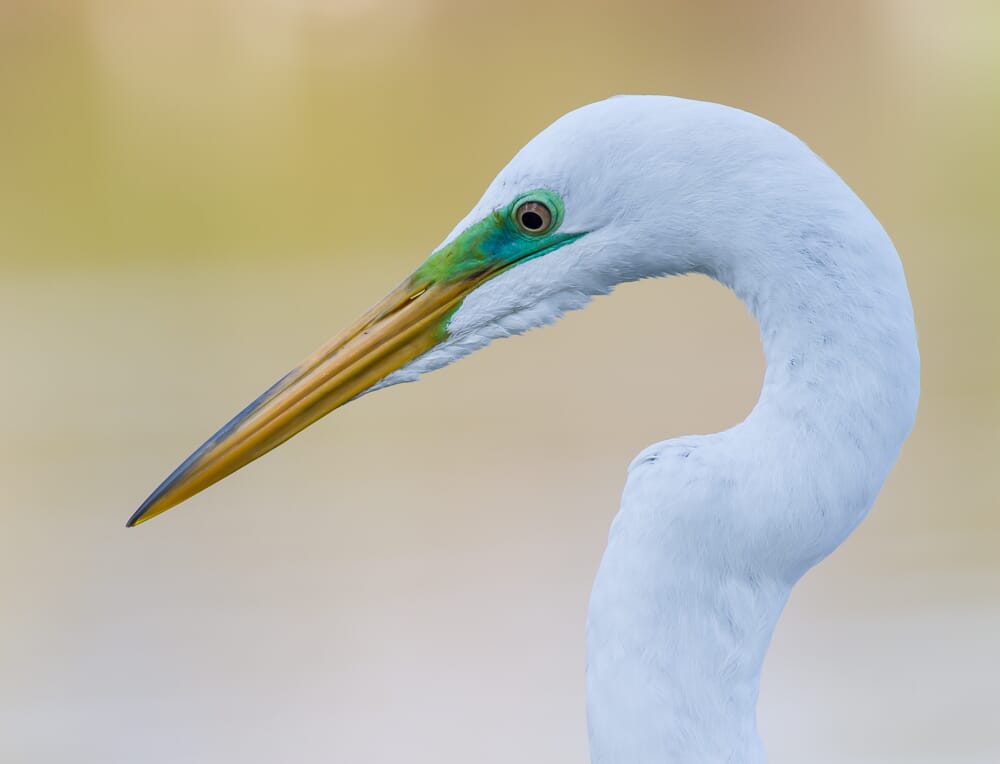
Here’s an example of a well-exposed bird photo:

Now, this may sound overly complicated. After all, how do you determine the right exposure? And how do you achieve it?
Fortunately, it’s not as hard as it sounds. Your camera has a meter built in, and this meter is excellent at determining the best exposure for the scene. Occasionally, you’ll want to make adjustments, but it generally does a good job–so you can rely on the meter’s recommendations to capture the perfect exposure.
However, even with the in-built camera meter, you’re going to need to take control over your camera settings. You see, exposure isn’t just a single quantity that your camera identifies automatically.
Instead, exposure is the result of three variables: aperture, ISO, and shutter speed.
Together, these variables determine the overall exposure.
And even with your camera making exposure recommendations, you have to decide how to carry out these recommendations.
Hopefully, this will all make sense once I explain these different exposure variables: aperture, ISO, and shutter speed.
Aperture in Bird Photography
Aperture refers to a diaphragm in the lens that opens wider or closes down depending on your camera settings.
Aperture is represented by f-numbers, like this: f/1.8, f/2.8, f/4, f/5.6, f/8, f/16, etc.
Now, the smaller the number, the wider the aperture opening. So an aperture of f/1.8 is very large, while an aperture of f/16 is very narrow.
Why does this matter?
Because the wider the aperture, the more light you let into the photo. And this, in turn, brightens the exposure.
Aperture also determines something else, called the depth of field.
The depth of field is basically the amount of the photo that’s sharp. For instance, when you take a photo of a bird, you might focus on the bird’s eye. But will the bird’s chest, which protrudes out in front of the eye, still be sharp? Will the bird’s back leg, which is behind the plane of the eye, still be sharp? What about a bird standing just behind your main subject? Will that bird be sharp?
These all depend on the depth of field.
If you use a wide aperture (e.g., f/2.8), the depth of field will be very thin, and only a small sliver of the bird will actually be sharp.
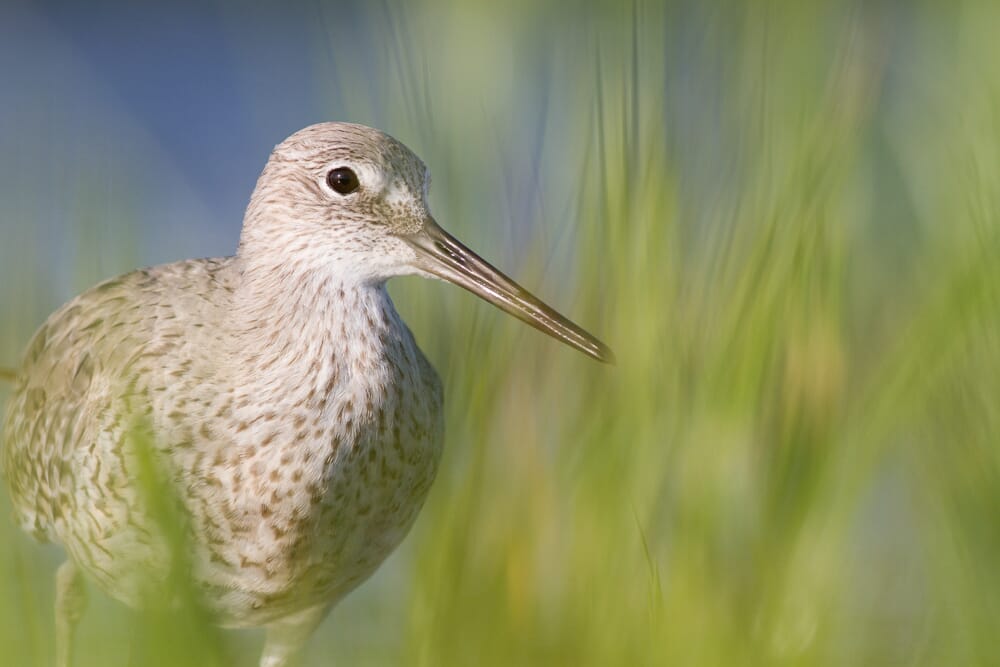
Here’s an example of a bird photo with a shallow depth of field. Notice how the vegetation around the bird is blurry:
If you use a narrow aperture (e.g., f/16), the depth of field will be very deep, and the whole bird will be sharp, plus the areas immediately in front of and behind the bird.
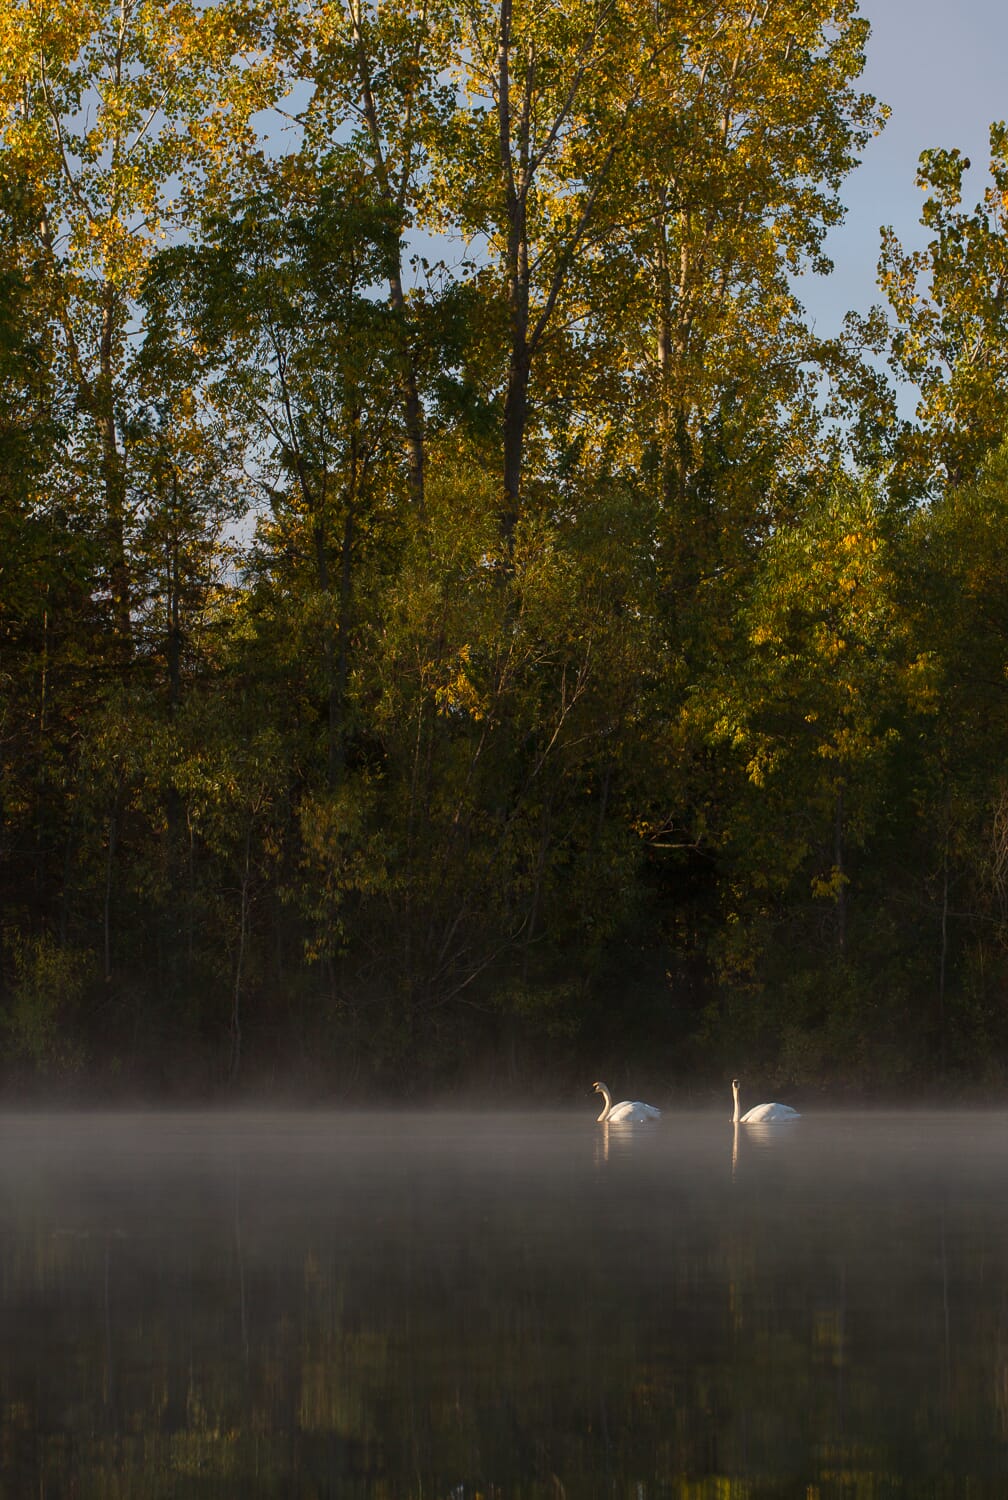
For instance, both the birds and the background are sharp in this photo, due to a deep depth of field:
Using a narrow aperture might seem like the best decision. After all, why not go for a bird that’s fully sharp?
First, using a narrow aperture doesn’t look as good. A wide aperture will give a nice, blurry background, while a narrow aperture will make too much stand out–which is distracting.
Second, as you’ll recall, the size of the aperture changes the exposure. If you use a narrow aperture, you’ll risk letting in too little light–which will cause your shots to be severely underexposed.
That’s why it’s best to stick with a wider aperture in bird photography. I recommend using an aperture of f/6.3 or f/7.1 for most close-up photos, because this will keep the entire bird sharp (including the back legs and tail). If you’re in a pinch and have very little light to work with, you can drop the aperture to f/5.6 and sacrifice a bit of depth of field for a well-exposed image.
However, while aperture is one component of exposure, you can also make things more or less bright with another key camera setting:
Shutter Speed in Bird Photography
Shutter speed refers to the length of time your camera’s shutter is exposed to the world. In other words, the shutter speed is the amount of time for which you take a picture.
Shutter speed is represented in seconds, like this: 2s, 1s, 1/2s, 1/20s, 1/60s, 1/250s, etc.
The longer the shutter speed, the more light the shutter lets in, and the brighter the photo. The shorter the shutter speed, the less light the shutter lets in, and the darker the photo.
Make sense?
So you can see why aperture doesn’t determine the exposure on its own. Instead, you have to balance the aperture and the exposure, using the camera’s recommendation. But note that there are a huge number of aperture and shutter speed combinations that will give you the same exposure. For instance, if you shoot at f/8 and 1/115s, you might get a nice shot. But if you narrow the aperture to f/11 and you lengthen the shutter speed to 1/60s, you’ll get the exact same exposure.
The two balance each other out. This is a good thing–because it gives you a lot of room for artistry. You get to choose an aperture that fits your needs, and then you can choose a corresponding shutter speed, and vice versa.
Shutter speed also has another important feature:
It determines how sharp your images turn out. If you use a slow shutter speed, everything becomes blurry–because the objects in the frame will have time to move. But if you choose a fast shutter speed, you’ll freeze the scene, including lightning-fast motion like a bird in flight.
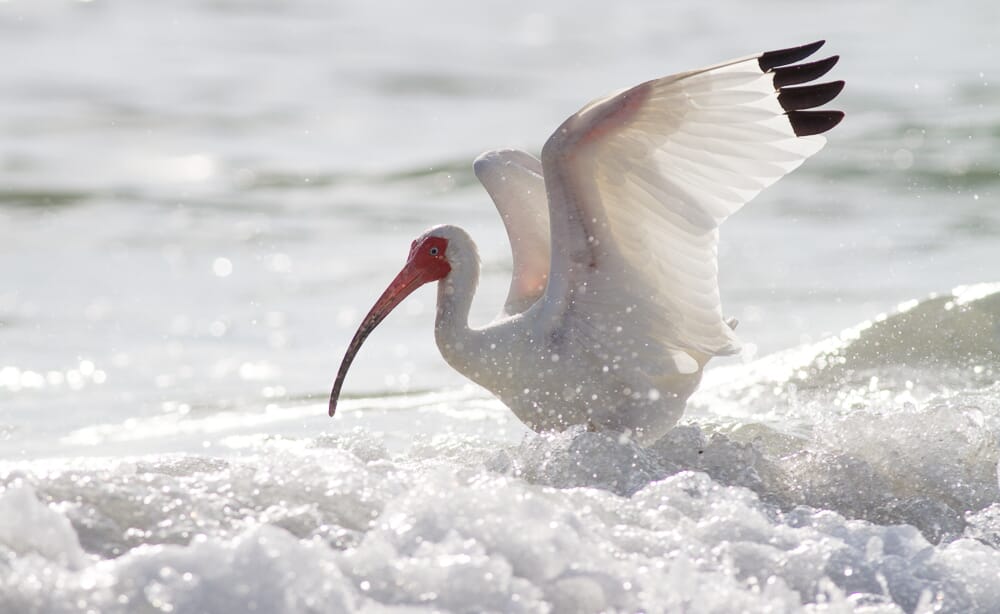
I had to use a fast shutter speed to freeze the bird’s wings in this photo:
That’s why always recommend you shoot birds in action at 1/1000s (and faster is pretty much always better). If you’re shooting birds in flight, 1/2000s or more is ideal.
ISO in Bird Photography
ISO is sometimes a bit of an exposure afterthought because it doesn’t have critical effects on the scene the way that aperture does (with its depth of field) or shutter speed does (by determining sharpness).
But ISO still matters.
You see, ISO refers to the sensitivity of your camera sensor to light. The higher the ISO, the more sensitive your sensor is to ambient light–and the brighter your exposure will turn out.
You might already realize why this is useful:
When the light is low, you still need a fast shutter speed to freeze birds. But a fast shutter speed cuts off light, resulting in dark photos.
It seems like an impossible predicament, until you realize you can crank up the ISO and get a brighter exposure without sacrificing shutter speed.
So ISO is like the third part of the balancing act, alongside aperture and shutter speed. You have to make sure you pick the best combination of these factors–in order to get the perfect exposure, the perfect depth of field, and a fast-enough shutter speed to achieve sharp photos.
Unfortunately, like aperture and shutter speed, ISO comes with a tradeoff. The higher the ISO, the more noise that is introduced into your photos. And noise doesn’t look good, plus it degrades detail and decreases the tonal range of your images.
So I recommend starting at your lowest ISO setting, and only increase it when you have to (such as when the light gets low and you desperately need a faster shutter speed).
And remember: You can always adjust the aperture and shutter speed to compensate for low light, as well!
Camera Modes and Bird Photography
I’ve talked a lot about aperture, shutter speed, and ISO. And I’ve explained how they affect various aspects of your bird photos.
But I haven’t explained how you control these settings, or how you know what the camera recommends.
These features are determined by the camera mode, which can be set via the Mode Dial on DSLRs.
When it comes to bird photography, there’s one mode I recommend above all others: Aperture Priority mode.
Aperture Priority allows you to set the ISO and aperture (by spinning the wheels or dials on your camera), while the camera sets the shutter speed based on its meter reading.
It’s great for shooting action, because the shutter speed will automatically adjust depending on the light. So if you’re photographing a bird that flies in sunlight, then shadow, then lands in sunlight, you’ll get good exposures in each and every shot.
You also have the option to use Manual mode, where you use the wheels and dials to input the aperture, the shutter speed, and the ISO. You do this based on the camera’s recommended exposure, which is displayed as a bar in the viewfinder.
But Manual mode can involve a lot of fiddling around, which isn’t ideal for fast-paced photography. So unless the light is very consistent, I recommend you work in Aperture Priority mode.
That way, you can get the best exposure possible.
Getting Tack-Sharp Bird Photos
If you want to capture amazing bird photos, they have to be tack-sharp. Even a bit of blur can easily ruin an otherwise strong photo, and so this is absolutely essential to get right.
That said, making sure your bird photos are sharp doesn’t have to be difficult. There are a few basic techniques you can use to ensure consistently sharp bird photography:
First, as I mentioned above, it’s important to use a fast shutter speed if you want sharp bird images. Birds frequently move fast–and without a correspondingly fast shutter speed, you’re going to end up with a blurry shot.
But what shutter speed is fast enough for sharp bird photos?
When you’re shooting stationary birds, it’s okay to drop your shutter speed down to around 1/500s, or even 1/250s. If your lens has image stabilization, feel free to go even lower.
For instance, a shot like this doesn’t require a fast shutter speed:
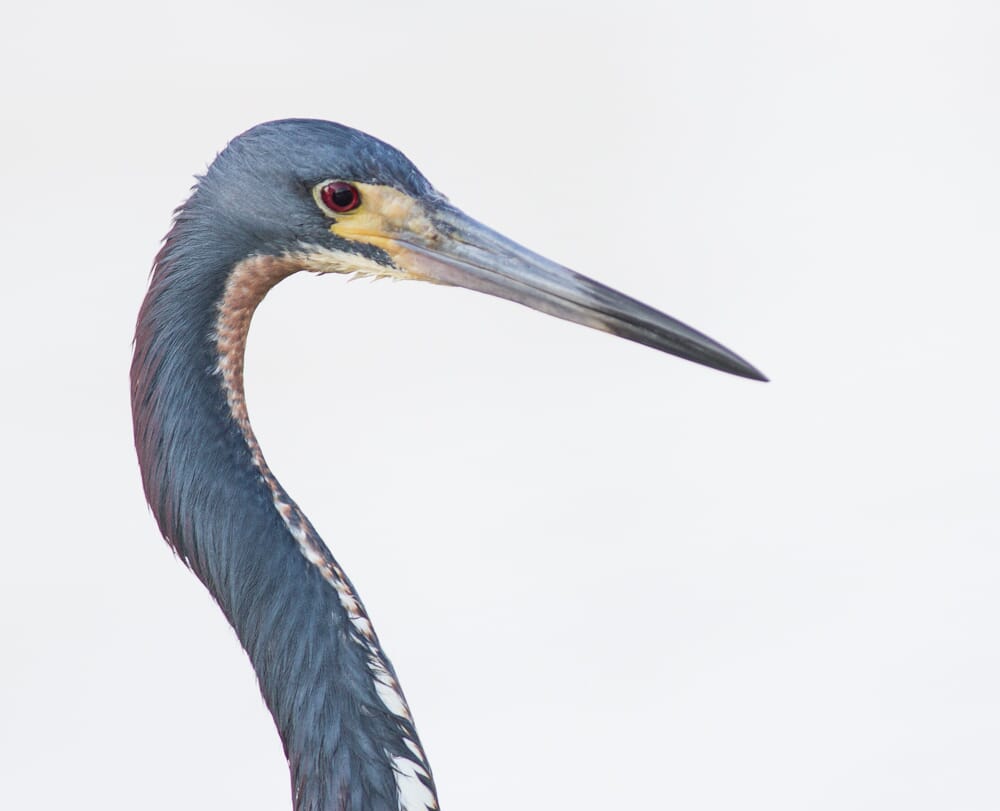
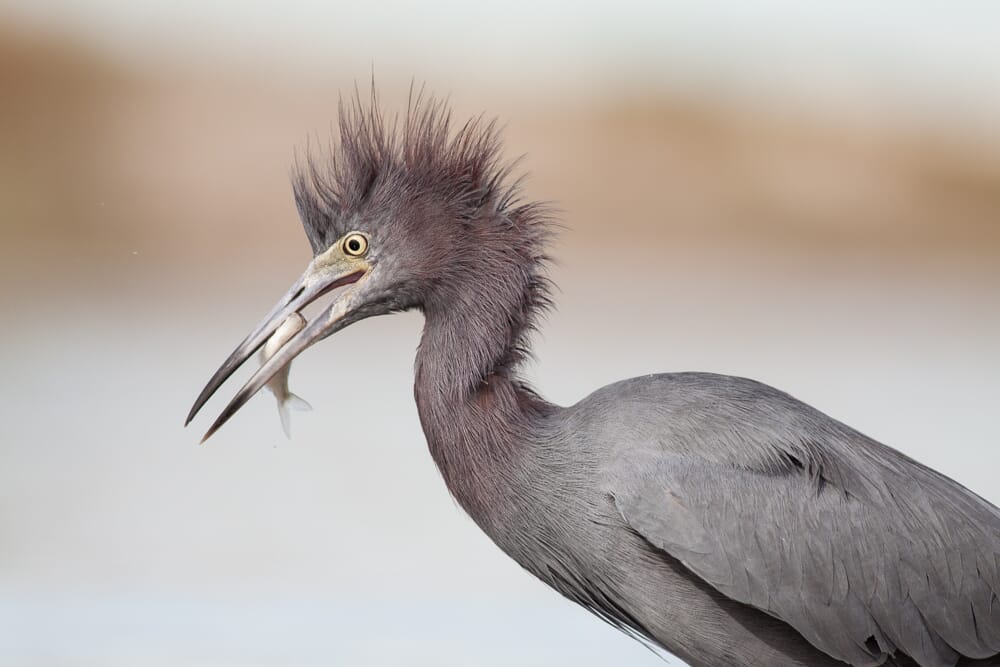
But when birds are walking, running, or hunting you’re going to need a shutter speed of at least 1/1000s, and 1/2000s is better. This hunting little blue heron required a faster shutter speed:
Finally, when birds are flying or fighting, then a shutter speed of at least 1/2000s is an absolute necessity, and 1/2500s, or even 1/4000s, is a good idea.
Note that you’ll often need to boost the ISO to allow for a good exposure when shooting at high shutter speeds. As I explained above, this is a necessary compromise, but one that you don’t want to take too far. Because the higher the ISO, the more noise you get, and the worse your photos will look. While it’s pretty much always better to have a noisy photo than a blurry one, too much noise can ruin a good photo, too!
Another technique for getting sharp photos of birds is ensuring that your camera setup is as stable as possible.
This is especially important when shooting with supertelephoto lenses, because the longer the lens, the more prone it is to camera shake.
Many bird photographers use tripods to keep their big lenses steady. However, tripods do come with some tradeoffs–primarily in the form of reduced flexibility and increased kit weight. So if you choose not to use a tripod, you should be especially careful when handholding in the field. Make sure you steady yourself as much as possible, by getting down on the ground, or by leaning against something sturdy (such as a wall or a tree).
That way, you can get sharp photos–no matter the situation.
Getting Close to Birds: How to Capture Frame-Filling Bird Photos
If you’ve ever tried to photograph birds before, you’ve probably run into the single biggest challenge of bird photography:
Getting close to birds.
Because birds don’t let people get close to them. They tend to be very wary, and not at all trusting.
Which means that if you want to get close to birds, you have to use one of several techniques that are designed to capture frame-filling shots without causing the birds stress:
Technique 1: The Stalking Approach
The stalking approach is often your best bet when there’s a significant distance between you and a bird, but you don’t have the time to come back and lie in wait, and you don’t know when the bird might fly away (and leave the location behind forever).
Here’s how it works:
Simply shoulder your camera setup, and start moving slowly toward the bird. Try to do it in small starts and stops, and make sure that you don’t make any sudden movements. I tend to do this in a “meandering” fashion, where I move to the right, to the left, stop, go back on myself a bit–all in the effort to appear very non-threatening.
I recommend you don’t look directly at the bird, but instead keep your head down and only check the bird’s location with your peripheral vision.
Once you’ve gotten somewhat close, you should get down on your knees (or on your stomach, if you’re willing). Then move forward even more slowly, periodically checking the bird’s location.
Note that it’s also a good idea to fire off your camera shutter every so often, in order to get the bird used to the sound.
If all goes well, you should be able to get close enough to take some good photos within 15 to 30 minutes. But if the bird starts to become agitated, or starts moving away, that’s a sign that you should probably give up the stalking attempt; it’s not worth harming your subject just to get a shot.
(Plus, it’s often possible to tell from photos whether or not the bird was uncomfortable. Shots of birds running away are rarely appealing!)
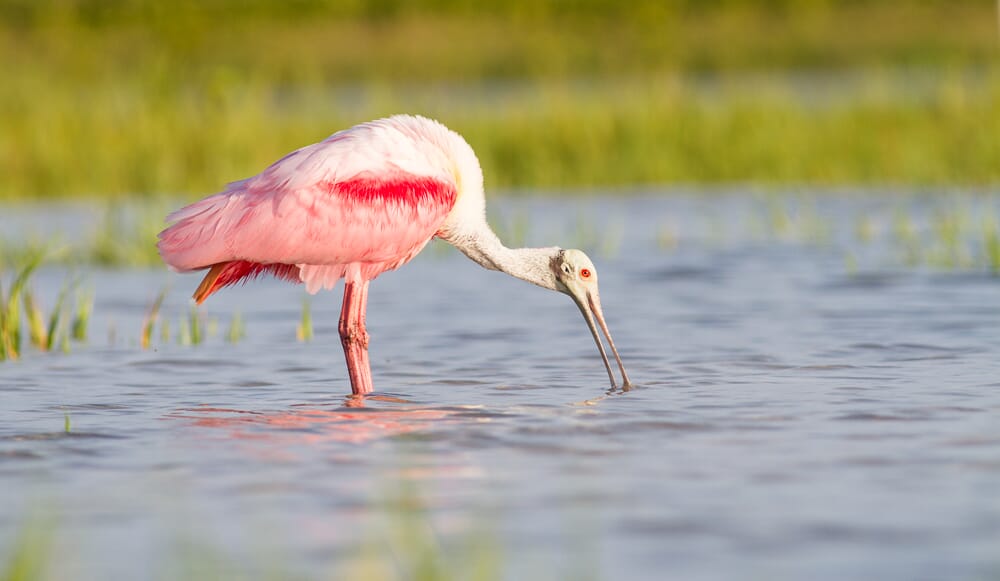
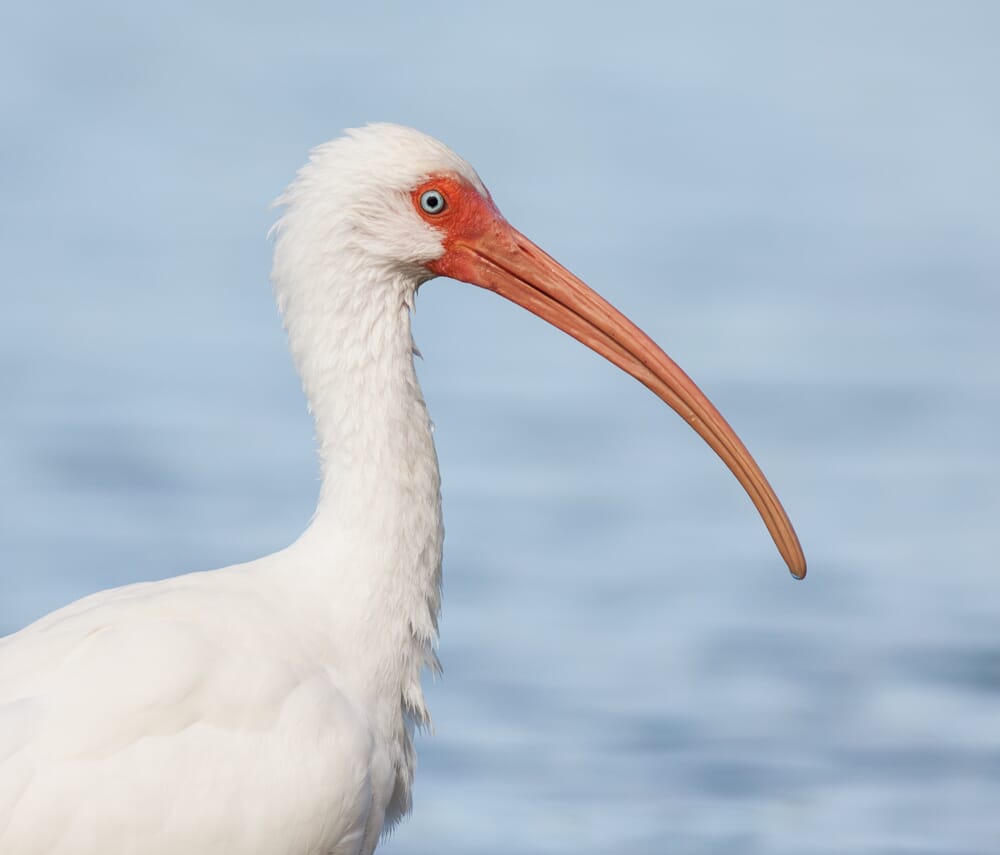
I was able to capture this photo of a spoonbill after a lot of careful stalking:
Technique 2: Lying in Wait
If you notice some birds you’d like to photograph that seem to be moving in a consistent pattern, it can be a great idea to try the “lying in wait” approach.
First, observe the birds. Note their movements, and try to discern the pattern. Songbirds will often come back to the same perch over and over again. And shorebirds tend to move down the beach in a certain direction.
Once you’ve determined how the birds are moving, ask yourself where they’ll be in 20 minutes or so.
Then simply position yourself in that location, get down low, and try not to move.
If you remain quiet and still, the birds will often move exactly as you predicted–and let you capture some beautiful close-up shots.
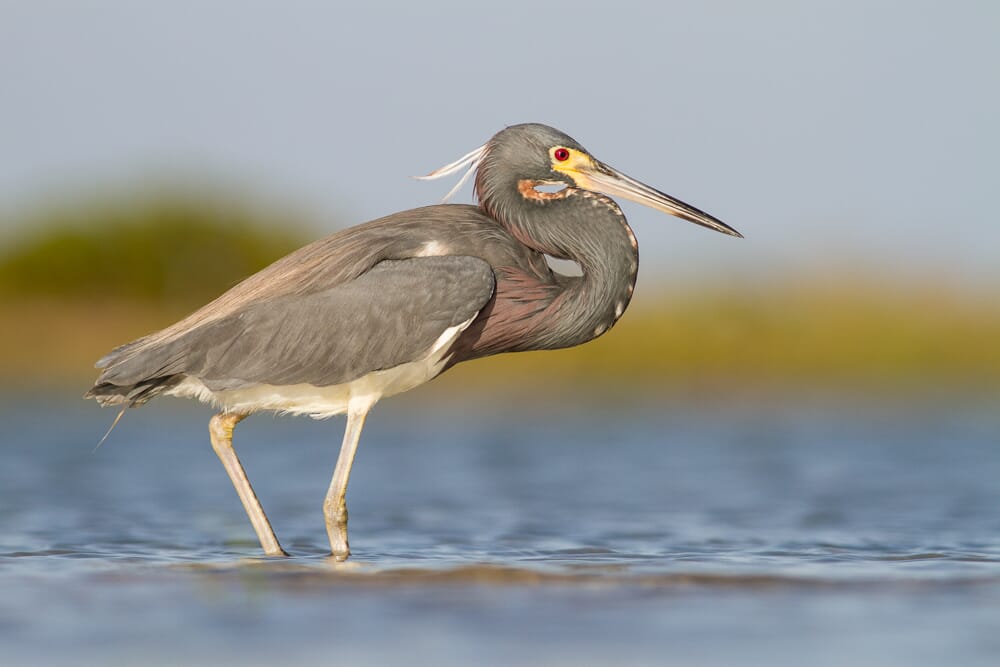
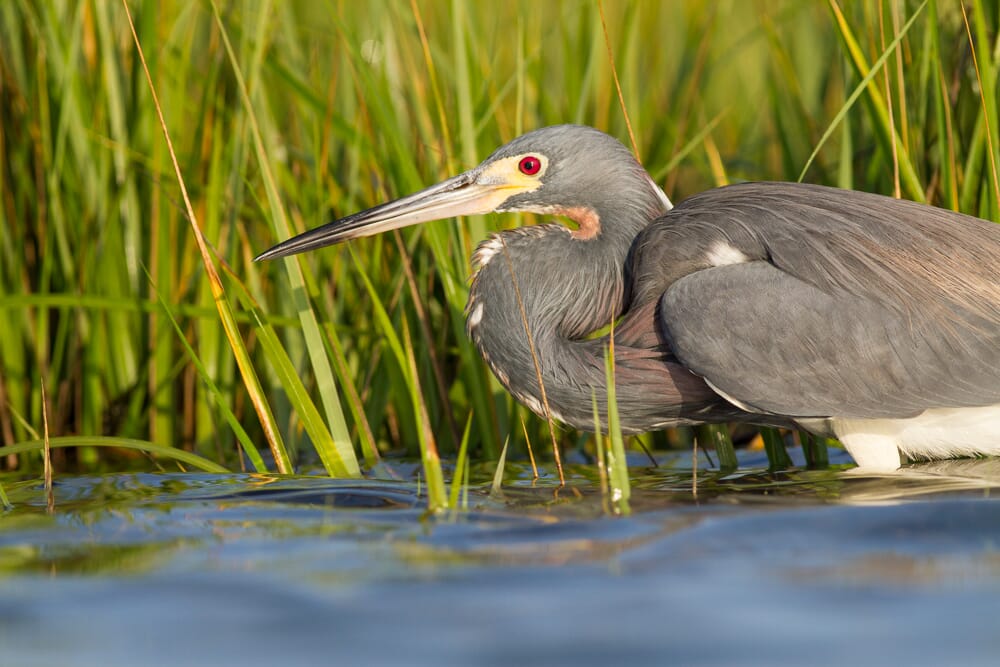
I love to use this approach when photographing shorebirds. When photographing this tricolored heron, I got into position, and simply waited for him to walk by:
Technique 3: Using a Blind
When you have a lot of time on your hands and have a spot in mind that birds often frequent, it can make sense to build a blind; this can shield you from view and let you get extraordinarily close to elusive subjects.
You can make a blind out of a number of materials. For instance, you could use a tent as a blind by cutting a hole in the front (for your lens), and positioning it in a good location. I’ve used a tent for a blind near the feeders in my backyard, and it was very successful. You could also think about using a wooden box that you cover with vegetation, especially if the blind will be more permanent and needs to withstand some tough weather conditions.
Note that there are some places that have blinds already built, so you should do a quick search in order to find any blinds near you.
Also, one last tip:
Cars are often great mobile blinds, because birds don’t find them nearly as threatening as humans. So if you see a bird by the roadside, it often makes sense to drive up to it. And, if possible, shoot out the window!
Lighting in Bird Photography: What You Need to Know
While it’s not possible to get a good bird photo without getting close to a bird (with the exception of environmental-type shots), you must also pay attention to other factors.
Chief among these is the light.
Beginner bird photographers often forget to think about different lighting scenarios, and their photos suffer because of it. This is very unfortunate, especially because it’s not actually hard to find good light to shoot in.
You just have to know what to look for!
Photograph on Cloudy Days for More Subtle Bird Photos
First, I’d like to talk about a more unusual type of bird photography lighting:
Cloudy light.
You see, while cloudy light isn’t all that popular among photographers, it can provide some very nice, very subtle lighting for low-key bird photography.
No, cloudy light isn’t good for creating dramatic backlit shots (for that, see the tip below).
But cloudy light is great at rendering detail, and it’s also great at keeping exposures simple (because the diffused light prevents extreme lights and darks). Plus, cloudy light helps bring out colors, which is especially nice when you’re photographing birds with gorgeous plumage.
So don’t be afraid to shoot in cloudy conditions. While clouds do come with some drawbacks (for instance, cloudy days are darker overall, and therefore require higher ISOs when shooting fast-moving subjects), there’s a lot that can be done on cloudy days!
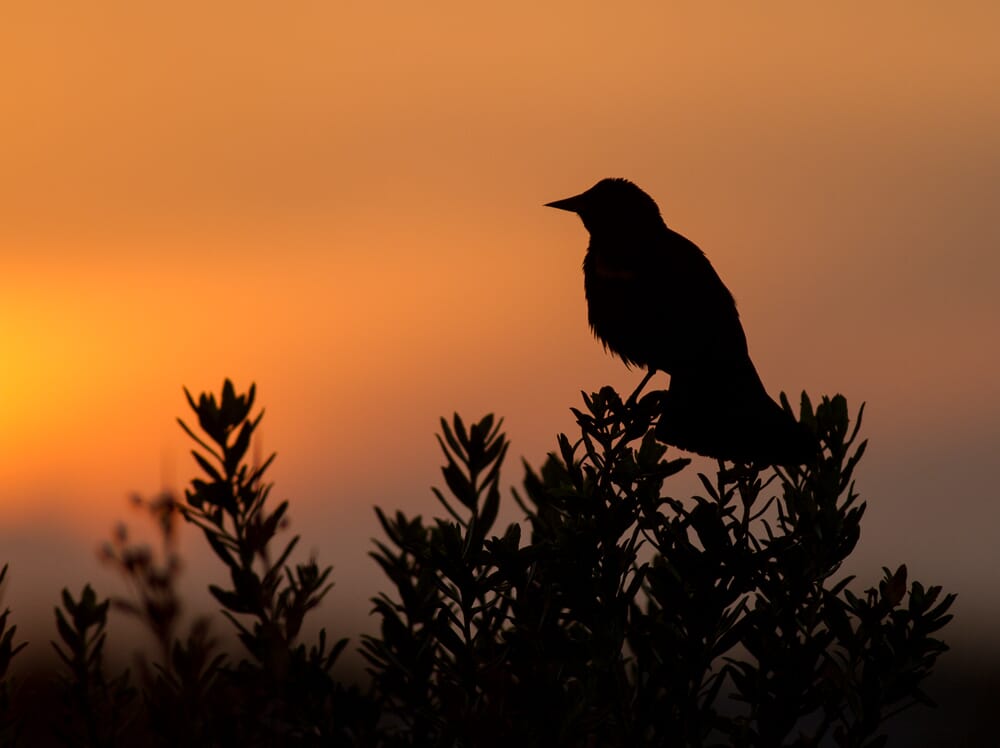
Photograph During the Golden Hours for Powerful Bird Images
The golden hours refer to the hour or two just after sunrise, and the hour or two just before sunset.
It’s when the sun is low in the sky, and casts a beautiful golden glow across the entire landscape.
Now, the golden hours are good for a few reasons.
First, the low sun is still bright, so you can comfortably produce action shots. But the angle of the sun prevents harsh shadows and highlights, which means that you can also count on beautifully-rendered tones and colors.
Second, the golden, late-afternoon light produces wonderfully warm tones, which can really take your photos to the next level.

That’s why I recommend you take advantage of the golden hours whenever you can. Bird photography is especially amenable to golden-hour shooting, because birds tend to be active at dawn and dusk.
So get out early, take a nap during the day, and stay late. That way, you’ll get some gorgeous golden-hour images!
Bird Photography Composition: The Essential Ingredients
Composition refers to the arrangement of elements in a photo. For instance, do you put the bird in the center of the frame? Do you put the bird along the edges of the frame? How do you position a horizon line or a tree in the background?
And if you want to capture beautiful bird photos…
…you have to master composition.
Fortunately, there are a few basic compositional guidelines that should keep your photos looking beautiful (even while you’re still trying to find your compositional footing).
Use the Rule of Thirds to Position Your Focal Point
The rule of thirds states that you should position your main subject a third of the way into the frame.
In other words, don’t center your subject. Instead, put your bird closer to one side, like this:
Now, the rule of thirds isn’t actually a rule; it’s a compositional guideline. But it often does pay to position birds toward the side of the frame. This keeps the composition a bit more interesting, a bit more dynamic. It makes the viewer want to look throughout the photo. It keeps the viewer engaged.
That’s why I recommend that you remember the rule of thirds as much as possible.
Note that when you’re photographing a bird that’s very large in the frame, you may not be able to put the bird off to the side (and you definitely don’t want to cut anything off, such as legs or wingtips!).
In these cases, it’s best to position the eye (or head) of the bird a third of the way into the frame. That way, you’ll get the power of the rule of thirds, but you won’t have to crop out parts of the bird.
Point the Bird Into the Frame
If you position your bird a third of the way into the photo, you’re basically left with two options:
Point the bird into the frame, or point the bird out of the frame.
In other words:
Do you want the bird looking into the frame, which will likely compel the viewer to follow their line of sight? Or do you want the bird looking out of the frame, which will keep the viewer from engaging with the photo?
It’s pretty much always best to compose your shot so the bird looks into the frame. And that’s the absolute best way to keep your photos engaging and dynamic.
Like this:
So instead of letting the bird get to the edge of the frame, keep the bird pulled back in the composition. That way, you can capture bird photos that will really get the viewer interested.
Keep Your Background as Simple and Non-Distracting as Possible
When it comes to bird photography (and photography in general, really), it’s hard to find an area more neglected than the background.
Photographers always focus on the foreground. They focus on the subject. They plan shoots around the subject, and they think about the subject constantly.
In doing this, they forget about the background.
And this is a huge problem.
Why?
Because the background is what makes the subject stand out. The background is what gives your photo that extra kick. If you forget about the background, your photos will just fall flat–because the background will distract from the main subject, or the background will just look bad.
So instead of forgetting about the background, look behind the birds. Take note of whether the background is distracting.
A distracting background might include one of a few things:
- Many colors
- Sudden transitions between colors
- Distracting elements, such as trees, human objects, etc.
If your background is distracting, you have a few options.
First, you can get down low to the ground. This often causes your background to open up, and can be a great first line of defense against a poor background.
By getting down low, I was able to turn a distracting background into a nice wash of color:

Second, you can move to the right or the left. This works well when you’re dealing with distracting objects; a slight shift in camera angle can easily get rid of an unwanted background.
Third, you can try shooting a different bird. Sometimes, the background is just terrible–so it’s better to try shooting somewhere else. That way, you can capture a beautiful background and a beautiful bird together, which will leave you far more satisfied.
The Ultimate Guide to Bird Photography: Conclusion
Hopefully, you now feel like you could go out and take some amazing bird photos.
Because here’s the thing:
Bird photography isn’t hard. At least, it doesn’t have to be.
As long as you follow the tips and tricks I’ve shown you today…
…you’ll be able to grab gorgeous photos, consistently.
How do I get started with bird photography?
To get started with bird photography, you’re going to need a long lens (one of at least 400mm, and ideally a DSLR with an APS-C sensor. Then I recommend you head out to a local park, preferably one where they maintain feeders year-round. Note that if you can’t find one of these, you can always put some feeders in your own backyard, and watch as the birds flock around them. That way, you’ll be able to capture some gorgeous close-up bird shots from your window! Note that you’ll probably also want to brush up on your stalking skills, especially once you start searching out bird photography opportunities in earnest. Birds don’t let you get close without a lot of hard work, so be prepared to be slow, steady, and patient.
What’s the best camera for bird photography?
There’s no one best camera for bird photography, but I do recommend you use a DSLR. This is primarily because of the DSLR lens lineup, which gives you far more options than the mirrorless lens lineup for bird photography. Among Nikon cameras, you should consider the Nikon D7500, which has good low light performance and strong autofocus capabilities, as well as the (admittedly much pricier) Nikon D500, which features even more impressive autofocusing speeds and is designed specifically for action photographers in need of an APS-C option. Among Canon cameras, the Canon 90D is an option with fast autofocus and good continuous shooting speeds. The Canon 7D Mark II is an old camera, but was designed with action shooters in mind, and still (quite a few years later) includes top-of-the-line autofocus and blazing fast shooting speeds.
What’s the best lens for bird photography?
If you want to capture frame-filling shots of birds, you’re going to need a telephoto lens (or, if you can afford it, a super-telephoto lens). Lenses in the 300mm range are long enough to capture photos of bigger birds (think herons and cranes), as well as smaller birds that are unusually acclimatized to humans. Lenses in the 400mm range and beyond are required for shots of skittish birds, or birds that are very small and/or difficult to reach. The Canon 100-400mm IS II is a great option for the beginning bird photographer who doesn’t mind spending a bit for quality glass and increased flexibility (from the zoom). The original 100-400mm IS is cheaper alternative, as is the 400mm f/5.6, which offers stellar optical quality but the decreased flexibility of a prime lens.
How do I take amazing bird photos?
To capture amazing bird photos, you’ll need to have the right gear, the right light, and the right composition. You’ll also need to figure out how to get close to your subject, because even long lenses will struggle to fill the frame with a bird. The proper gear includes a DSLR or mirrorless camera (I recommend a DSLR, but mirrorless can work just as well) and a lens of ideally 400mm or more. The right light includes cloudy light (when the diffused sky will give you beautiful colors and subtle images), and golden-hour light (which is consistently gorgeous). Compositionally, you’ll want to pay attention to the position of the bird in the frame (point the bird into the empty space), and you’ll want to select your background carefully–to be as simple as possible.
What are the best camera settings for bird photography?
For bird photography, I recommend you use Aperture Priority mode, which allows you to select the aperture and ISO. Your camera will then choose the best shutter speed for a good exposure. Dial in an aperture of around f/7.1 if you’re working in good light, and an ISO of around ISO 200 to ISO 400. Your camera will choose a fast shutter speed, and you’ll get a perfectly sharp photo. If the light is low, then you can start raising the ISO (though still keep it in a usable range) and widening the aperture (sacrificing depth of field for shutter speed).
How should I compose my bird photos?
I recommend using the rule of thirds to position your bird. Make sure the bird’s eye is always visible, and the bird’s head is either parallel to the camera or pointed toward you. Point the bird into the empty space (so that the bird has space to move into the frame). Select a nice, clean background–one that will emphasize the bird and make it pop off the page.
What’s the best light for bird photography?
The best light for bird photography is the golden hours of early morning and late afternoon, when the sun is low in the sky (and casts a beautiful golden light across the landscape). During this time, you can capture stunning images of pretty much any bird. Cloudy light is also nice for bird photography, though it is less dramatic than golden-hour lighting. Clouds create diffused light, which helps bring out color and detail.
How do I get close to birds?
Getting close enough to capture frame-filling shots of birds is one of the hardest aspects of bird photography. Getting detailed bird shots begins with a long lens, but it also requires patience, as well as knowledge of bird behavior. I recommend a few separate approaches, depending on your situation. First, you can use a stalking approach, where you slowly approach the bird from a distance. This is good for birds that are less skittish, and for situations where you don’t have time for greater finesse. Second, if you’re able to discern a pattern in your subject’s movement, you can position yourself ahead of the bird and lie in wait. This is often good for shorebirds that are moving along beaches, as well as songbirds that keep returning to the same branch, etc. Finally, you can build a blind to capture shots of the most elusive birds–or, in a pinch, you can use your car!
Disclosure/Disclaimer: As an Amazon Associate, we earn from qualifying purchases. Certain content was provided "as is" from Amazon and is subject to change or removal at any time. Product prices and availability: Amazon prices are updated daily or are accurate as of the date/time indicated and are subject to change. Any price and availability information displayed on Amazon.com at the time of purchase will apply to the purchase of this product.
Great information Thank you