Butterfly lighting is a fantastic portraiture technique, especially if you’re looking to produce photos that are both dramatic and refined. It’s not hard to use, either; all you need is a camera, a single off-camera flash, and a light stand (or a cooperative assistant!).
That said, the effect does require some practical knowledge, and it can take a bit of work to achieve the best results. In this article, I explain everything you need to know to get started, including what butterfly lighting is, when you should use it, and how to create it. I also offer plenty of examples for added inspiration.

A Complete Guide to Butterfly Lighting:
What Is Butterfly Lighting?
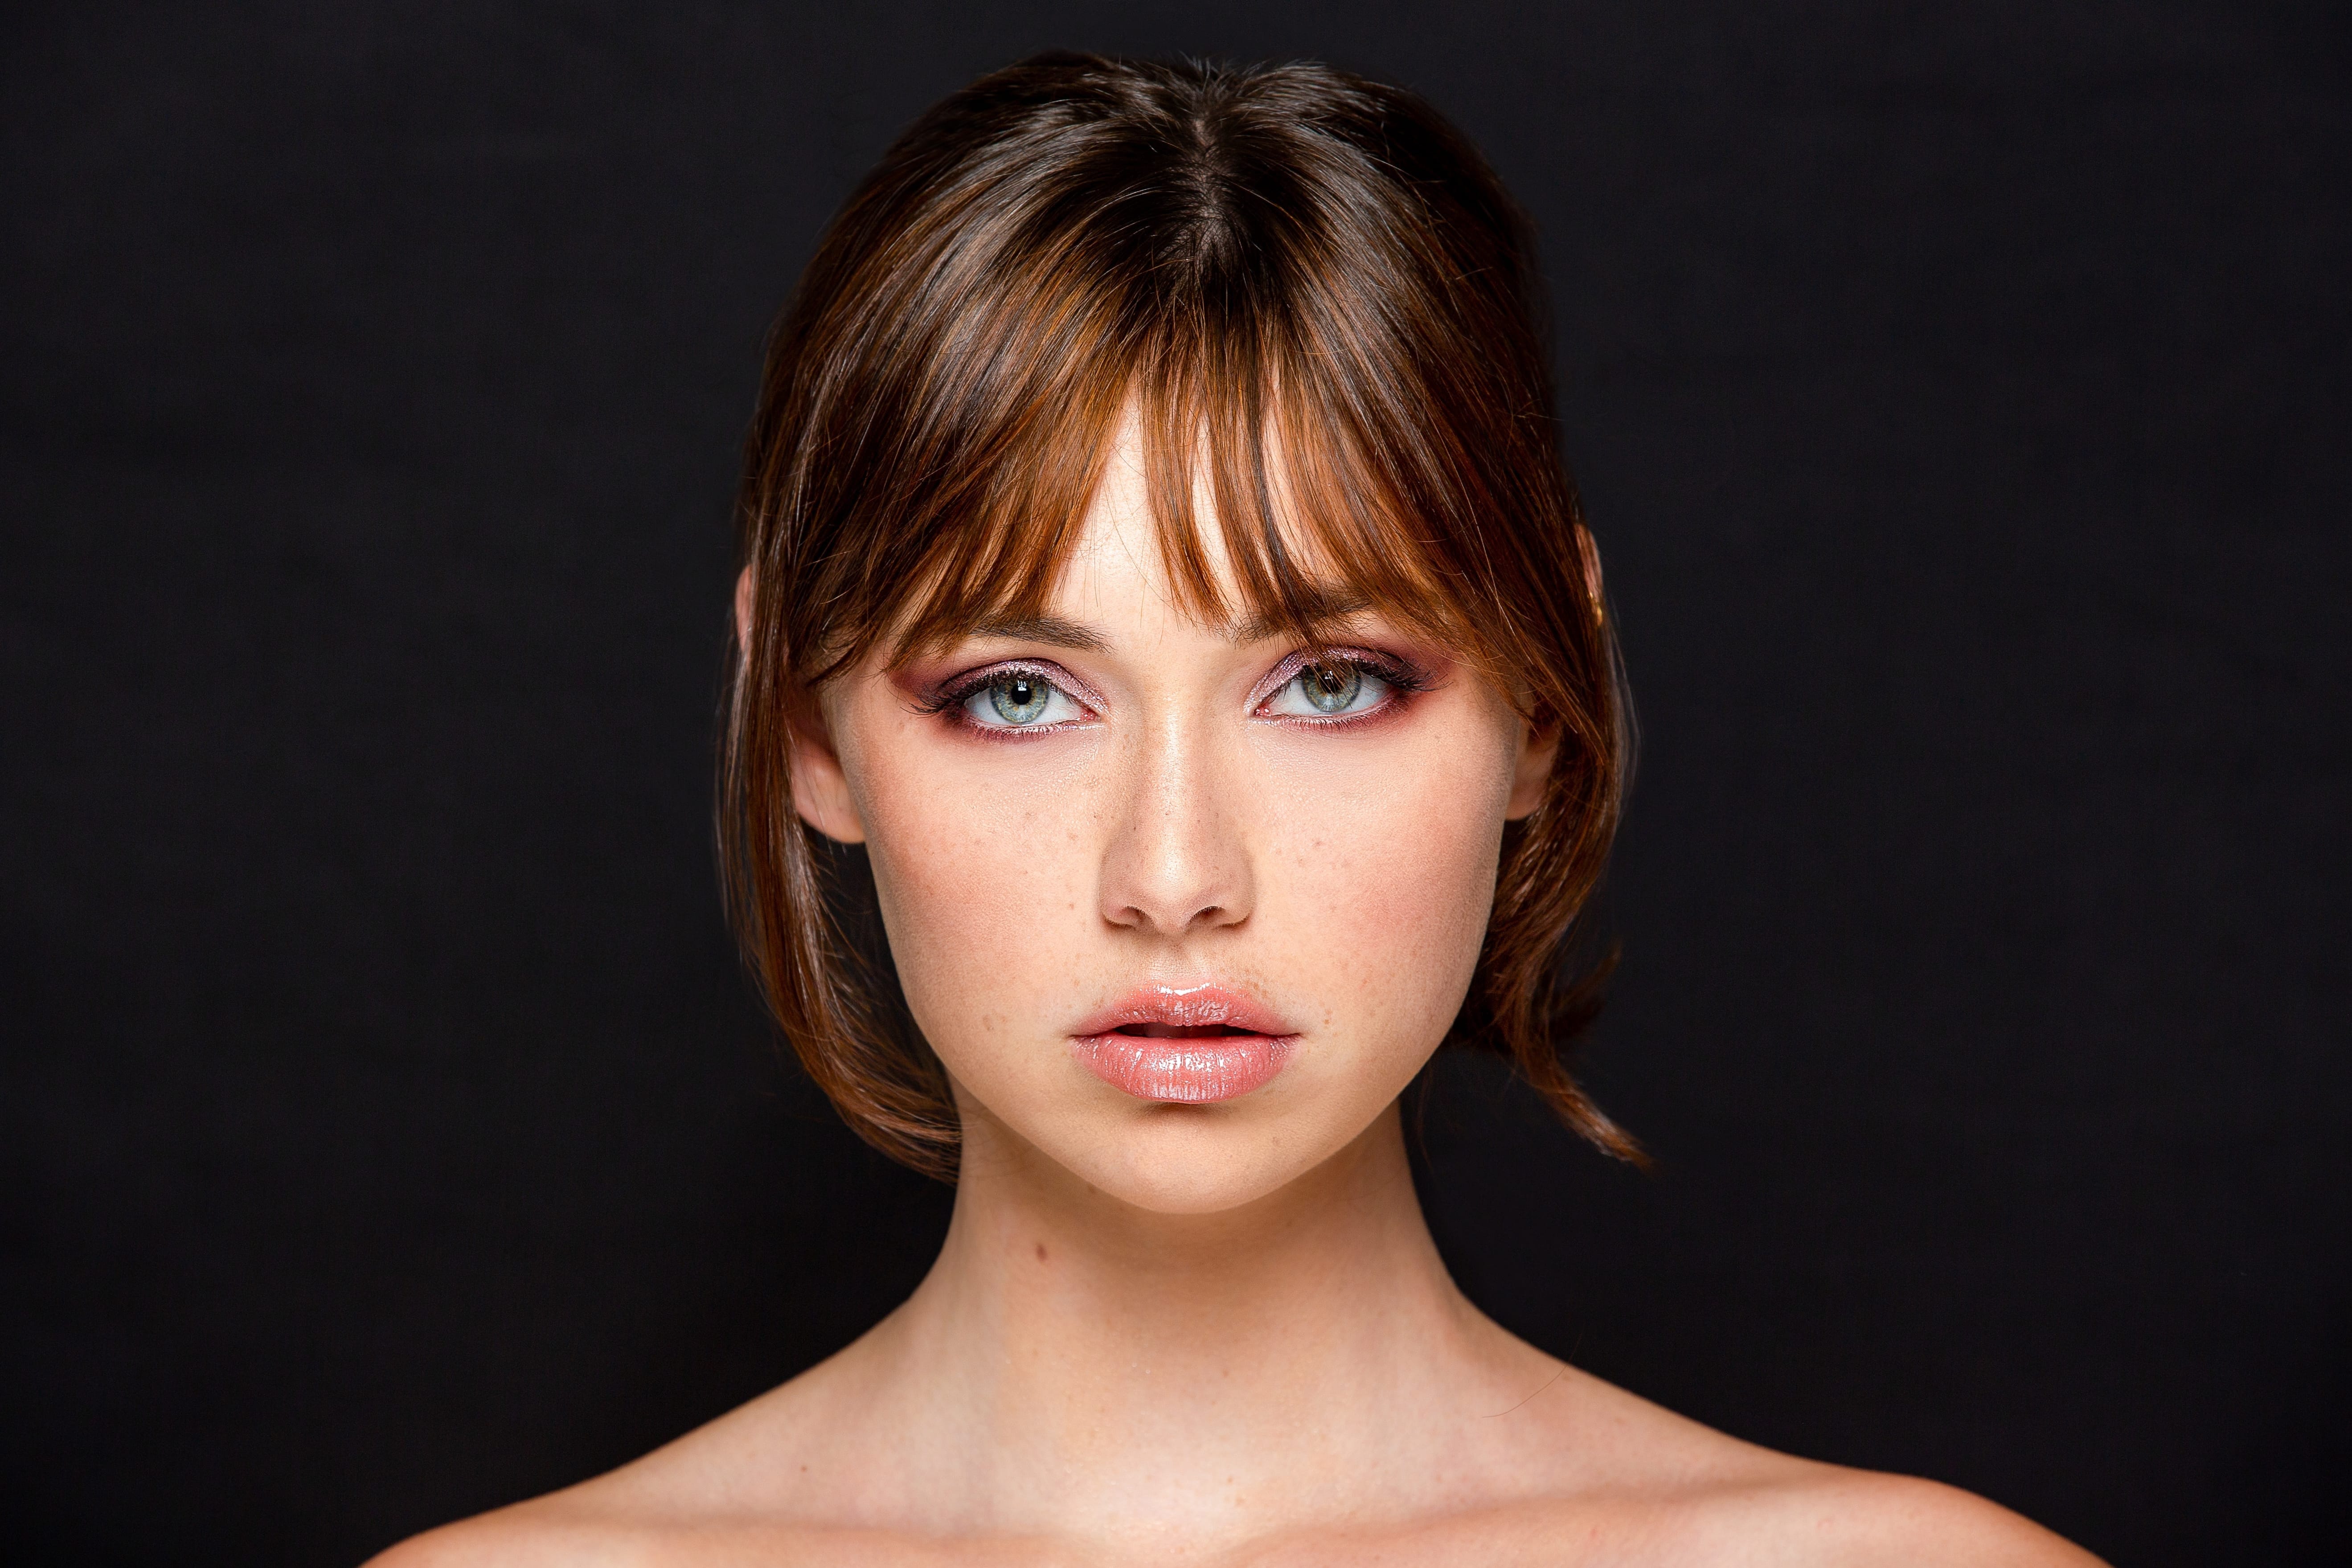
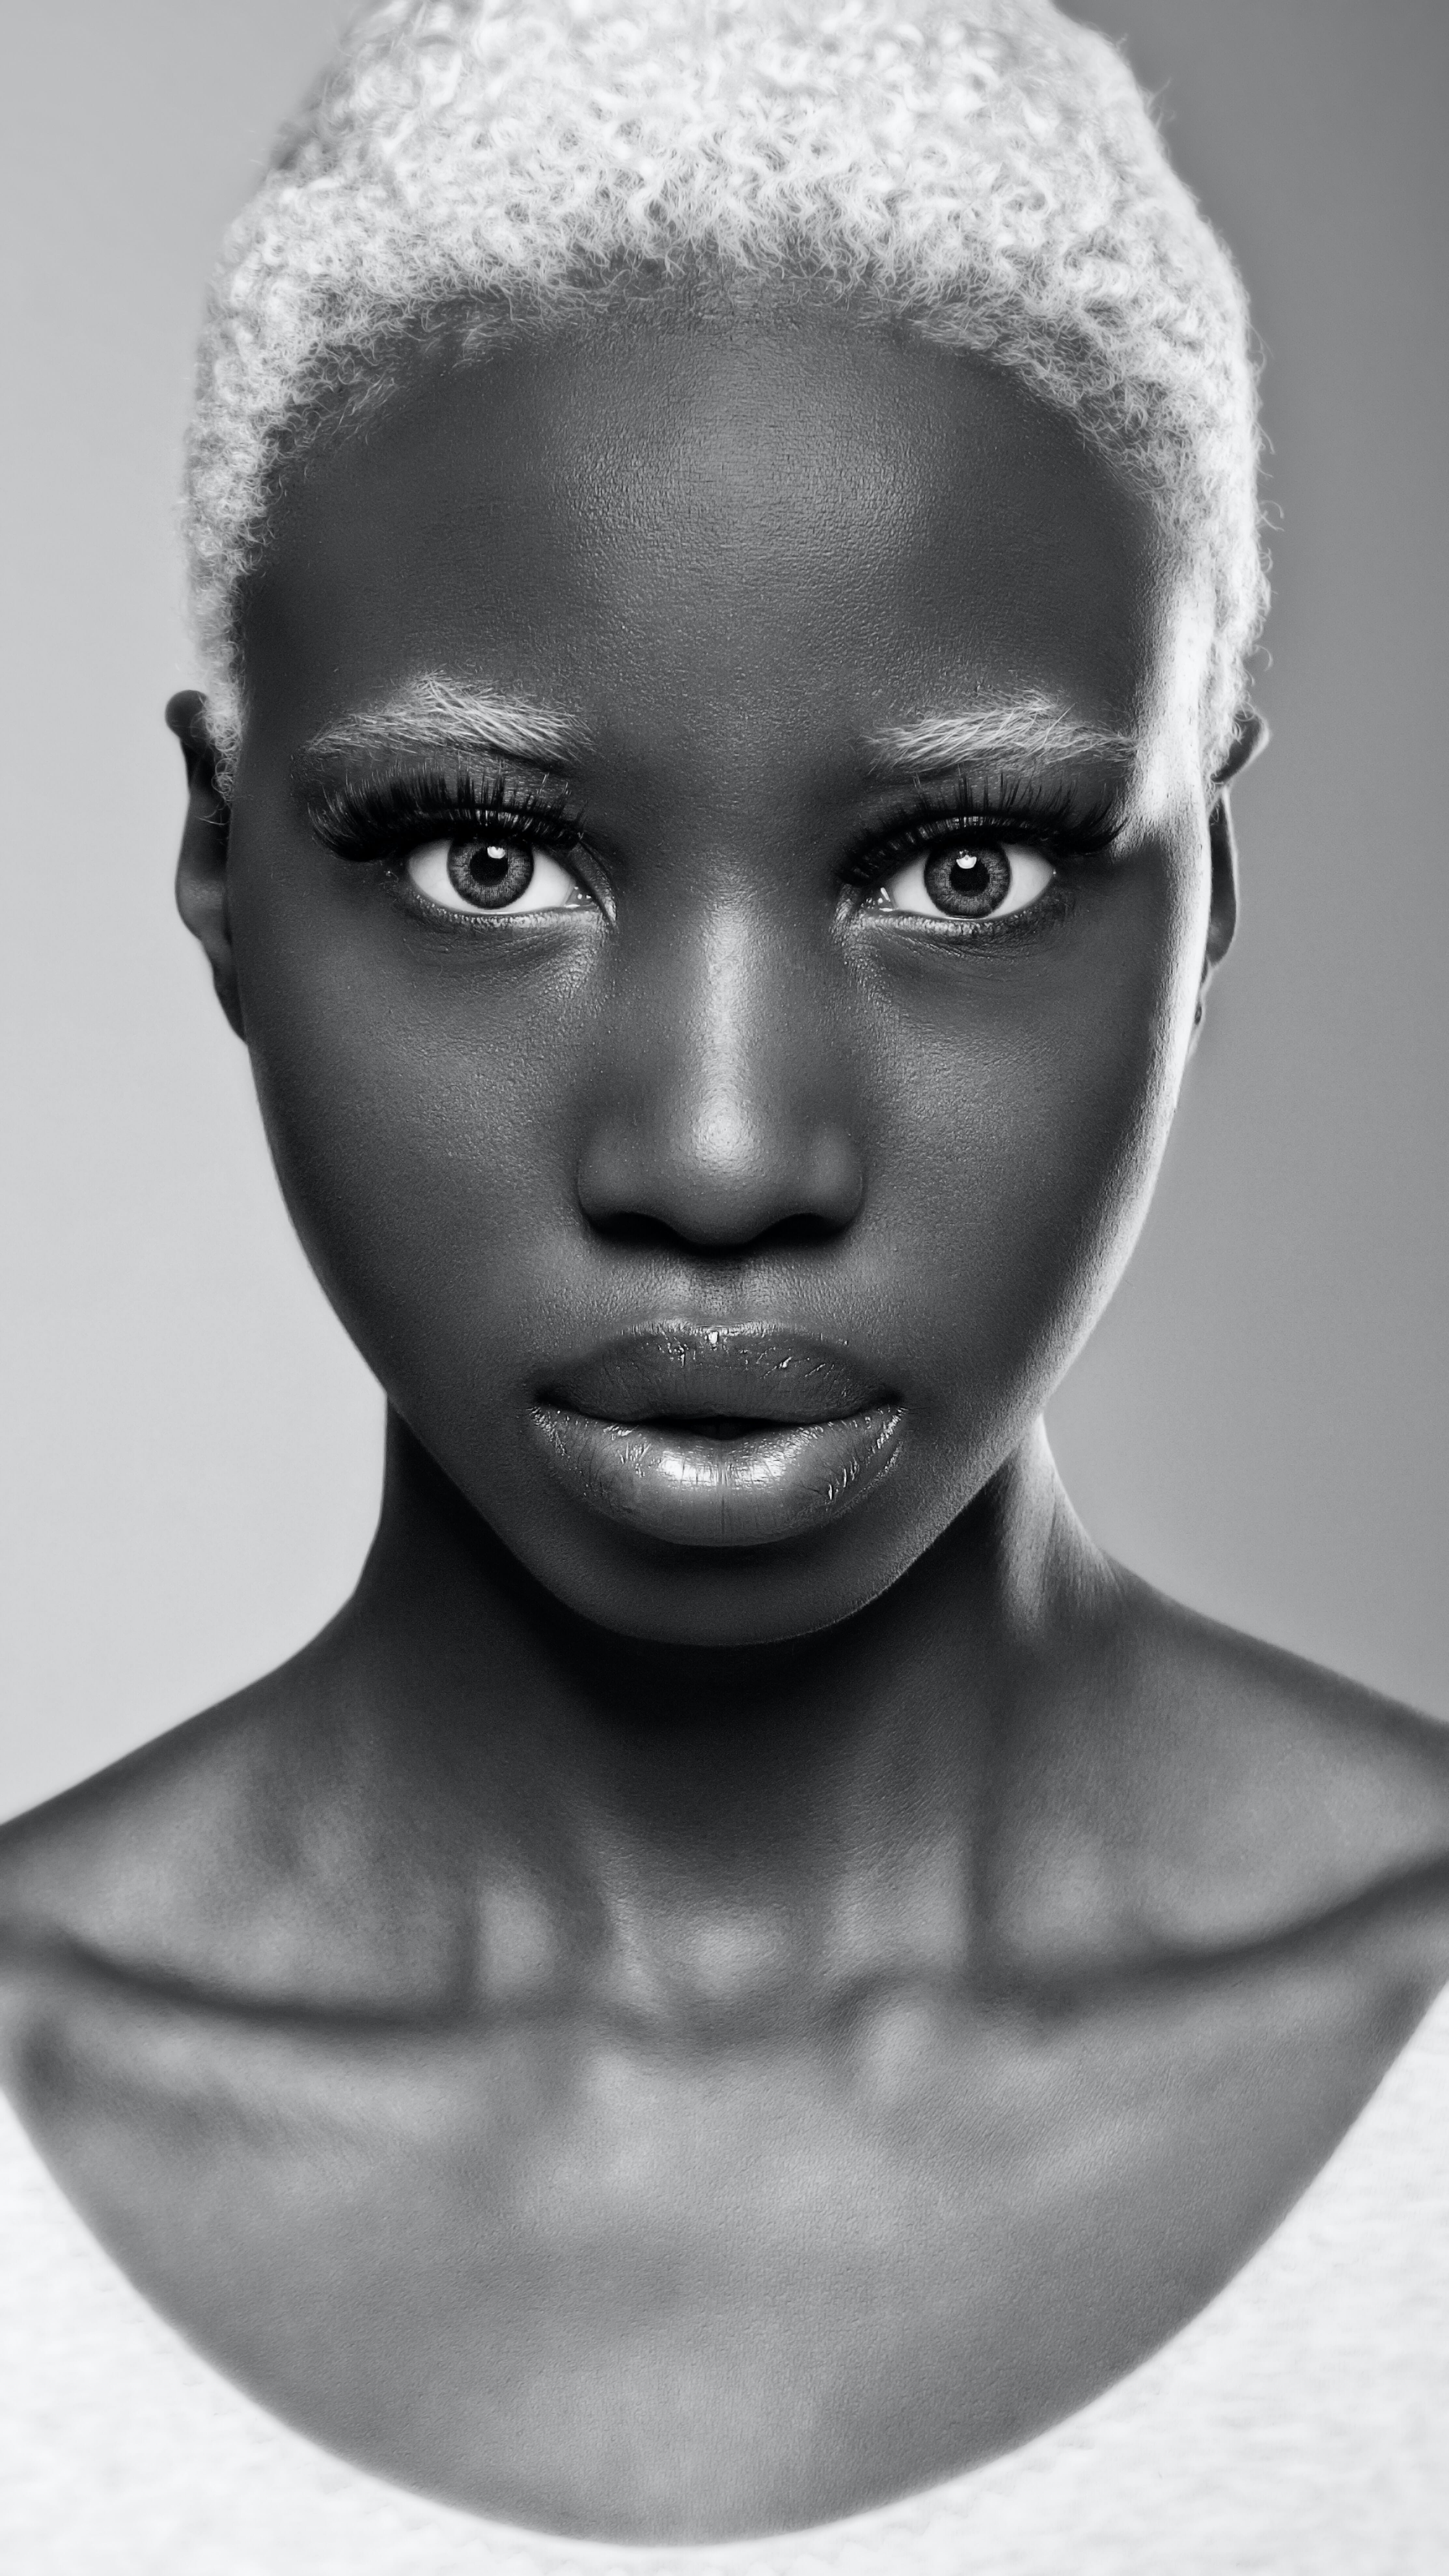
Butterfly lighting is a common portrait lighting technique, known for the butterfly-shaped shadow it creates under the portrait subject’s nose.
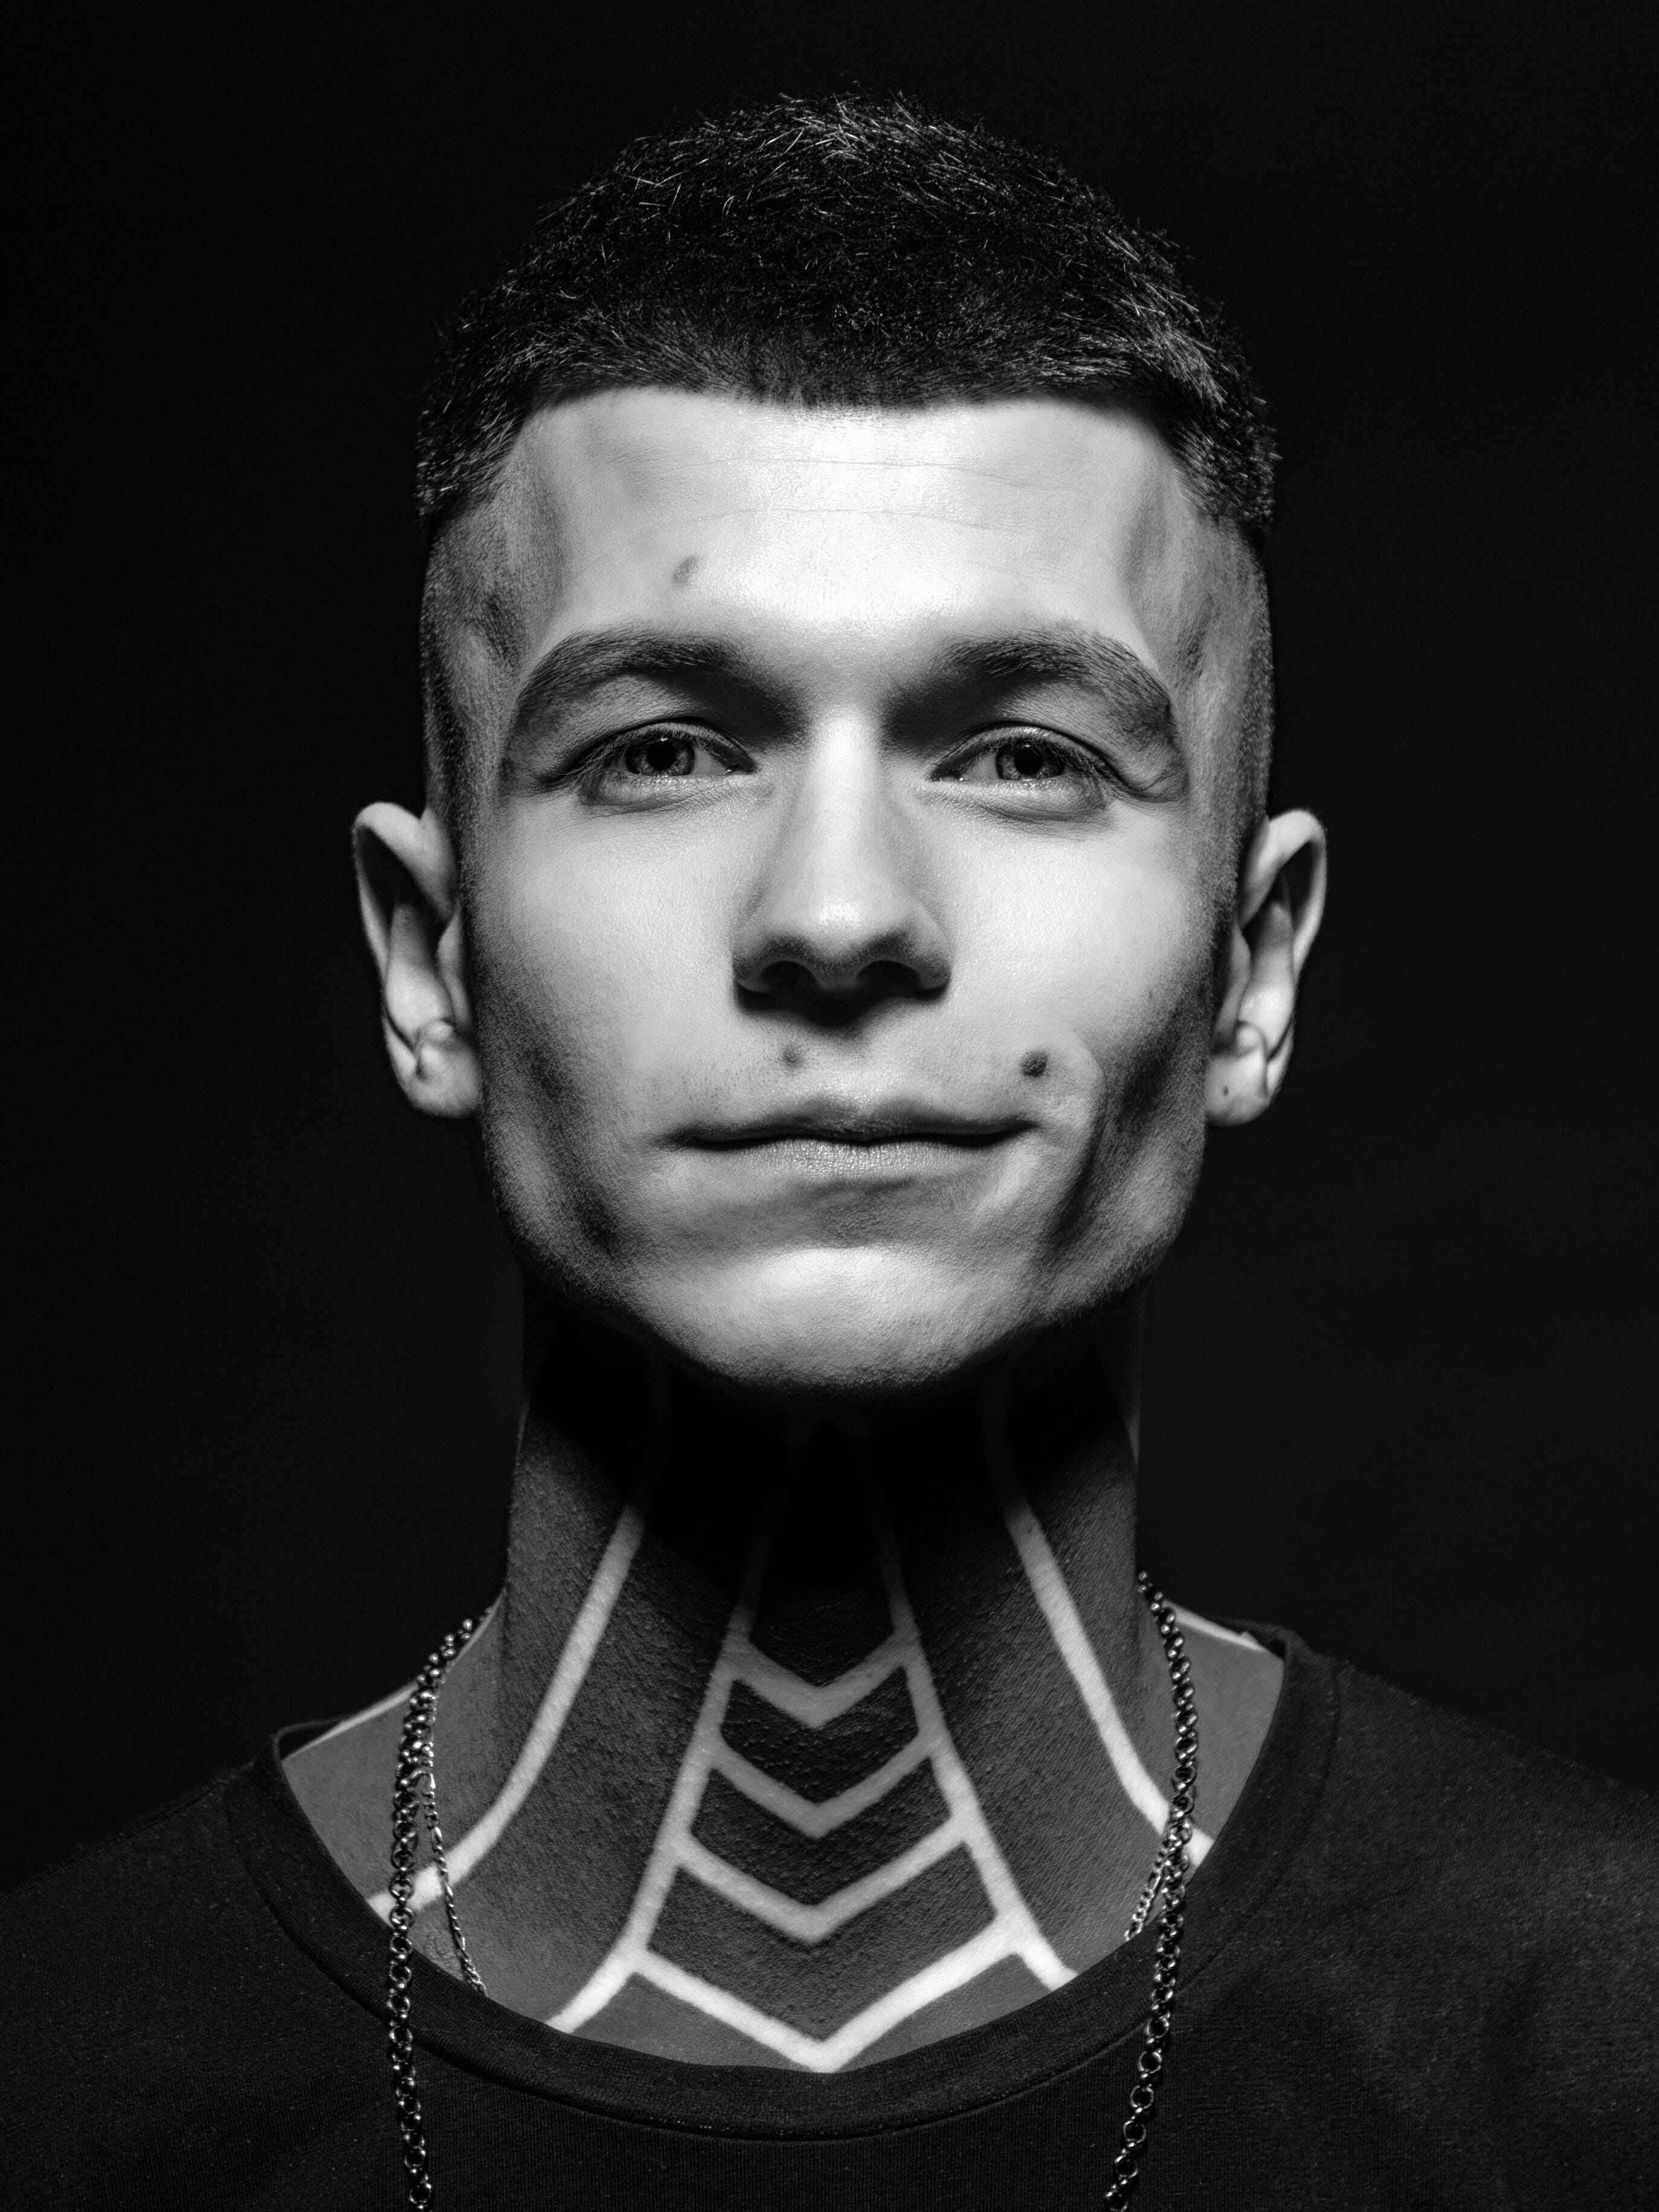
The effect is also referred to as “Paramount lighting” and “Hollywood lighting” because it was frequently used in older movies. But it’s also used in fashion magazine portraits, and it’s an excellent glamour lighting pattern to have in your photographic tool belt.
In general, the effect is created using artificial lighting, though you can use natural light to get a similar result.
When Should You Use the Butterfly Effect?
Butterfly lighting is fantastic for situations where you want to emphasize the angles of your subject’s face. It enhances high cheekbones and makes noses and chins look far sharper.

It has that glamorous reputation because it’s so frequently used to light professional models, and this can be both good and bad – good if you’re photographing subjects that are looking for a little extra pizazz, but bad if you’re photographing subjects that are interested in more natural, less dramatic results.
So I recommend using butterfly lighting when photographing subjects that want that extra bit of pop. On the other hand, you should avoid it when photographing families and children. (That said, you can always tone down the intensity of the effect via a reflector, which I’ll talk about in a later section.)
You can also use the lighting pattern when you want to slim down a subject’s face. The under-the-chin shadow is great for achieving a thinner look.
How to Achieve a Beautiful Butterfly Effect
As I mentioned above, the butterfly pattern is very easy to create and can be done by most portrait photography beginners.
Essential Equipment
The biggest hurdle to creating a pro-level butterfly effect is making sure you have the right light source.
Unfortunately, it’s tough to achieve butterfly lighting with the sun because you’ll have very little control over the direction of the light and the shadows it creates. It can be done, but it’s not a great way to get started. That’s why I’d encourage you to use an off-camera flash instead.
You’ll also need a trigger because the flash shouldn’t be mounted directly onto your camera’s hot shoe, and you’ll need a light stand that you can raise above your subject (this is where you’ll position the flash).
Finally, while it’s possible to create the effect without a reflector, you’re going to want to have one on hand. You can find a reflector on Amazon for cheap, or you can create one out of white poster board.
(Note that if you do decide to purchase a reflector, I recommend the five-in-one options. These will give you several reflector colors to work with – generally silver, gold, and white – and allow you to achieve a variety of effects.)
The Basics
Even if you’ve never used an off-camera flash before, you shouldn’t struggle too much to achieve a nice effect.
First, position your subject looking straight ahead (i.e., toward you). Then position the light in front of your subject and slightly above their head. Make sure it’s angled downward to create the butterfly shadow under the nose.
The higher you raise the light, the more prominent the shadows and the more dramatic the result, so make sure you think about your different options. Feel free to experiment with different angles; it really all depends on what you’re after and your personal photographic preferences.
As the photographer, you should crouch (or stand) below the light so it comes from directly behind you and beams right into the subject’s face.
Note: It’s very common to use side light for portraits (e.g., Rembrandt lighting). However, butterfly lighting is completely and utterly flat. Your light should not be at an angle from your subject; otherwise, you risk creating something more akin to loop lighting and will lose the dramatic, angular effect.
Soft and Hard Light
When you use an unmodified (i.e., naked) flash to light your subject, you’ll end up with very harsh, sharp shadows and lines. And if you use a modified flash, you’ll end up with less contrast and softer transitions between the shadows and the highlights on your subject.
Either one of these options can work well, so you’ll want to test out unmodified and modified lighting setups and see what you prefer. Photographers will often use one or the other depending on whether they want a harsh, dramatic look (such as when photographing an athlete) or a softer, more feathery look (such as when creating a more gentle, flattering image).
Adding in a Reflector
Once you have your (main) key light, you can go ahead and add the reflector. Note that you technically don’t have to do this, but it’ll push light under your subject’s nose and chin to add back some detail and prevent the shadows from overpowering the shot.
Related Posts
So put the reflector under the subject’s chin, and experiment with different angles and distances whenever you get the chance. By bringing the reflector up close to the chin, you’ll add a lot of light, and by moving it farther away, you’ll end up with stronger shadows.
By the way, you can try holding the reflector yourself, but if that doesn’t work out, you can either have an assistant hold it or ask the model if they’re comfortable keeping it in place. Reflectors are featherlight, so you shouldn’t have to worry too much about tiring anyone out!
Adjusting the Head Angle
When approaching each new lighting setup, it’s important to remember that different head angles will result in dramatically different effects.
By tilting your subject’s head up, you’ll end up with less of a shadow under the nose and the chin – and by tilting your subject’s head down, the shadows will become more pronounced, and you’ll get more of that angular, intense look.
Adding a Backlight
While the most basic butterfly lighting setups just involve a single flash and a reflector, you’re always free to take things to the next level.
Consider adding a flash behind your subject as a rim light. You might also include a light pointed at the background to create a nice halo. Either one of those options will help your subject stand out without ruining the butterfly effect.
Capture Your Dramatic Portraits!
Butterfly lighting is an easy technique to master, and it’s one that can get you great results over and over again.
So remember to position the light just above your subject, and pay careful attention to the shadow under their nose. Don’t be afraid to experiment with different head and lighting positions, and whenever possible, use that reflector.
You’ll be capturing great portraits in no time at all!
Butterfly Lighting FAQ
What is butterfly lighting?
It’s a type of lighting pattern featuring a butterfly-shaped shadow under the nose.
How did butterfly lighting get its name?
Butterfly lighting is named after the shadow it produces under the subject’s nose, which looks vaguely like a butterfly.
When should you use butterfly lighting?
I recommend using butterfly lighting when you plan to create dramatic, angular portraits.