If you’re looking for a simple way to produce beautiful portraits, then a clamshell lighting pattern is a fantastic option.
It’ll give you images that work for pretty much every kind of situation, from glamour shots to family portraits to corporate headshots and so much more.
But what actually is clamshell lighting, and how do you set it up for amazing results?
That’s what this article is all about.
So if you’re ready to discover the secrets to amazing clamshell lighting…
…then let’s dive right in!
Clamshell Lighting Explained:
What Is Clamshell Lighting?
Clamshell lighting refers to a lighting pattern where one light is positioned below your subject and one light is positioned above your subject, to create a sort of “clamshell” design.
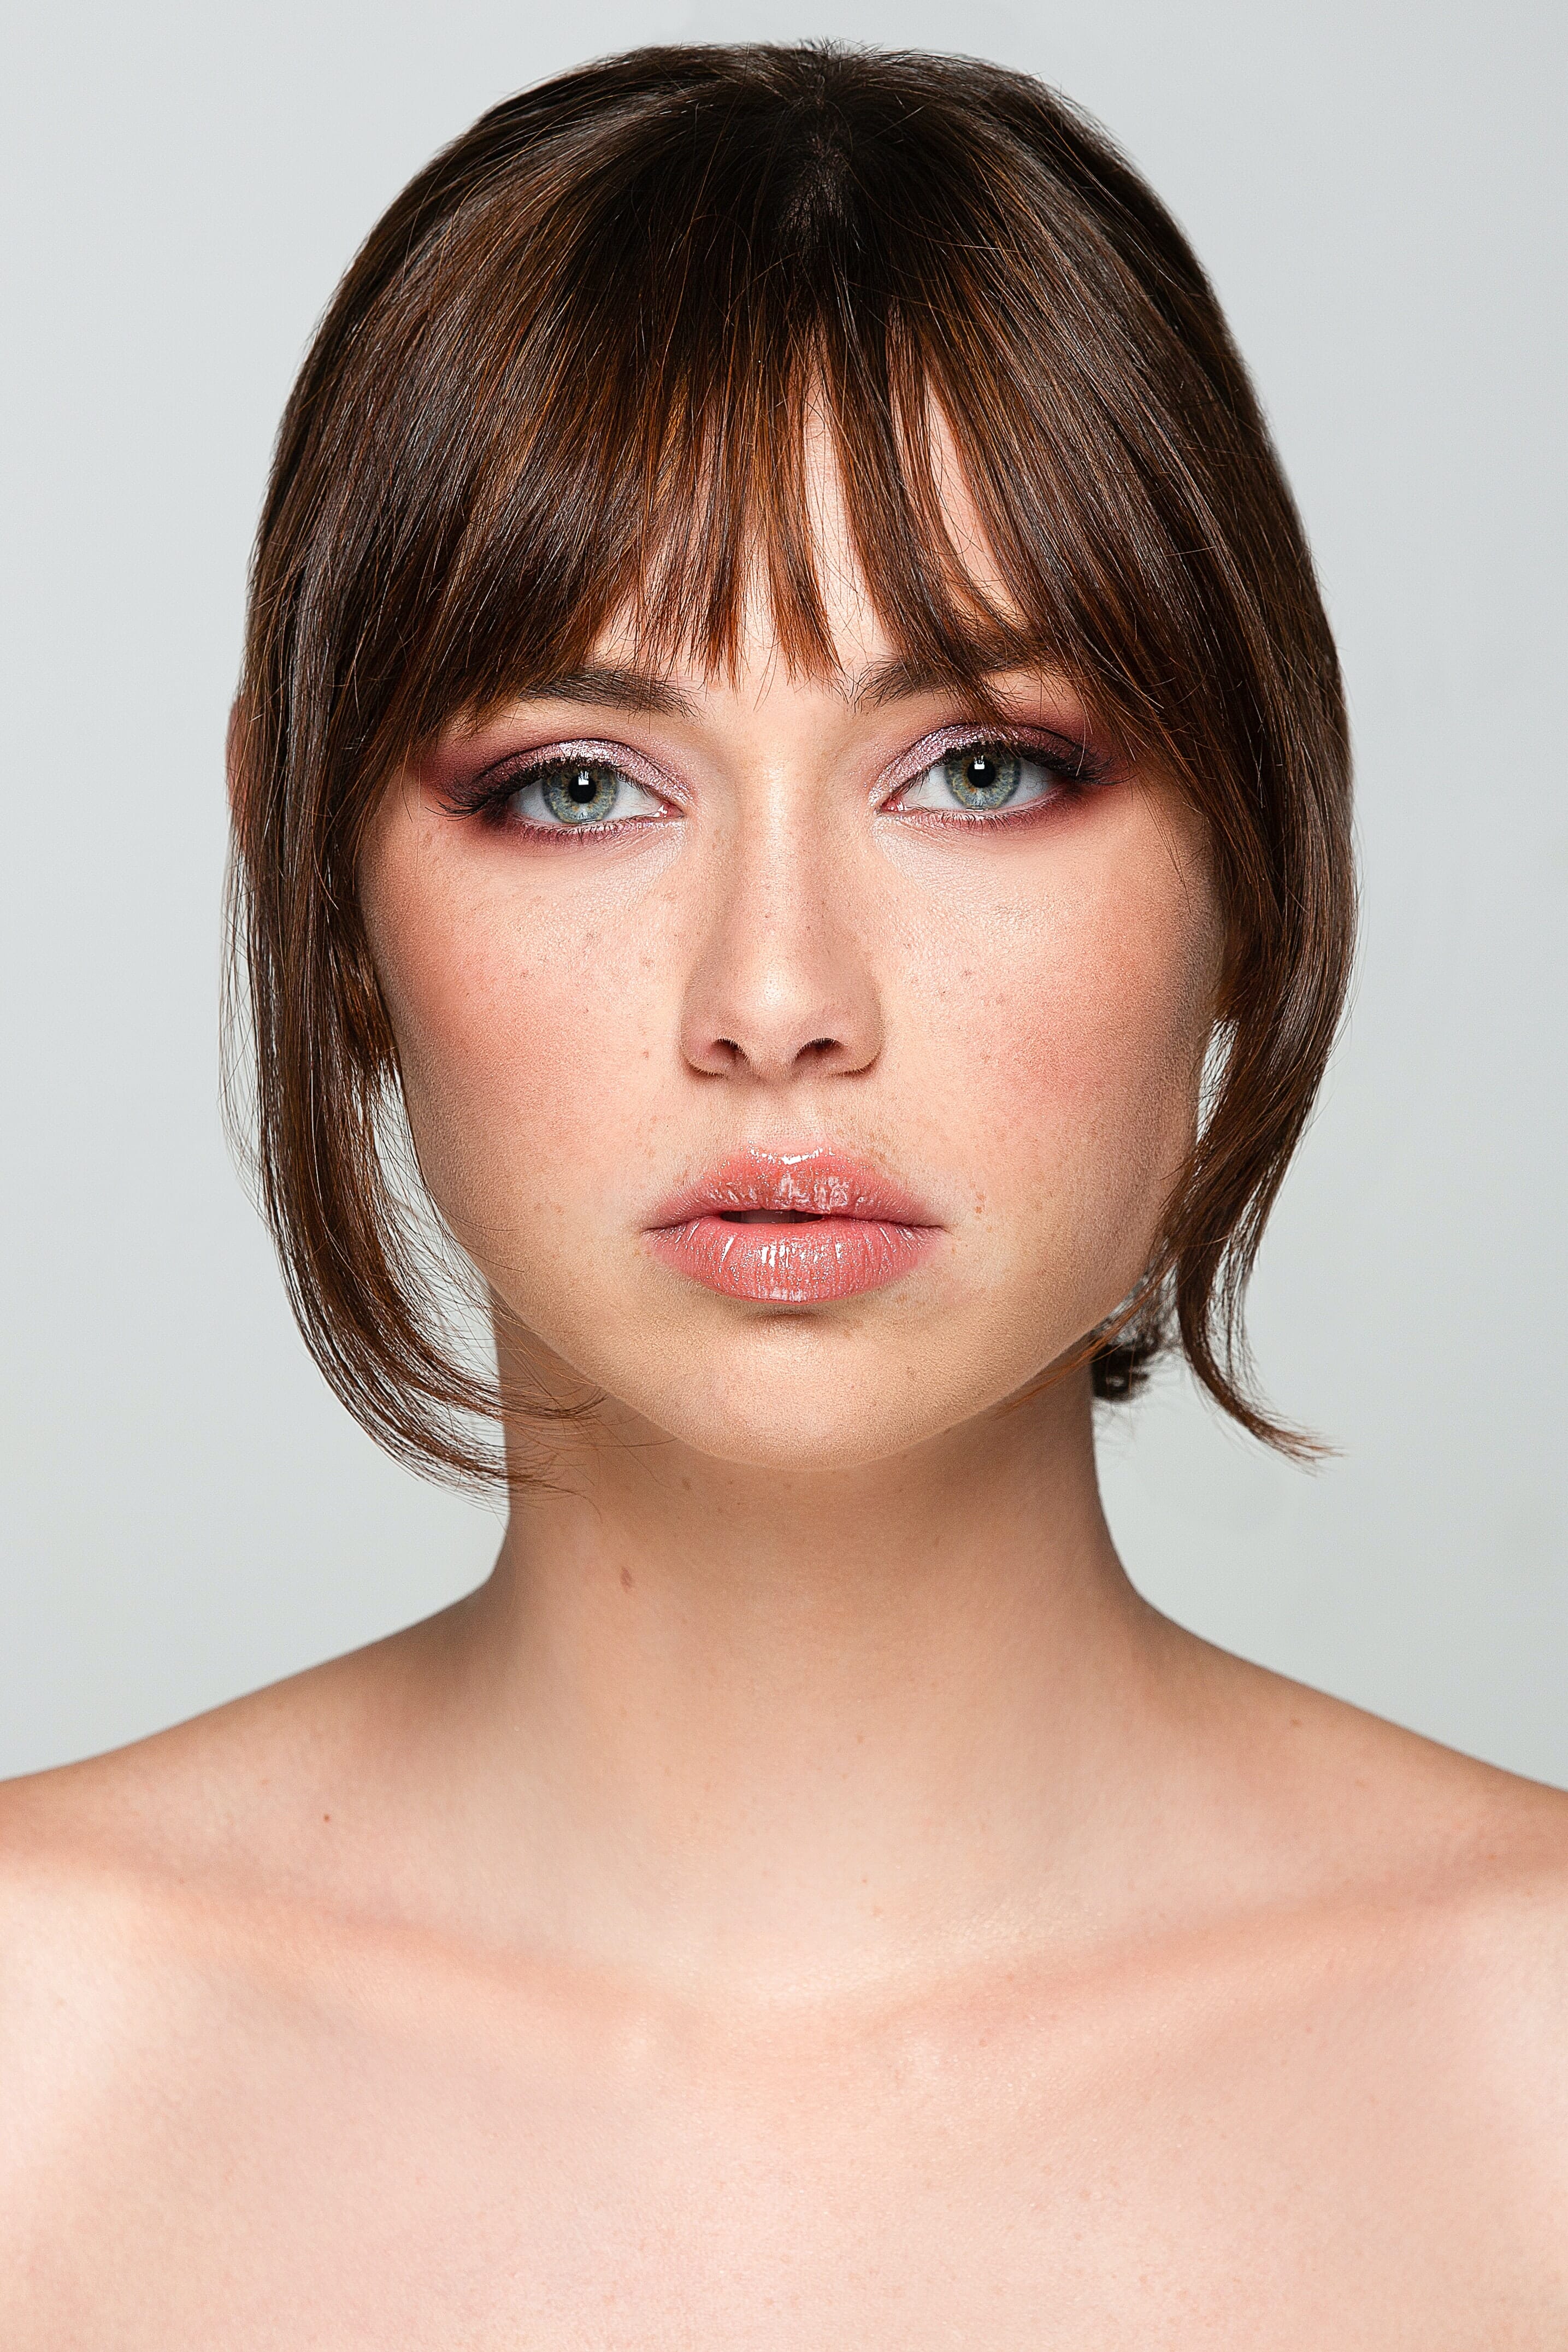
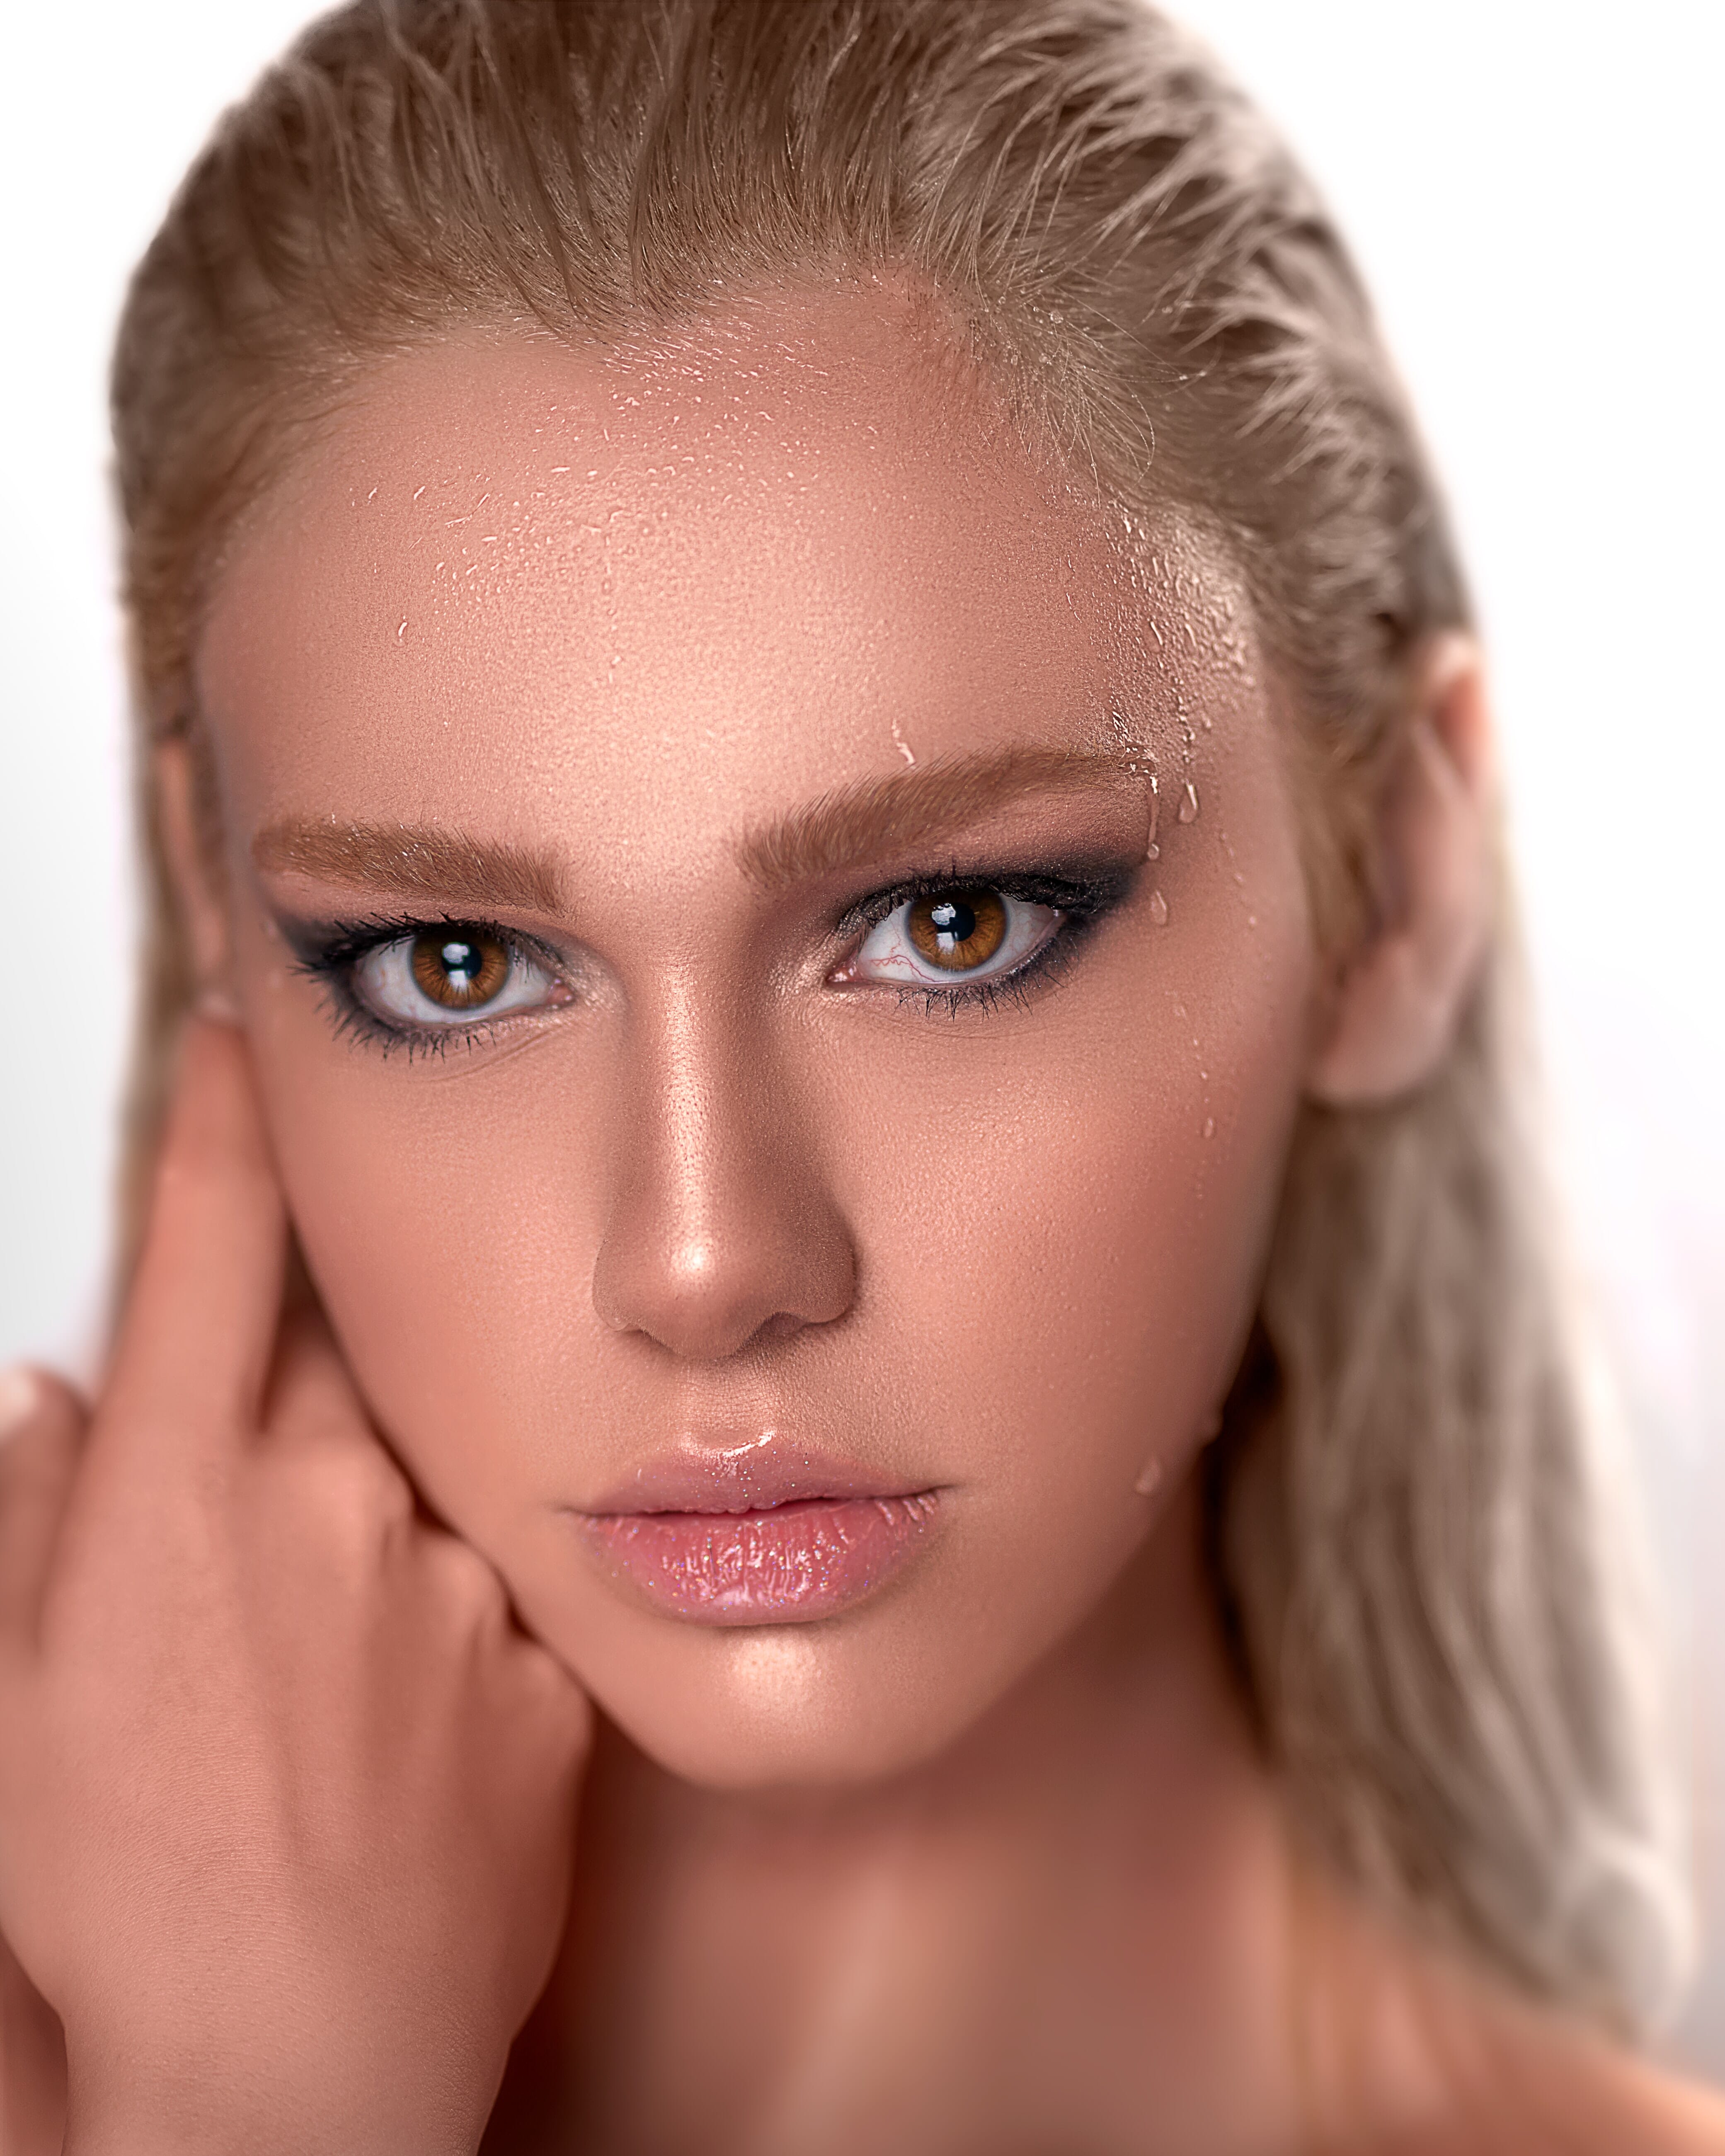
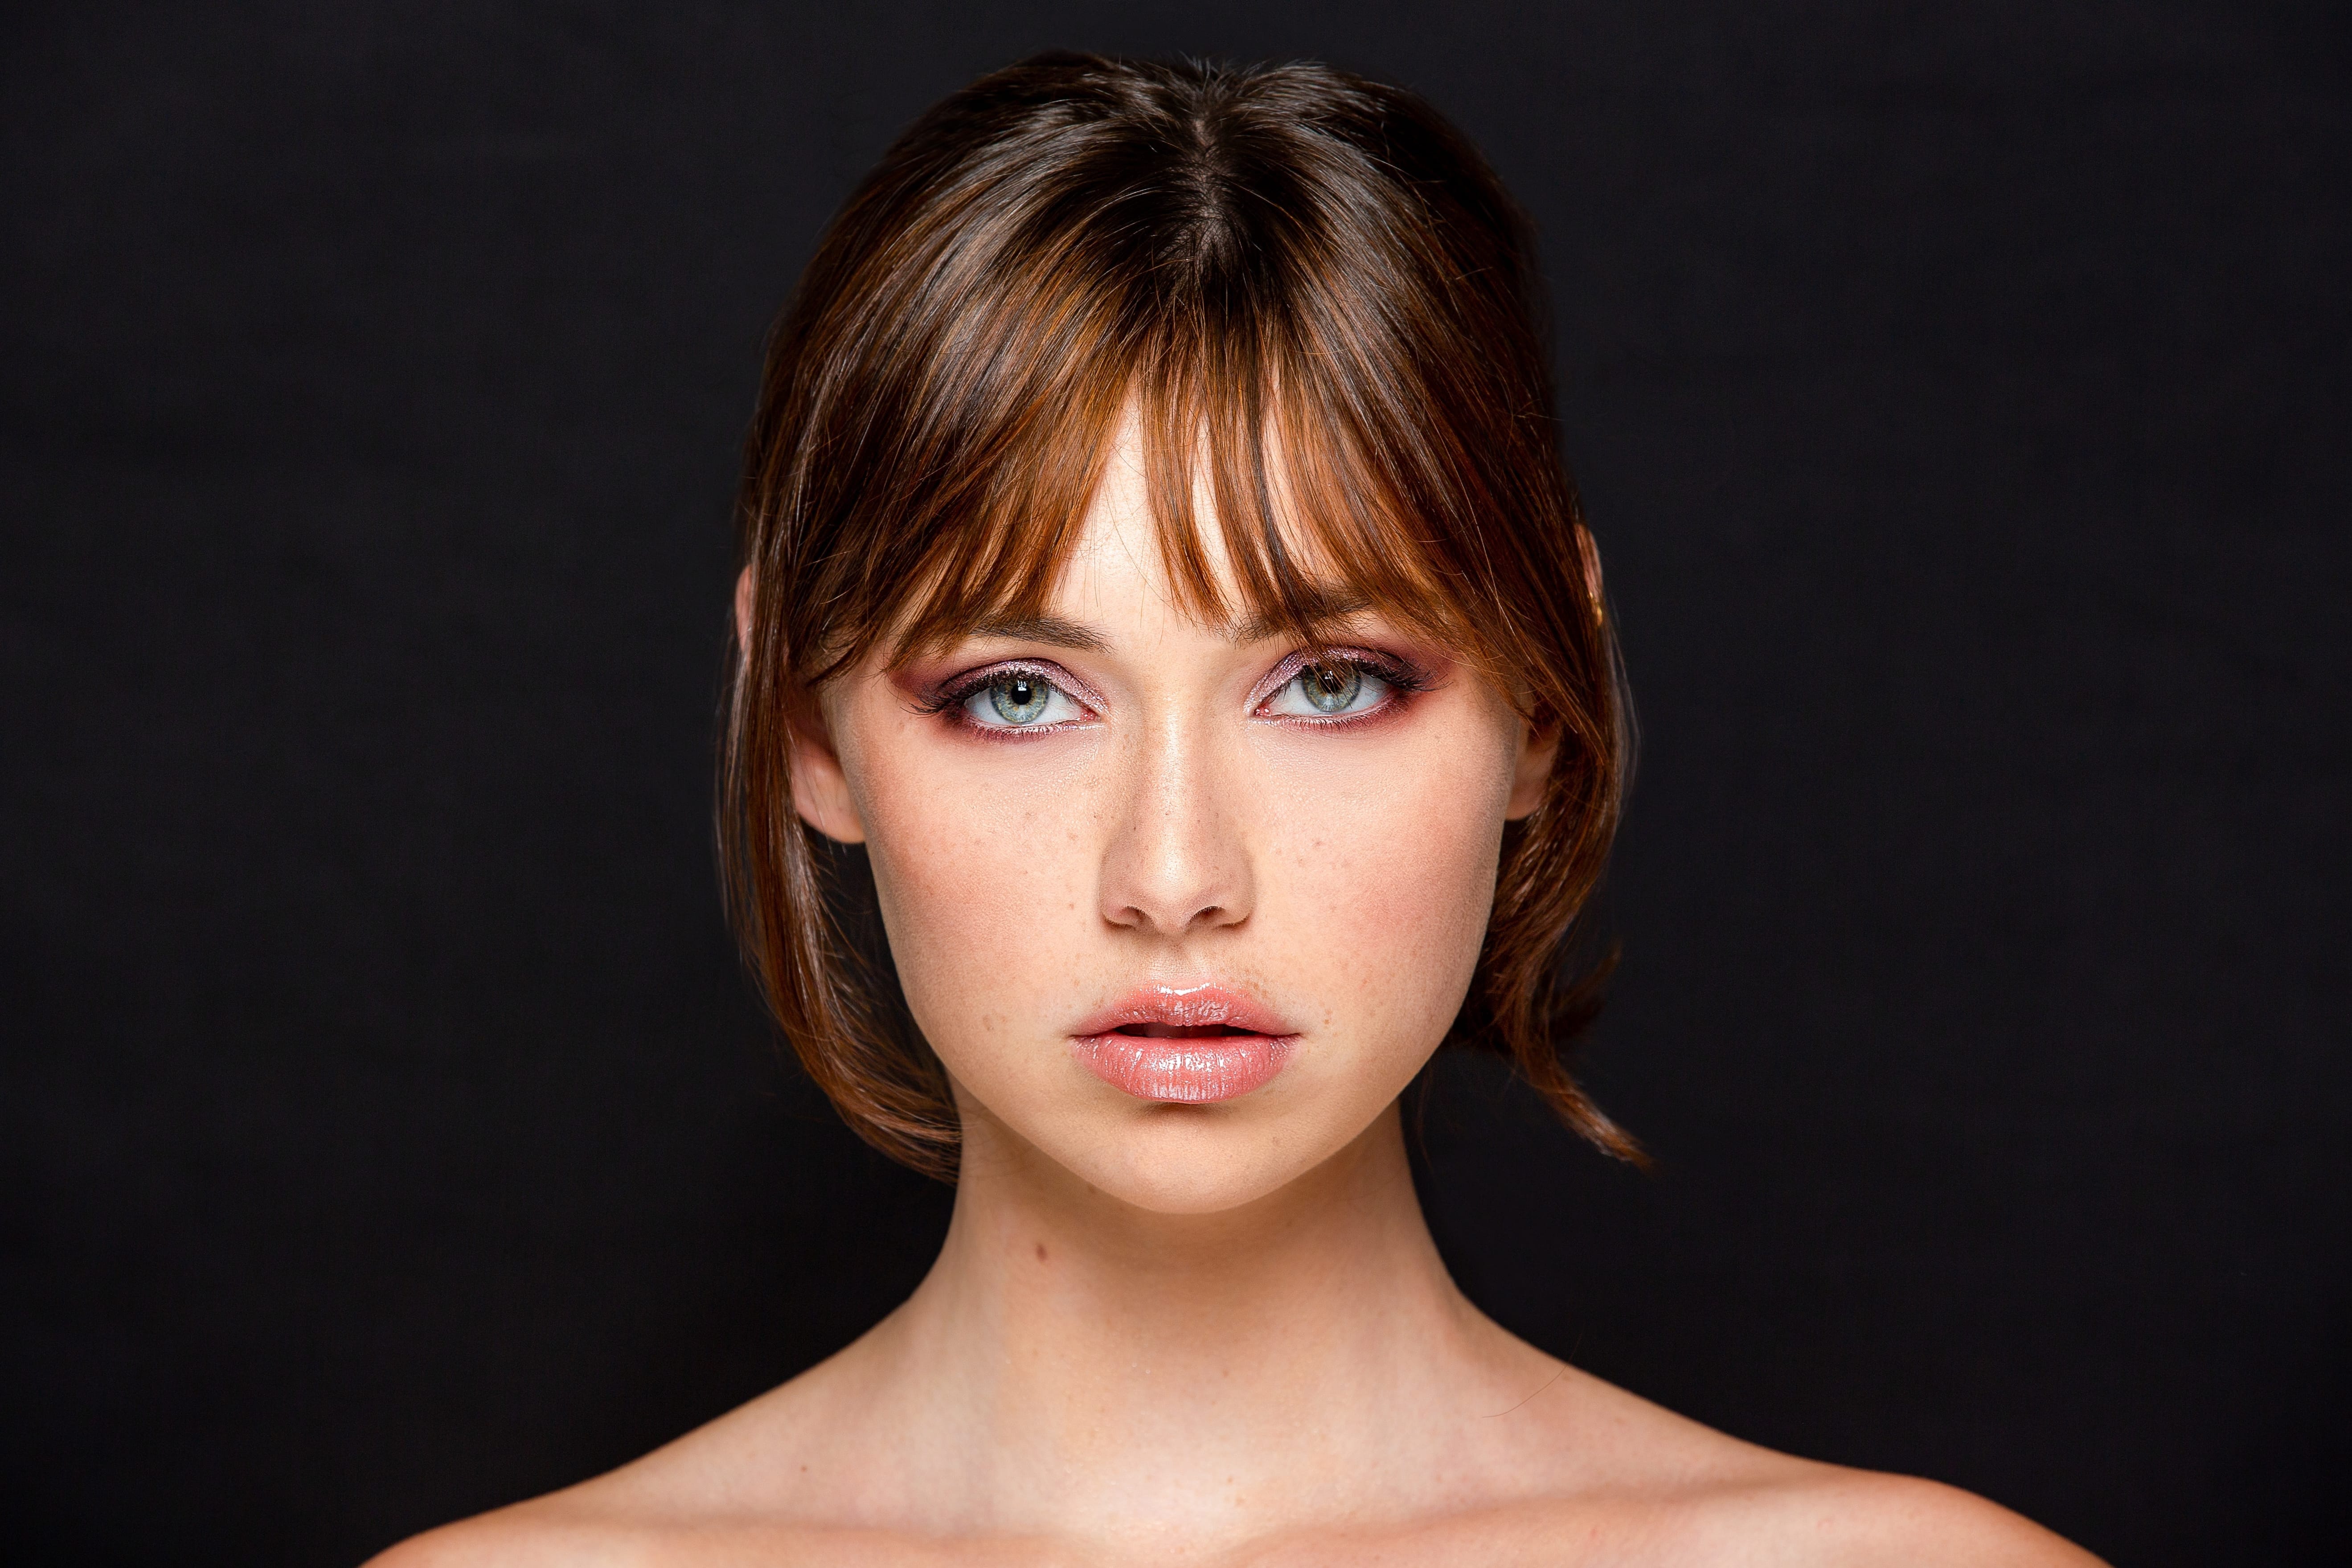
It produces wonderfully flattering shots like this:
Note that clamshell lighting is a type of frontlighting, which means that it keeps the shadows to a minimum and helps to create soft, evenly-lit features.
It’s also extremely easy to produce (and can be done with just one or two lights), which is why it’s such as a popular type of lighting for photographers across the board.
A hallmark of clamshell lighting is the double catchlight in the subject’s eyes, which you’ll start to notice all the time once you look for it:
When Should You Use Clamshell Lighting?
Technically, you can use clamshell lighting in most portrait situations. It works well on most subjects, and will give you images that are bright and eye-catching. You can use clamshell lighting for family portraits, for corporate headshots, for fashion shots, and much, much more.
Note that clamshell lighting doesn’t create much in the way of shadows, which means that it’s not an especially strong lighting pattern if you’re aiming to create drama. It’s a flattering type of light, but not a moody one.
Also note that, while clamshell lighting does offer a lot of flexibility in terms of positioning shadows, it’s generally not very slimming; most of the shadows under the subject’s chin are pushed away by the bottom clamshell light, so a better alternative (when the goal is to slim down the subject’s face) is to go with butterfly lighting.
Clamshell Lighting: A Step-By-Step Guide
Clamshell lighting requires minimal equipment, and is extremely easy to create.
Let’s take a look at what you need to get started:
Necessary Equipment
The most common clamshell lighting setup involves two lights, such as strobes or speedlights. You can get away with a light and a reflector, but this will limit your flexibility somewhat (and ideally you’ll have both a second light and a reflector on hand, so you can play around with different looks).
You’ll need light stands (so that you can carefully position your clamshell setup), and you’ll want a flash trigger (because each flash will need to come off your camera).
In terms of light modifiers, unless you have a particularly harsh shot in mind, I’d suggest working with softboxes or beauty dishes. These will allow you to soften the light and create a more flattering result.
Clamshell Lighting Basics
Here’s how clamshell lighting works:
First, place your main light (the key light) above and in front of your subject. A 45-degree angle is popular, though you’re free to experiment with slightly adjusted lighting positions for different effects.
You’ll want this light to be in front of you (i.e., the photographer), so that your camera is able to sit just below it for a straight or raised angle.
At this point, you’ll have a setup that’ll produce a lot of angular, intense shadows, but this isn’t what clamshell lighting is about. That’s why you need to add a reflector under your subject’s chin, or a second light, one that will push light beneath your subject and create a stunning result. You should generally start with this light at a 45-degree angle, pointing up, so that it mirrors the key light, though you’ll then be able to make adjustments depending on your subject and the shot you’ve envisioned.
Note that both the key light and the second (fill) light should now both be in front of you, the photographer–and your aim is generally to shoot the model from head-on, with a lens that pokes out from between the two light sources. Of course, you can ask the model to turn their head and strike different poses, but be careful to maintain the same shadow presence that you see from very straight clamshell lighting.
By the way, if you’re not sure whether to go with a reflector or a second light:
I like going with a second light, rather than a reflector. It’s easier to control, and doesn’t require any holding–though if you do go with a reflector, you can always have the model hold it, or an assistant of some sort.
Evening Out the Second Light
Once you’ve created the “clamshell” setup, with your lights nicely positioned in the shape of a clam, you’ll want to fine tune the strength of the lights.
Generally, the second (fill) light should be weaker than the main (key) light. The fill light certainly shouldn’t be stronger or closer than the key light, because this would produce grotesque shadows that come from beneath the subject, like you’d find in a horror movie.
You can play with different combinations of lighting strength, though to do this with a reflector you’ll want to move it closer and farther away from the subject’s face.
Adding a Third Light
While you only need two lights to create the clamshell pattern, you’re always free to add additional lights to the setup.
For instance, you might add a light pointing at the backdrop to create a slight halo effect, or you might add a rimlight to help the subject pop more off the background.
Keep the Catchlights
As I mentioned in an earlier section, clamshell lighting, when done properly results in a double catchlight.
You get one catchlight from the top clamshell light, and one catchlight from the bottom clamshell light, which helps the eyes to pop off the page and adds a lot of intensity.
For this reason, it’s important that you make sure that both catchlights are present in the shot. Make sure that your top and bottom light stay in front of your subject without going too high or low, because the farther you move them up (in the case of the top light) and down (in the case of the bottom light), the more you risk losing one (or both) of the catchlights.
Make sense?
Clamshell Lighting Versus Butterfly Lighting
If you’re familiar with different types of photography lighting, then you’ve probably come across another, very similar lighting setup:
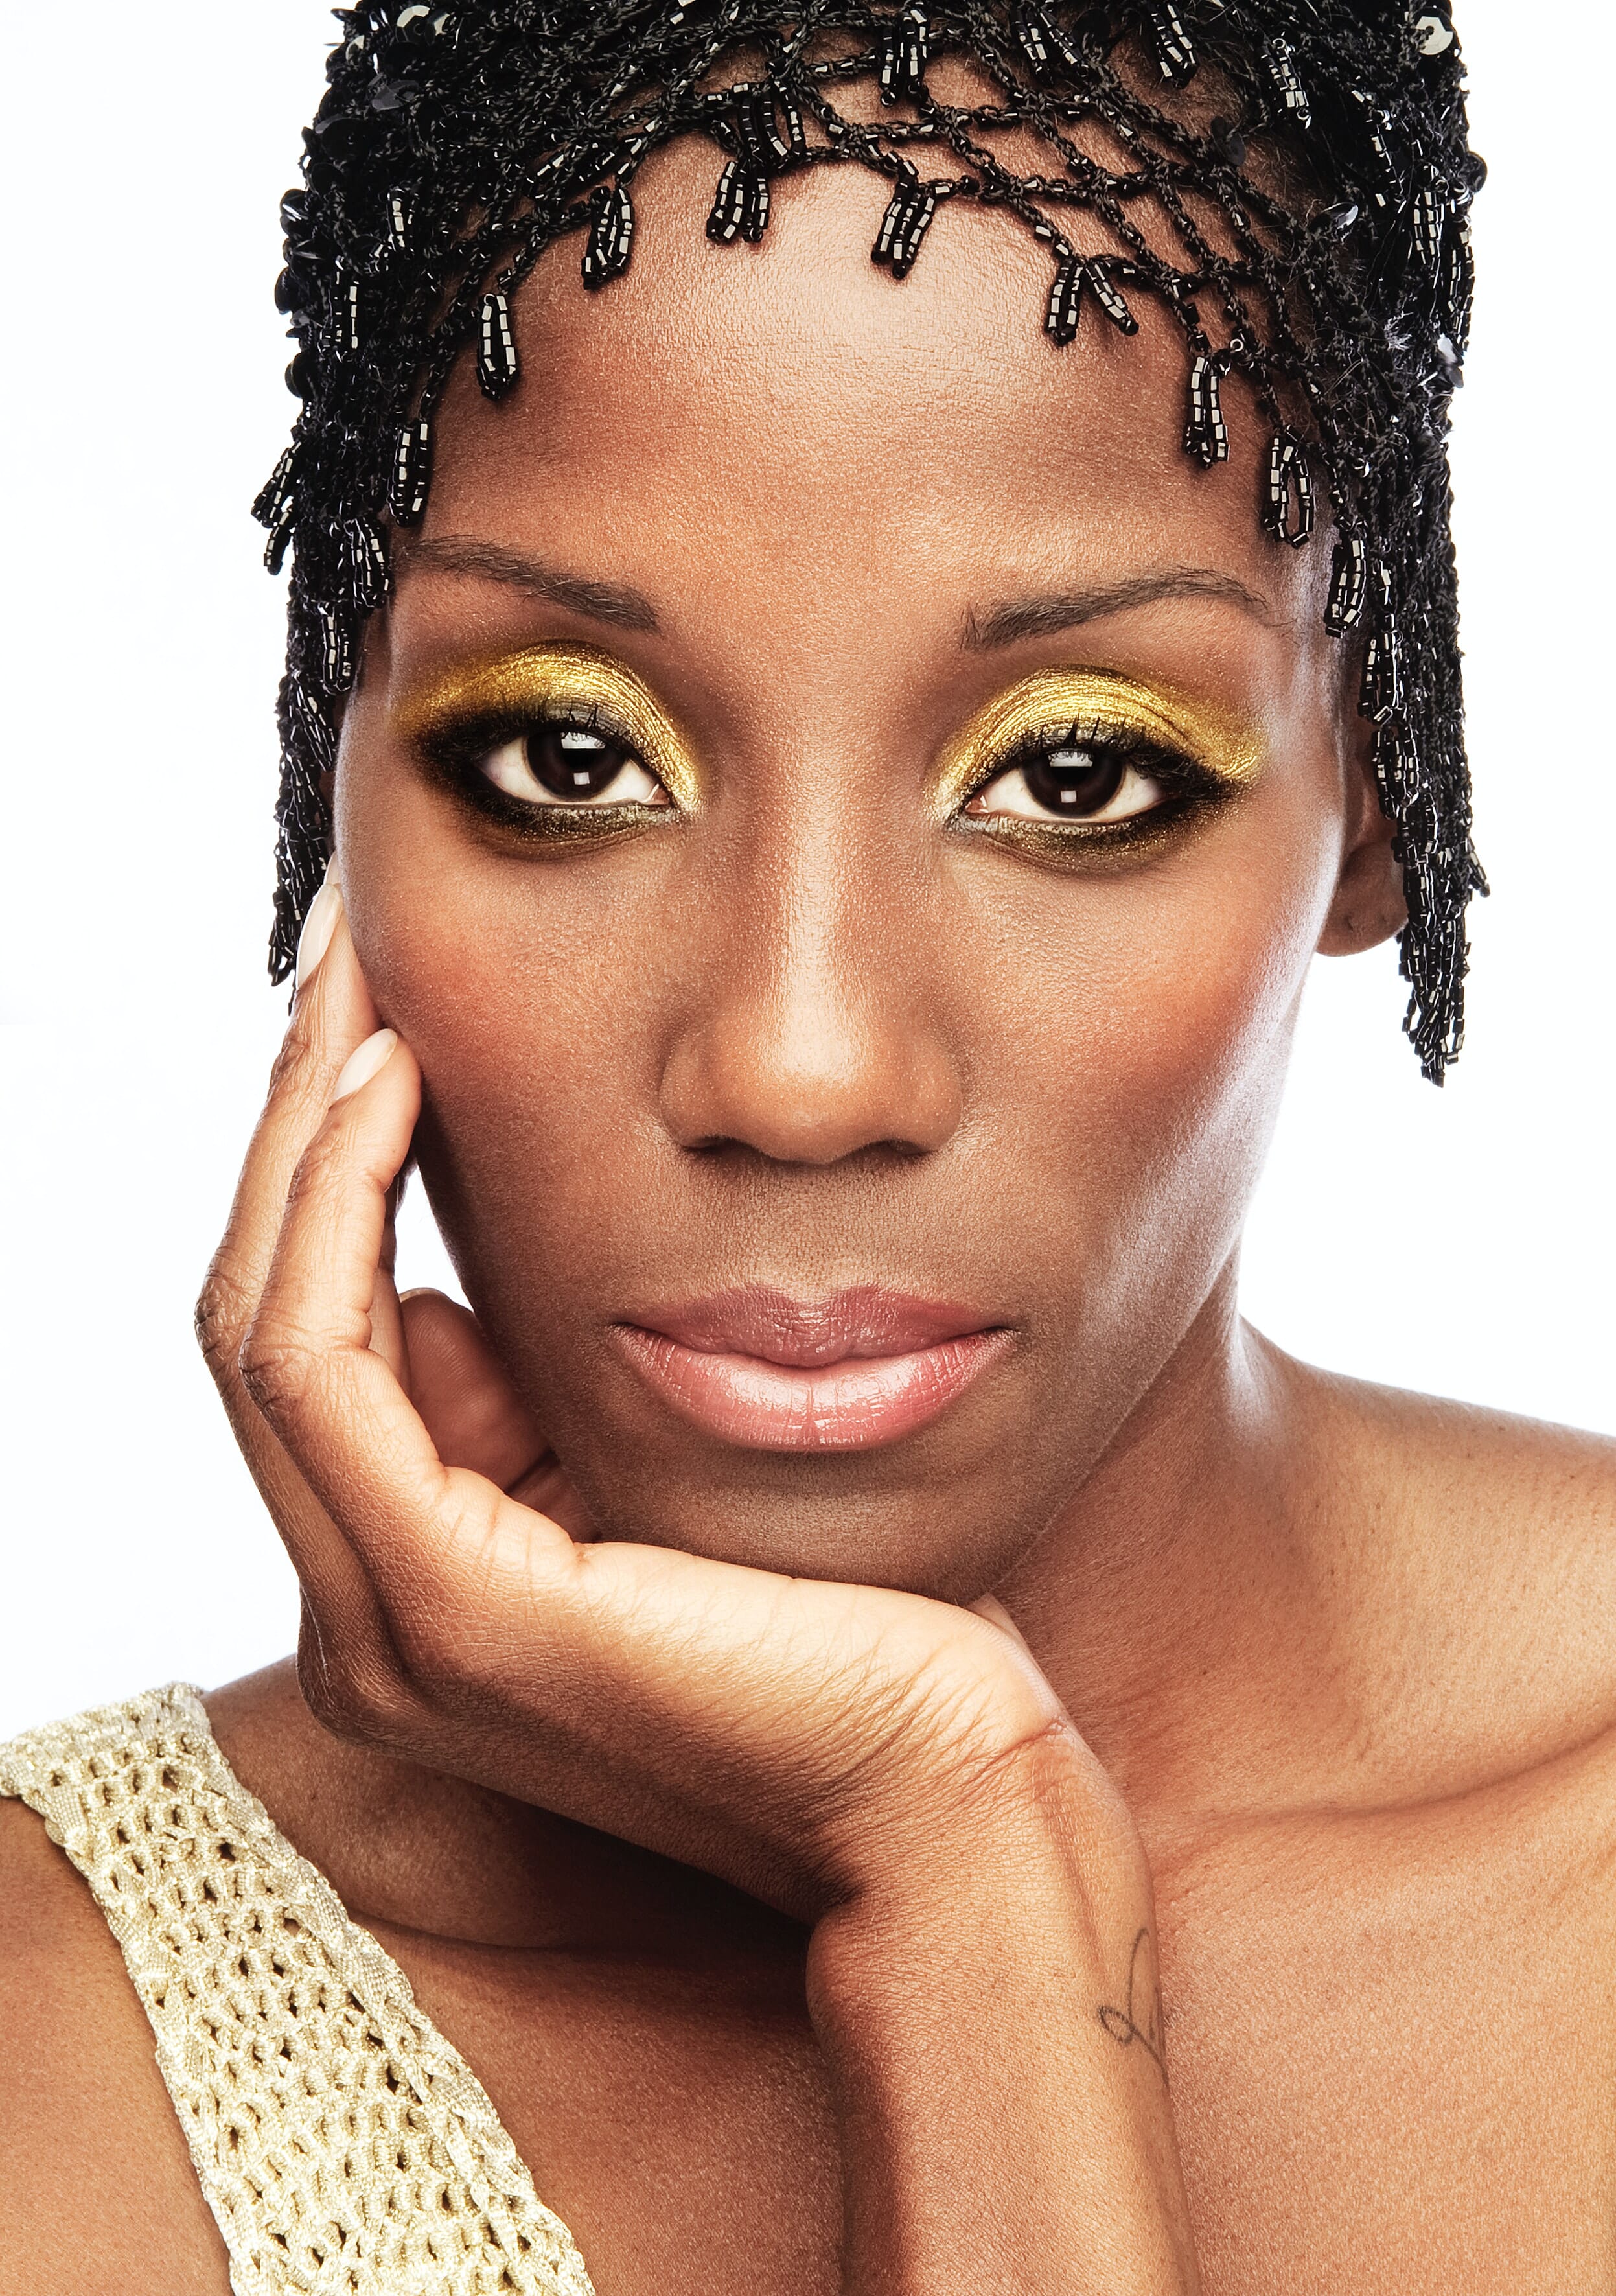
Butterfly lighting involves placing a light just above the subject, pointing down at an angle just like clamshell lighting. And you can also use a second light or a reflector beneath the subject, pointing upward.
It creates images like this:
But here’s the difference between butterfly and clamshell lighting:
With butterfly lighting, the top light should heavily dominate, in order to create a butterfly-shaped shadow under the subject’s nose. The result will be intense, angular, glamorous, and dramatic.
Whereas with clamshell lighting, you should get a much more even look, thanks to a more powerful bottom light (or nearer reflector). So you’ll get a flattering shot, yes, but not one that’s quite so intense.
Both types of lighting have their place, but clamshell lighting is a bit more broadly applicable, given the gentler result.
Clamshell Lighting: Conclusion
Clamshell lighting is useful, it’s flattering, and it’s easy to create.
So whenever you’re looking to create a portrait that’ll really please the model…
…try clamshell lighting!
I bet they–and you!–will be impressed by the result.
What is clamshell lighting?
Clamshell lighting is a common lighting pattern in portrait photography. You position one light out in front and above your subject, and another light out in front and below your subject. This gives a very flattering look, one that’s relatively flat but that avoids bringing out unwanted textures in your subject’s face.
When should you use clamshell lighting?
Clamshell lighting is a great “all around” lighting pattern, which works for most portrait subjects, thanks to the soft, relatively even lighting.
What type of photos does clamshell lighting produce?
Clamshell lighting produces very soft, gentle, bright images. An indicator of clamshell lighting is the double catchlight in portrait subjects’ eyes, which looks simply amazing and really helps to make the images pop.
I used Clamshell lighting as a sort of ‘photo booth on steroids’ at an event with about 150 people, one to five at a time. I had to use a small room, with the background about a foot behind the subjects. The clamshell worked great in eliminating shadows and no reflections with eyeglasses.