If you’re looking to capture beautiful photos, then golden triangle photography is something that you absolutely need to master.
But what actually is the golden triangle? And how can you use it for amazing compositions?
That’s what this article is all about.
I’m going to tell you all about golden triangle photography–and how you can use the golden triangle for consistently beautiful results.
So if you’re ready to start using this composition technique…
…let’s get started.
Golden Triangle Photography:
What Is Golden Triangle Photography?
In photography, composition is key.
Specifically, you have to arrange the elements of your images in a pleasing way, so that you end up with a balanced, flowing image for viewers to get lost in.
And the golden triangle is just one guideline for arranging the elements within your images.
You see, golden triangle photography is any photography that uses a compositional technique referred to as the golden triangle.
What is the golden triangle?
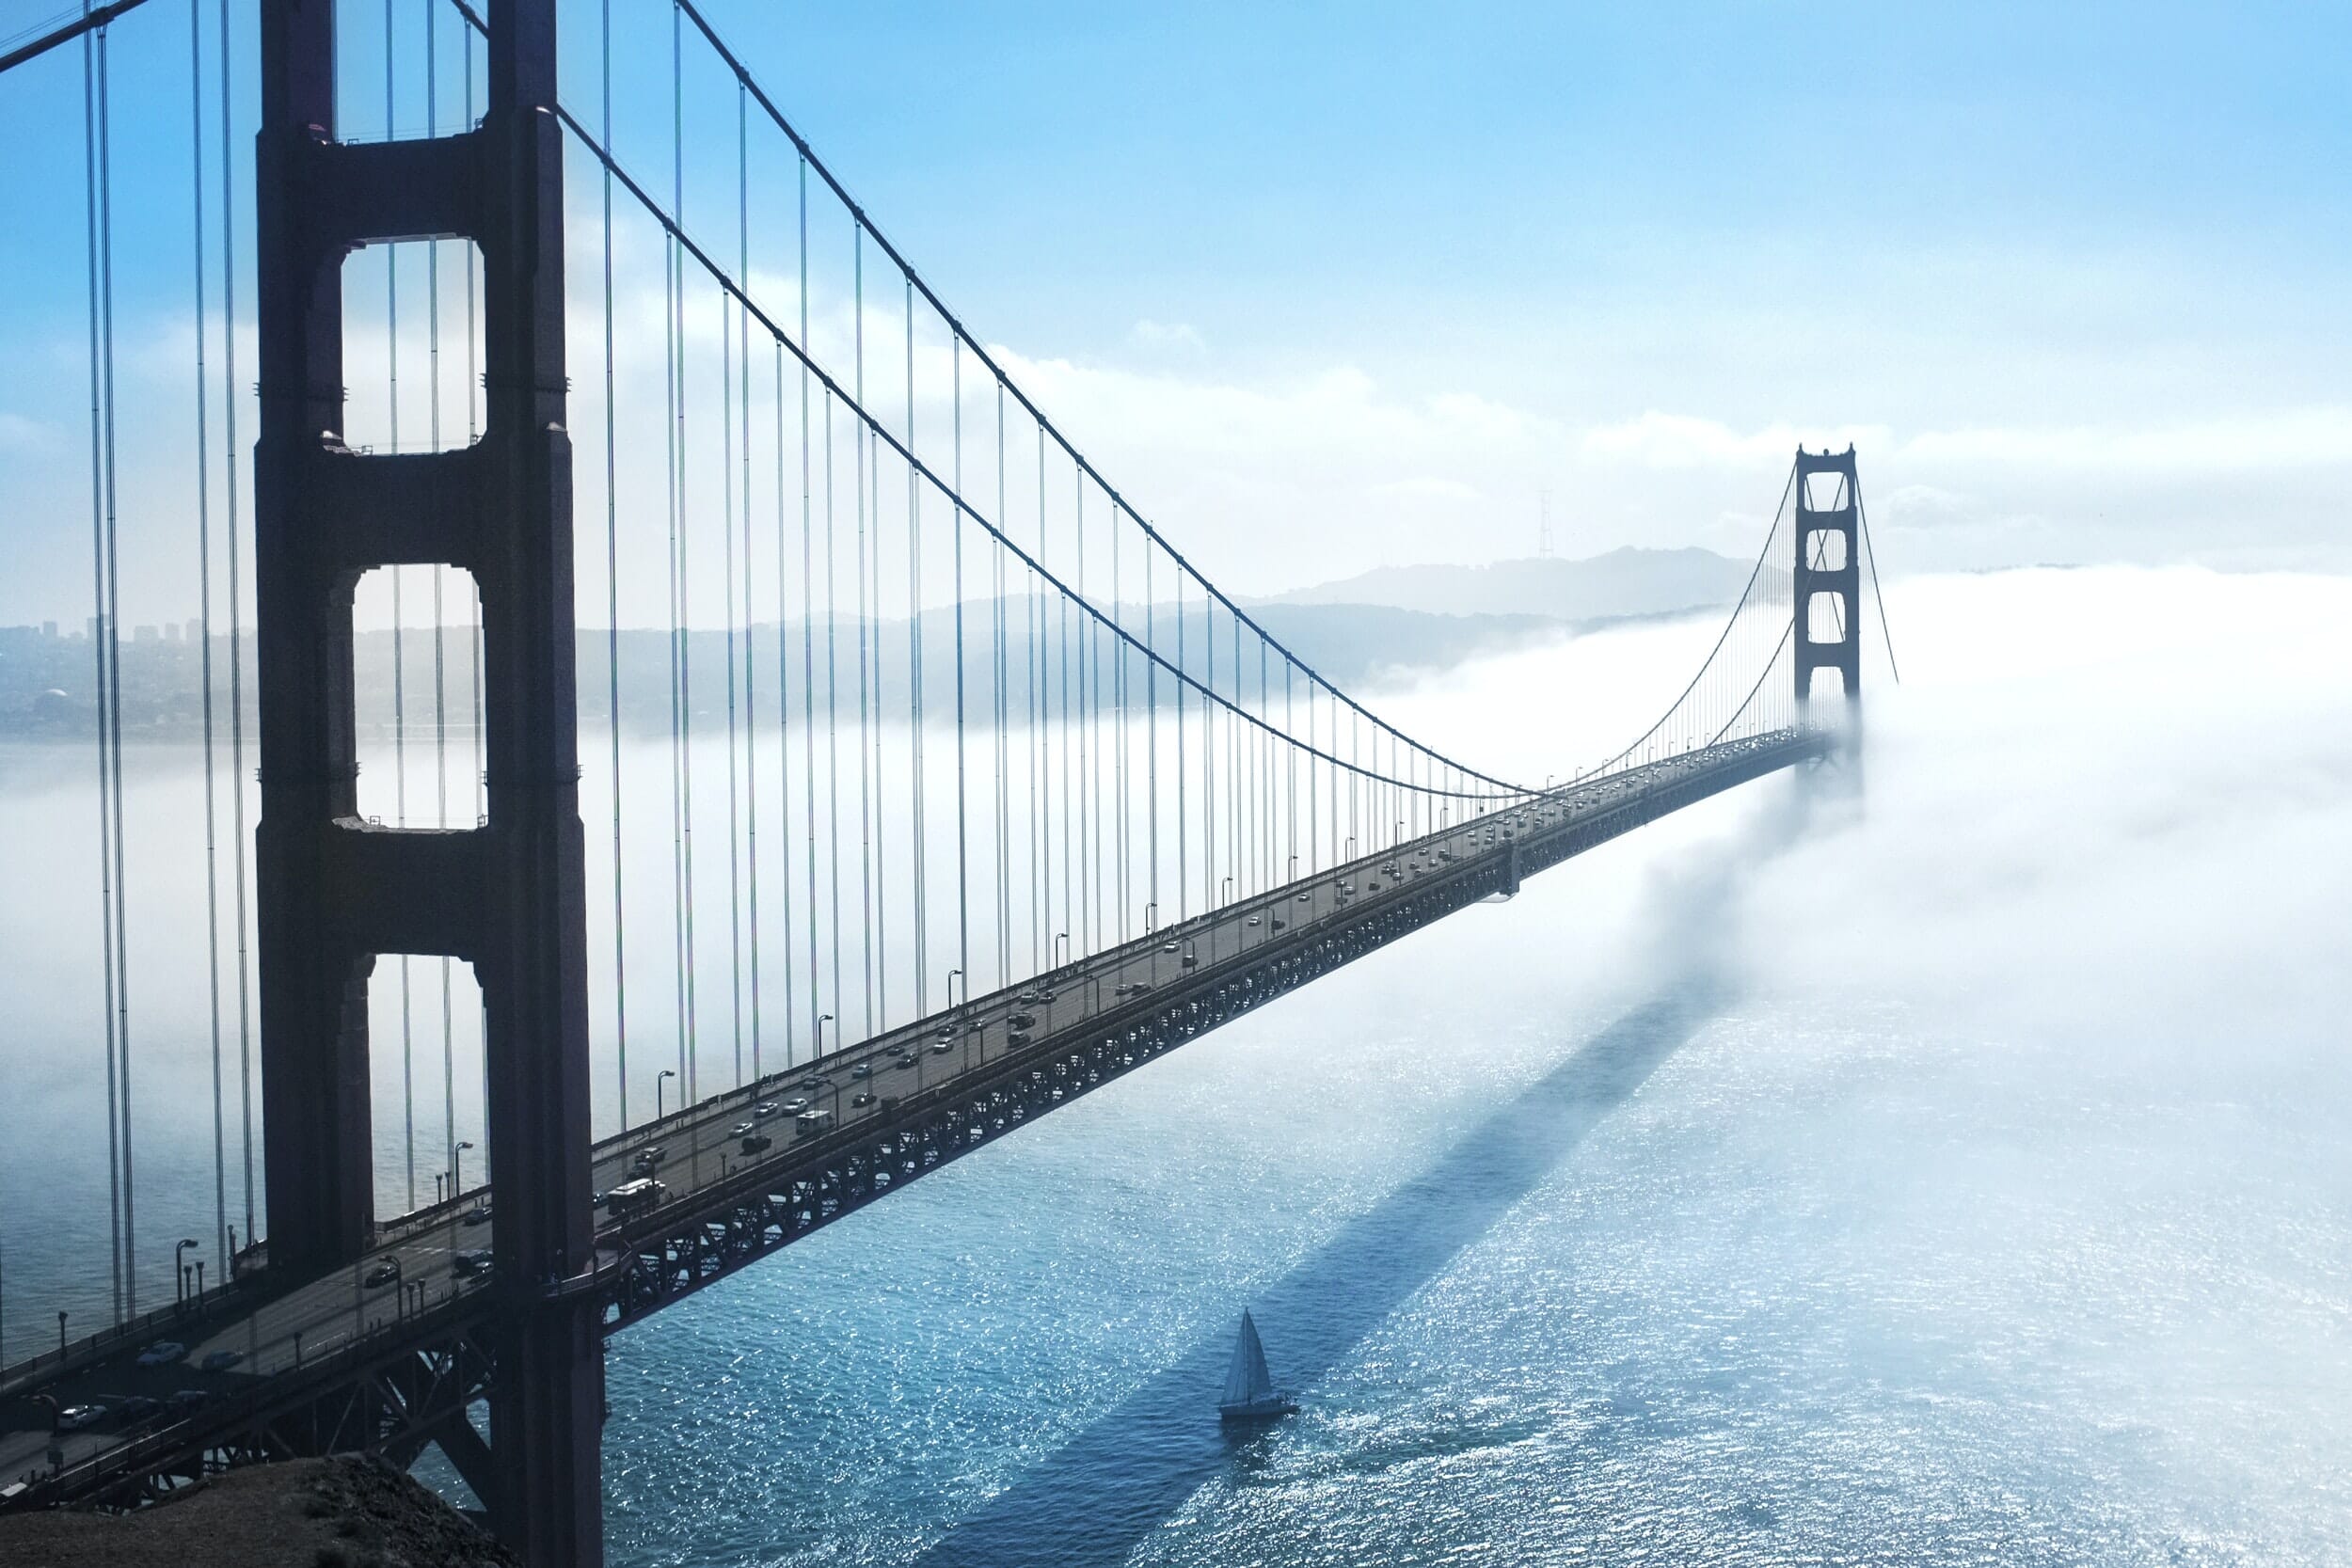
Well, it’s part of an overlay that looks like this:
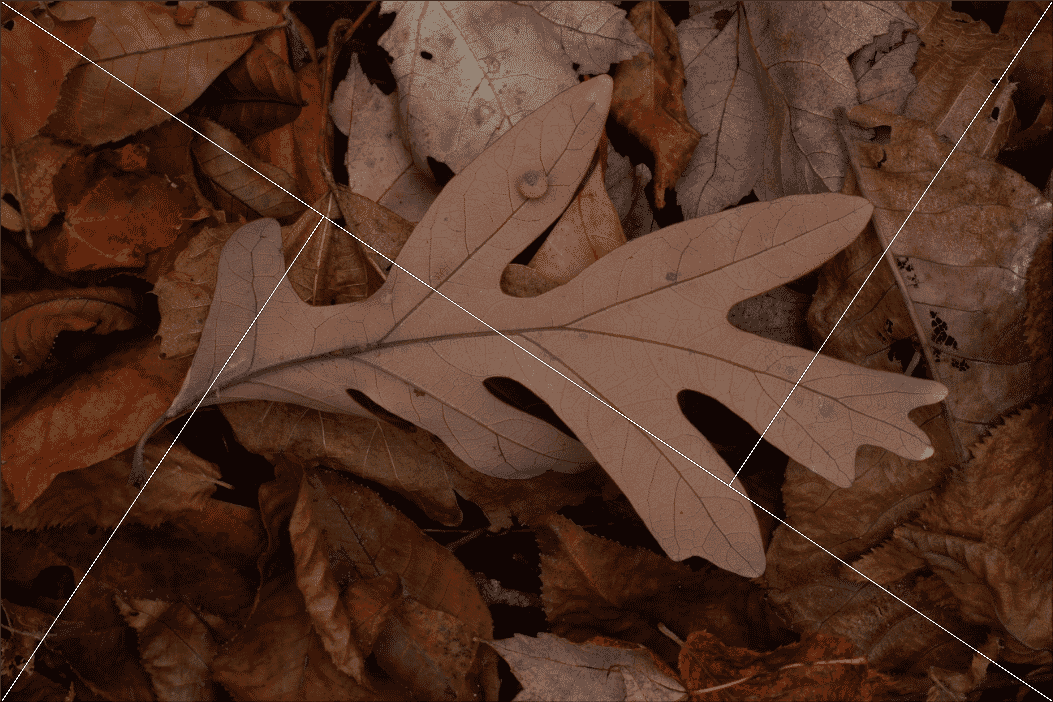
You create it by drawing a diagonal line from one image corner to another. Then draw lines from the remaining two corners so they intersect with the main diagonal at a right angle.
That gives you a golden triangle overlay, which includes four distinct triangles (though there are six triangles, overall, when you combine them together!).
These triangles (and their constituent lines) are designed to guide you as you determine the composition of a photo.
While I’ll get into the specifics later on, think of the triangle edges as markers, upon which you can place key elements (e.g., the edges of a mountain) or contain key elements (e.g., a flowing river).
Make sense?
Why Use the Golden Triangle in Your Photography?
The golden triangle actually extends far beyond photography; many classical paintings, for instance, use the golden triangle to great effect.
But what makes it so compelling? Why should you think about using the golden triangle in your work?
The golden triangle does two things:
First, it helps achieve balance; by placing subjects at the golden triangle intersection points, or by placing lines along the golden triangle edges, you can create a satisfying, stable photograph.
But the golden triangle does something else:
Even while it helps you balance your compositions…
…it also ensures you include a level of dynamism, or movement, within the scene. The golden triangle emphasizes diagonals, which are always good for enhancing movement and visual flow. And so by using the golden triangle guidelines, you’ll be able to take your images from more static compositions to more dynamic compositions–compositions that move the eye throughout the frame.
Note that dynamic compositions tend to be very powerful, because they trap the viewer within the scene. The viewer’s eye shifts from compositional element to compositional element, which is exactly what you want in a great photo.
When Should You Use the Golden Triangle?
You can use the golden triangle in most forms of photography.
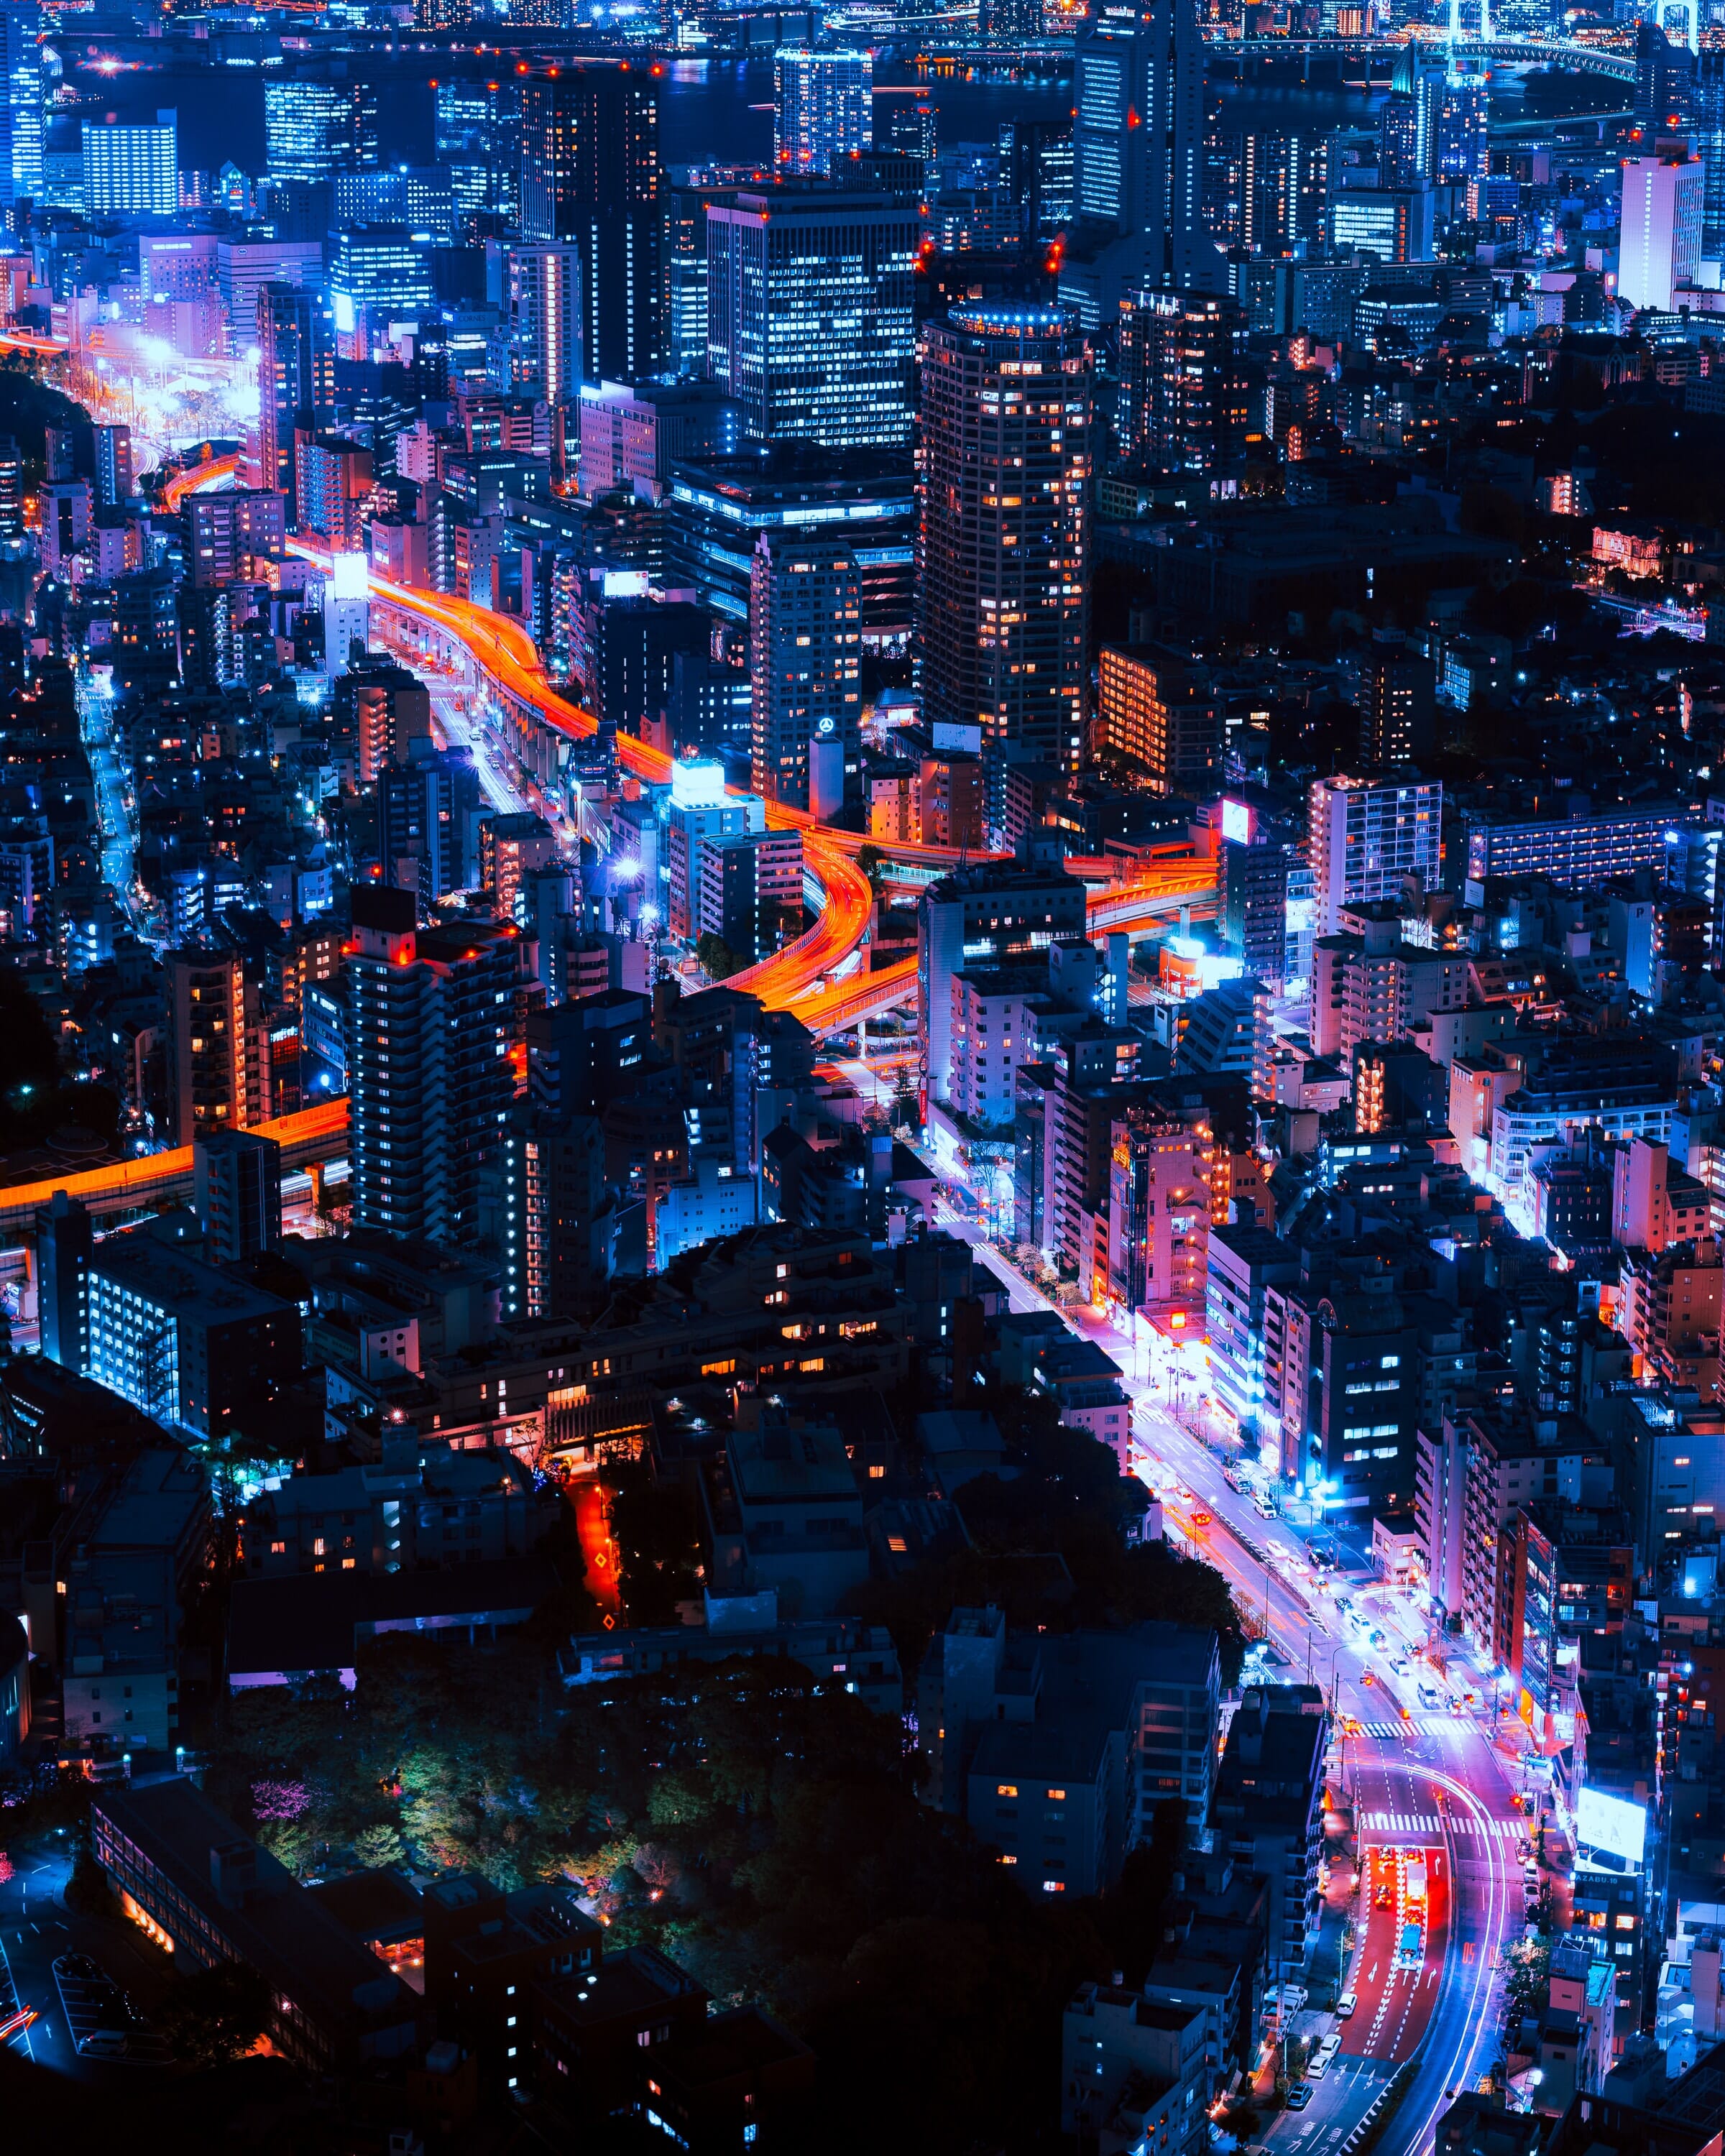
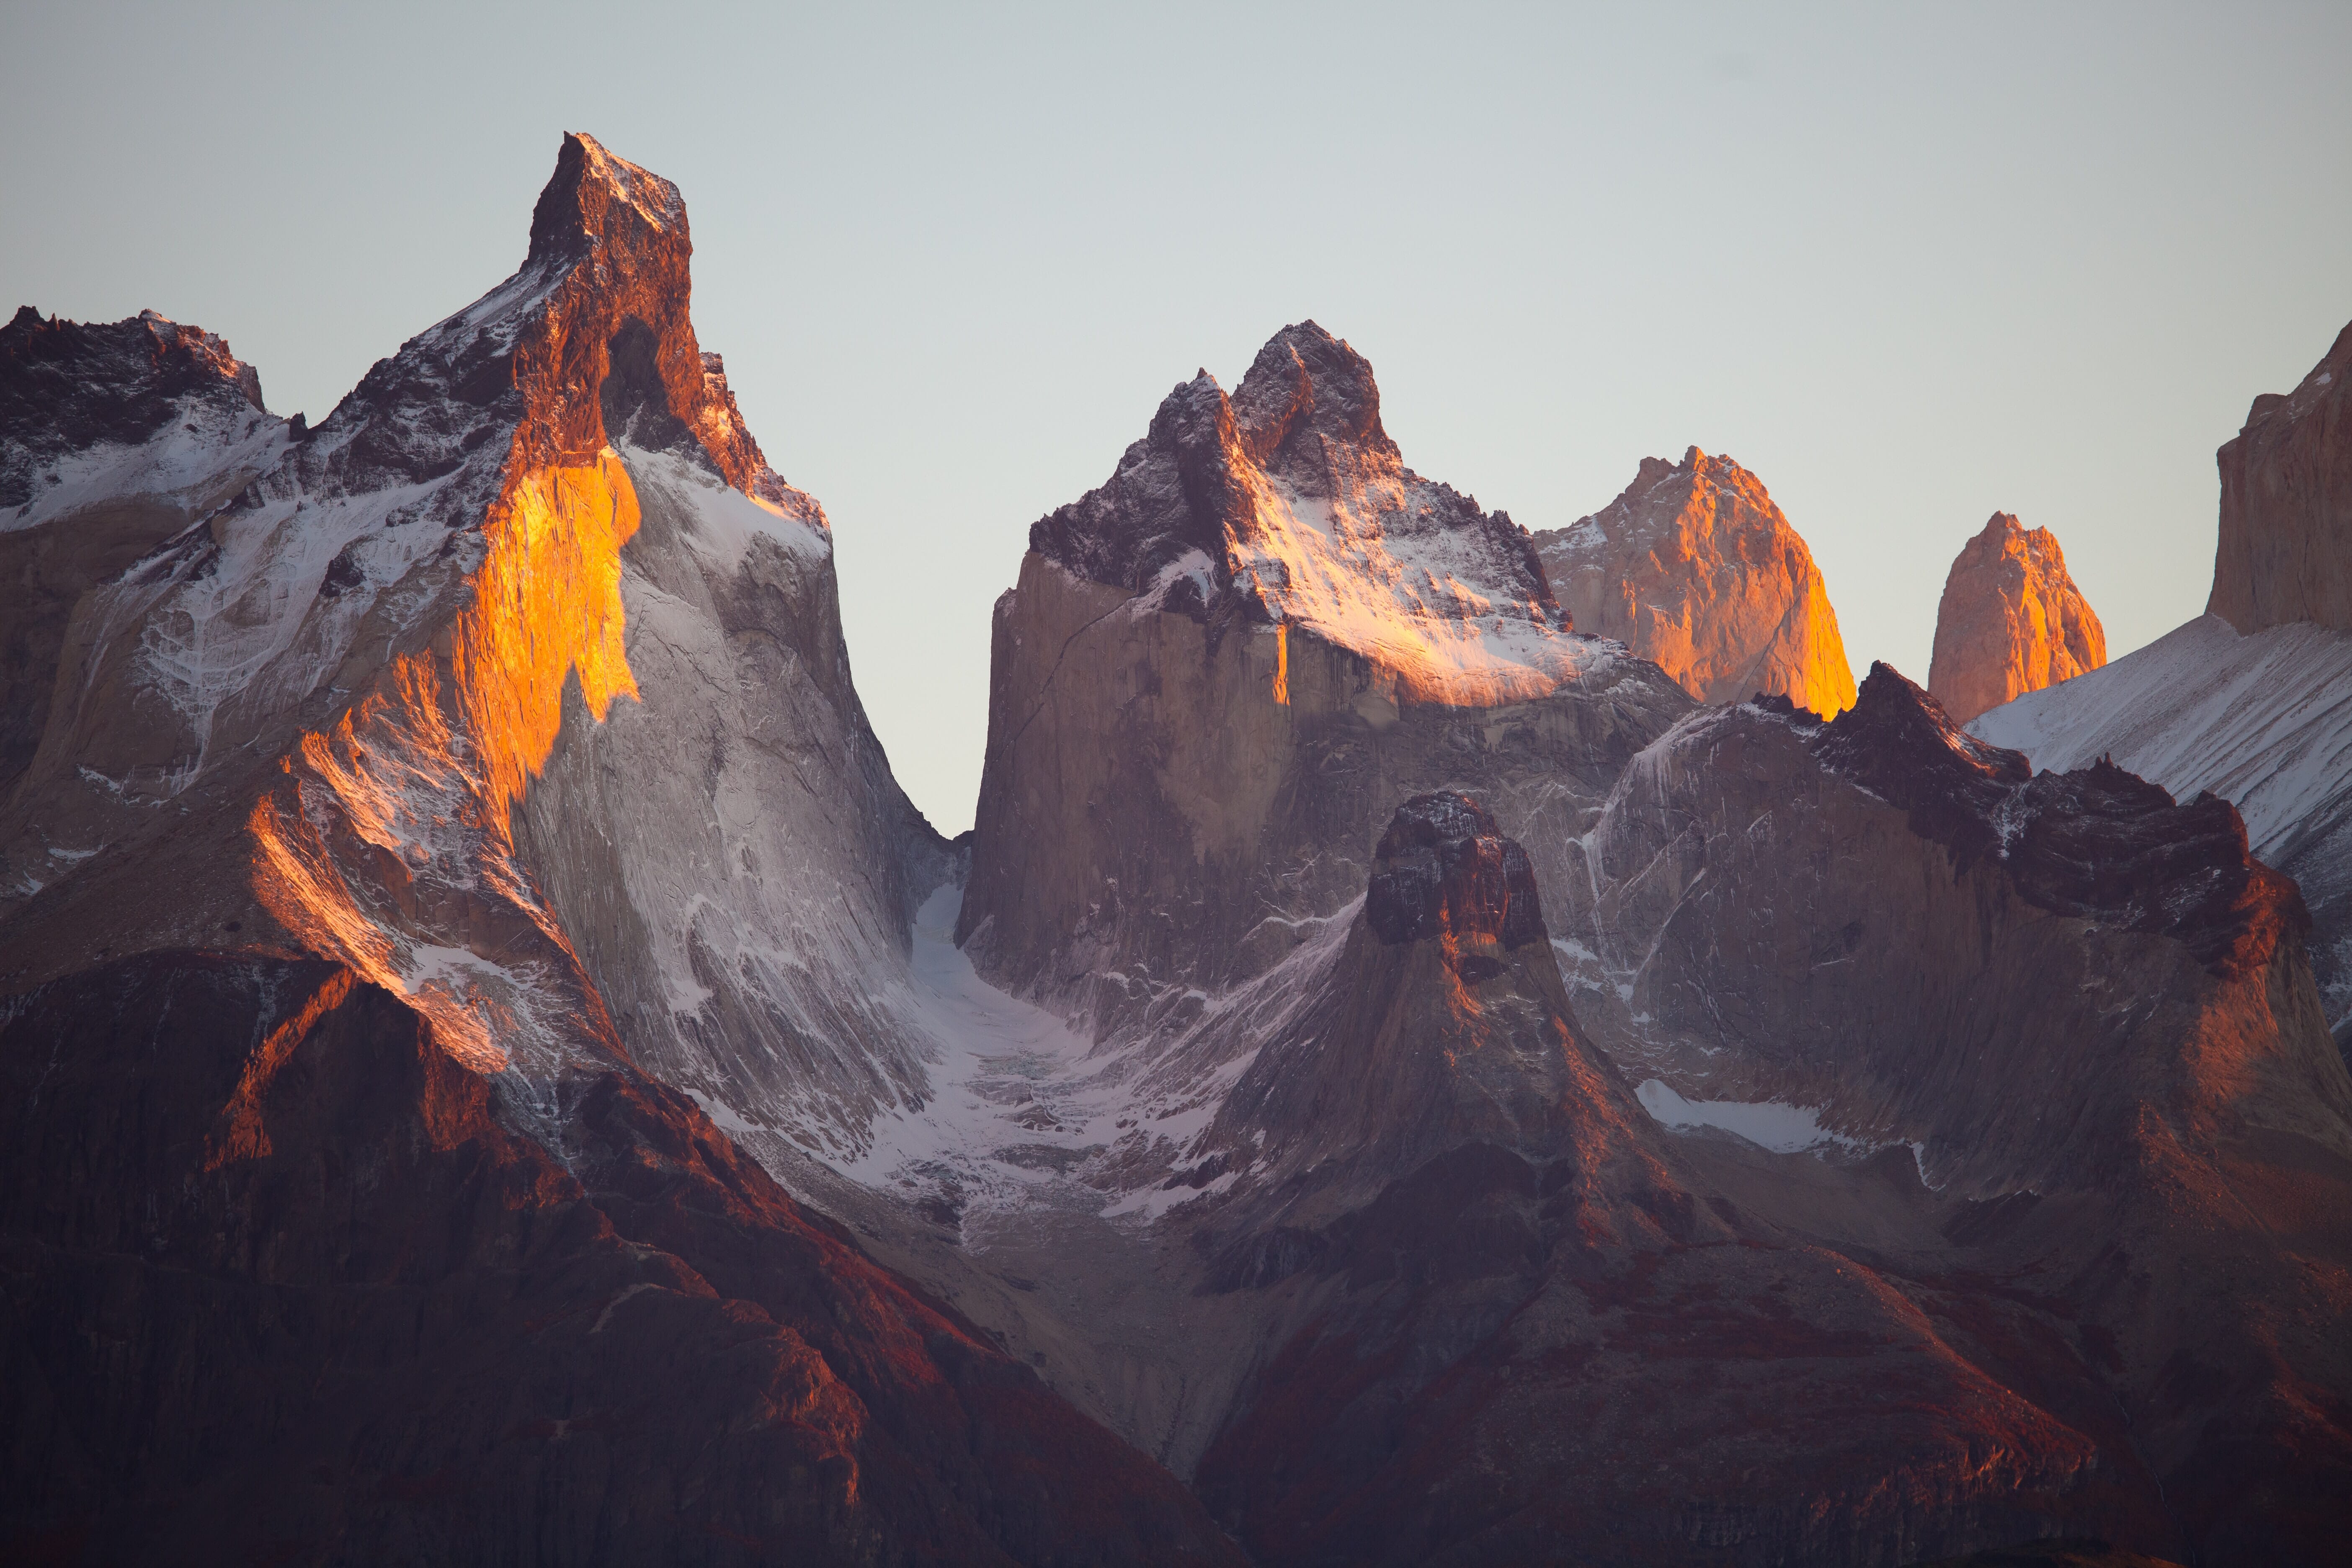
For instance, landscape photography often involves photographing mountains, which often take on triangular forms, as well as rivers (which can run along the golden triangle diagonals). And note that you can get far more creative than this–you can ensure that the sky fills one of the triangular guidelines, or that you have a foreground subject at one triangle intersection and a background subject at another triangle intersection.
In portrait photography, you can position your subject so that their body runs along the golden triangle lines. You could place their head at one golden triangle intersection and their hips at another. Or you could position an arm along one line, and bent legs along another.
In still life photography, you can position a key element at each of the triangle intersections, or you can fill a triangle with eye-catching elements, while leaving another triangle completely empty (as negative space).
Really, it’s up to you how you use the golden triangle; none of this is set in stone, and the golden triangle is meant as a guideline, not a rule.
The Golden Triangle Vs the Rule of Thirds
If you’ve been studying photographic composition, you’ve probably come across another compositional guideline:
The rule of thirds.
Now, the rule of thirds suggests that you put your main compositional elements along the rule of thirds gridlines, here:
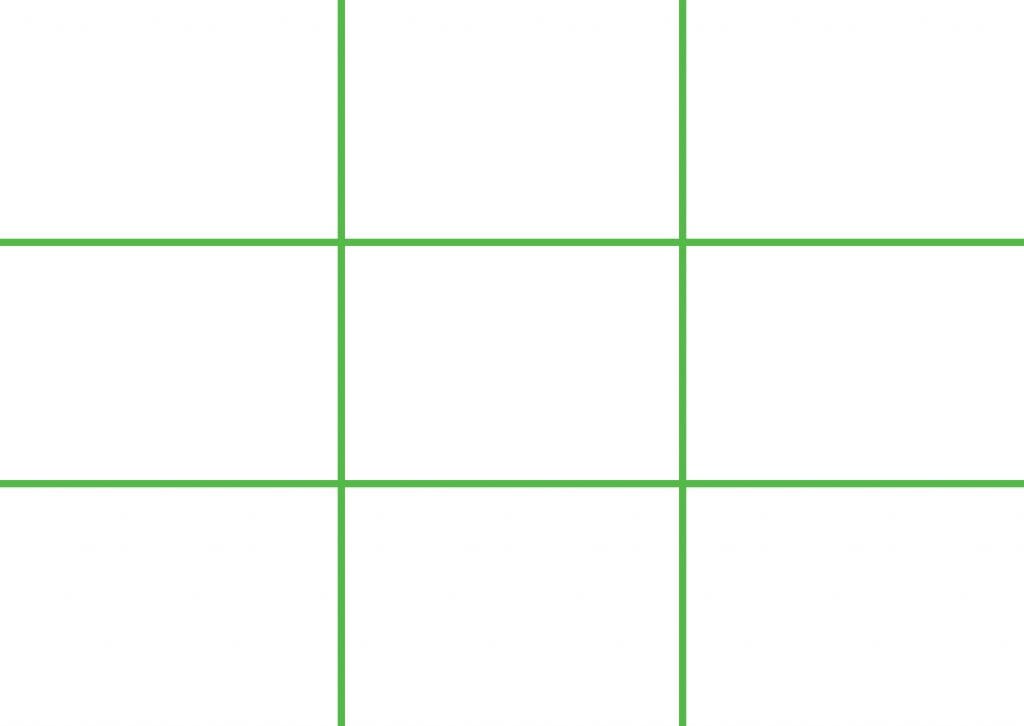
And this includes positioning elements along the lines, as well as at the intersections of the lines (which are known as “power points”).
This helps create balanced compositions, though photos that adhere very strictly to the rule of thirds tend to be slightly less dynamic than photos that adhere to the golden triangle, thanks to the lack of diagonals.
But you’re probably wondering:
Does it make sense to use the rule of thirds? Or the golden triangle?
Honestly, either one works well, and it depends a lot on the scene that you’re photographing. Some scenes lend themselves well to the rule of thirds, such as a seascape shot with clear horizon lines but no real triangular subjects in sight.
And other scenes lend themselves well to the golden triangle, such as mountain scenes that include a lot of triangular shapes, or desert landscape scenes with a lot of interesting lines.
Really, I recommend you keep both these compositional overlays in the back of your mind, and use them as they become relevant. Don’t force your photos into an arrangement that doesn’t work–instead, use the rule of thirds and the golden triangle to guide your compositional process.
And by the way:
The rule of thirds and the golden triangle aren’t mutually exclusive. You can use both guidelines at once:
The rule of thirds to establish horizon lines and position your subject.
And the golden triangle to contain other compositional elements and position diagonal lines.
Tips for Working With the Golden Triangle
Now let’s take a look at some tips and tricks for beautiful golden triangle photography, no matter your favorite photography genre:
Aim to Incorporate Triangles Within Your Scene
The golden triangle overlay is full of triangles, which means that this one might seem like a bit of a no-brainer.
But you must be aware of triangles to use the golden triangle technique.
And it’s easy to miss triangles if you’re not looking for them.
That’s why I recommend you really cement the golden triangle overlay into your mind so that you start to identify triangles without really meaning to.
Then, when you do find a triangle, you instantly have a way of positioning it within the scene for a balanced, beautiful shot.
Place Leading Lines Along Triangle Diagonals
It’s true that the golden triangle is all about, well, triangles.
But it’s also about the edges of triangles, which form diagonal lines across the scene.
By positioning key compositional elements along these lines, you can create a sense of movement because the eye will go along the lines straight toward the middle of the frame, where (ideally!) you include your main subjects and other points of interest.
For instance, if you’re photographing a person on a mountain, you can use the edges of the mountain to draw the eye, starting at the corner of the scene…
…all the way to the person standing in the middle of the shot.
But where, precisely, should you position this person?
One great option is to use the triangle intersection points, as I discuss in the next tip:
Position Your Subject at Intersection Points
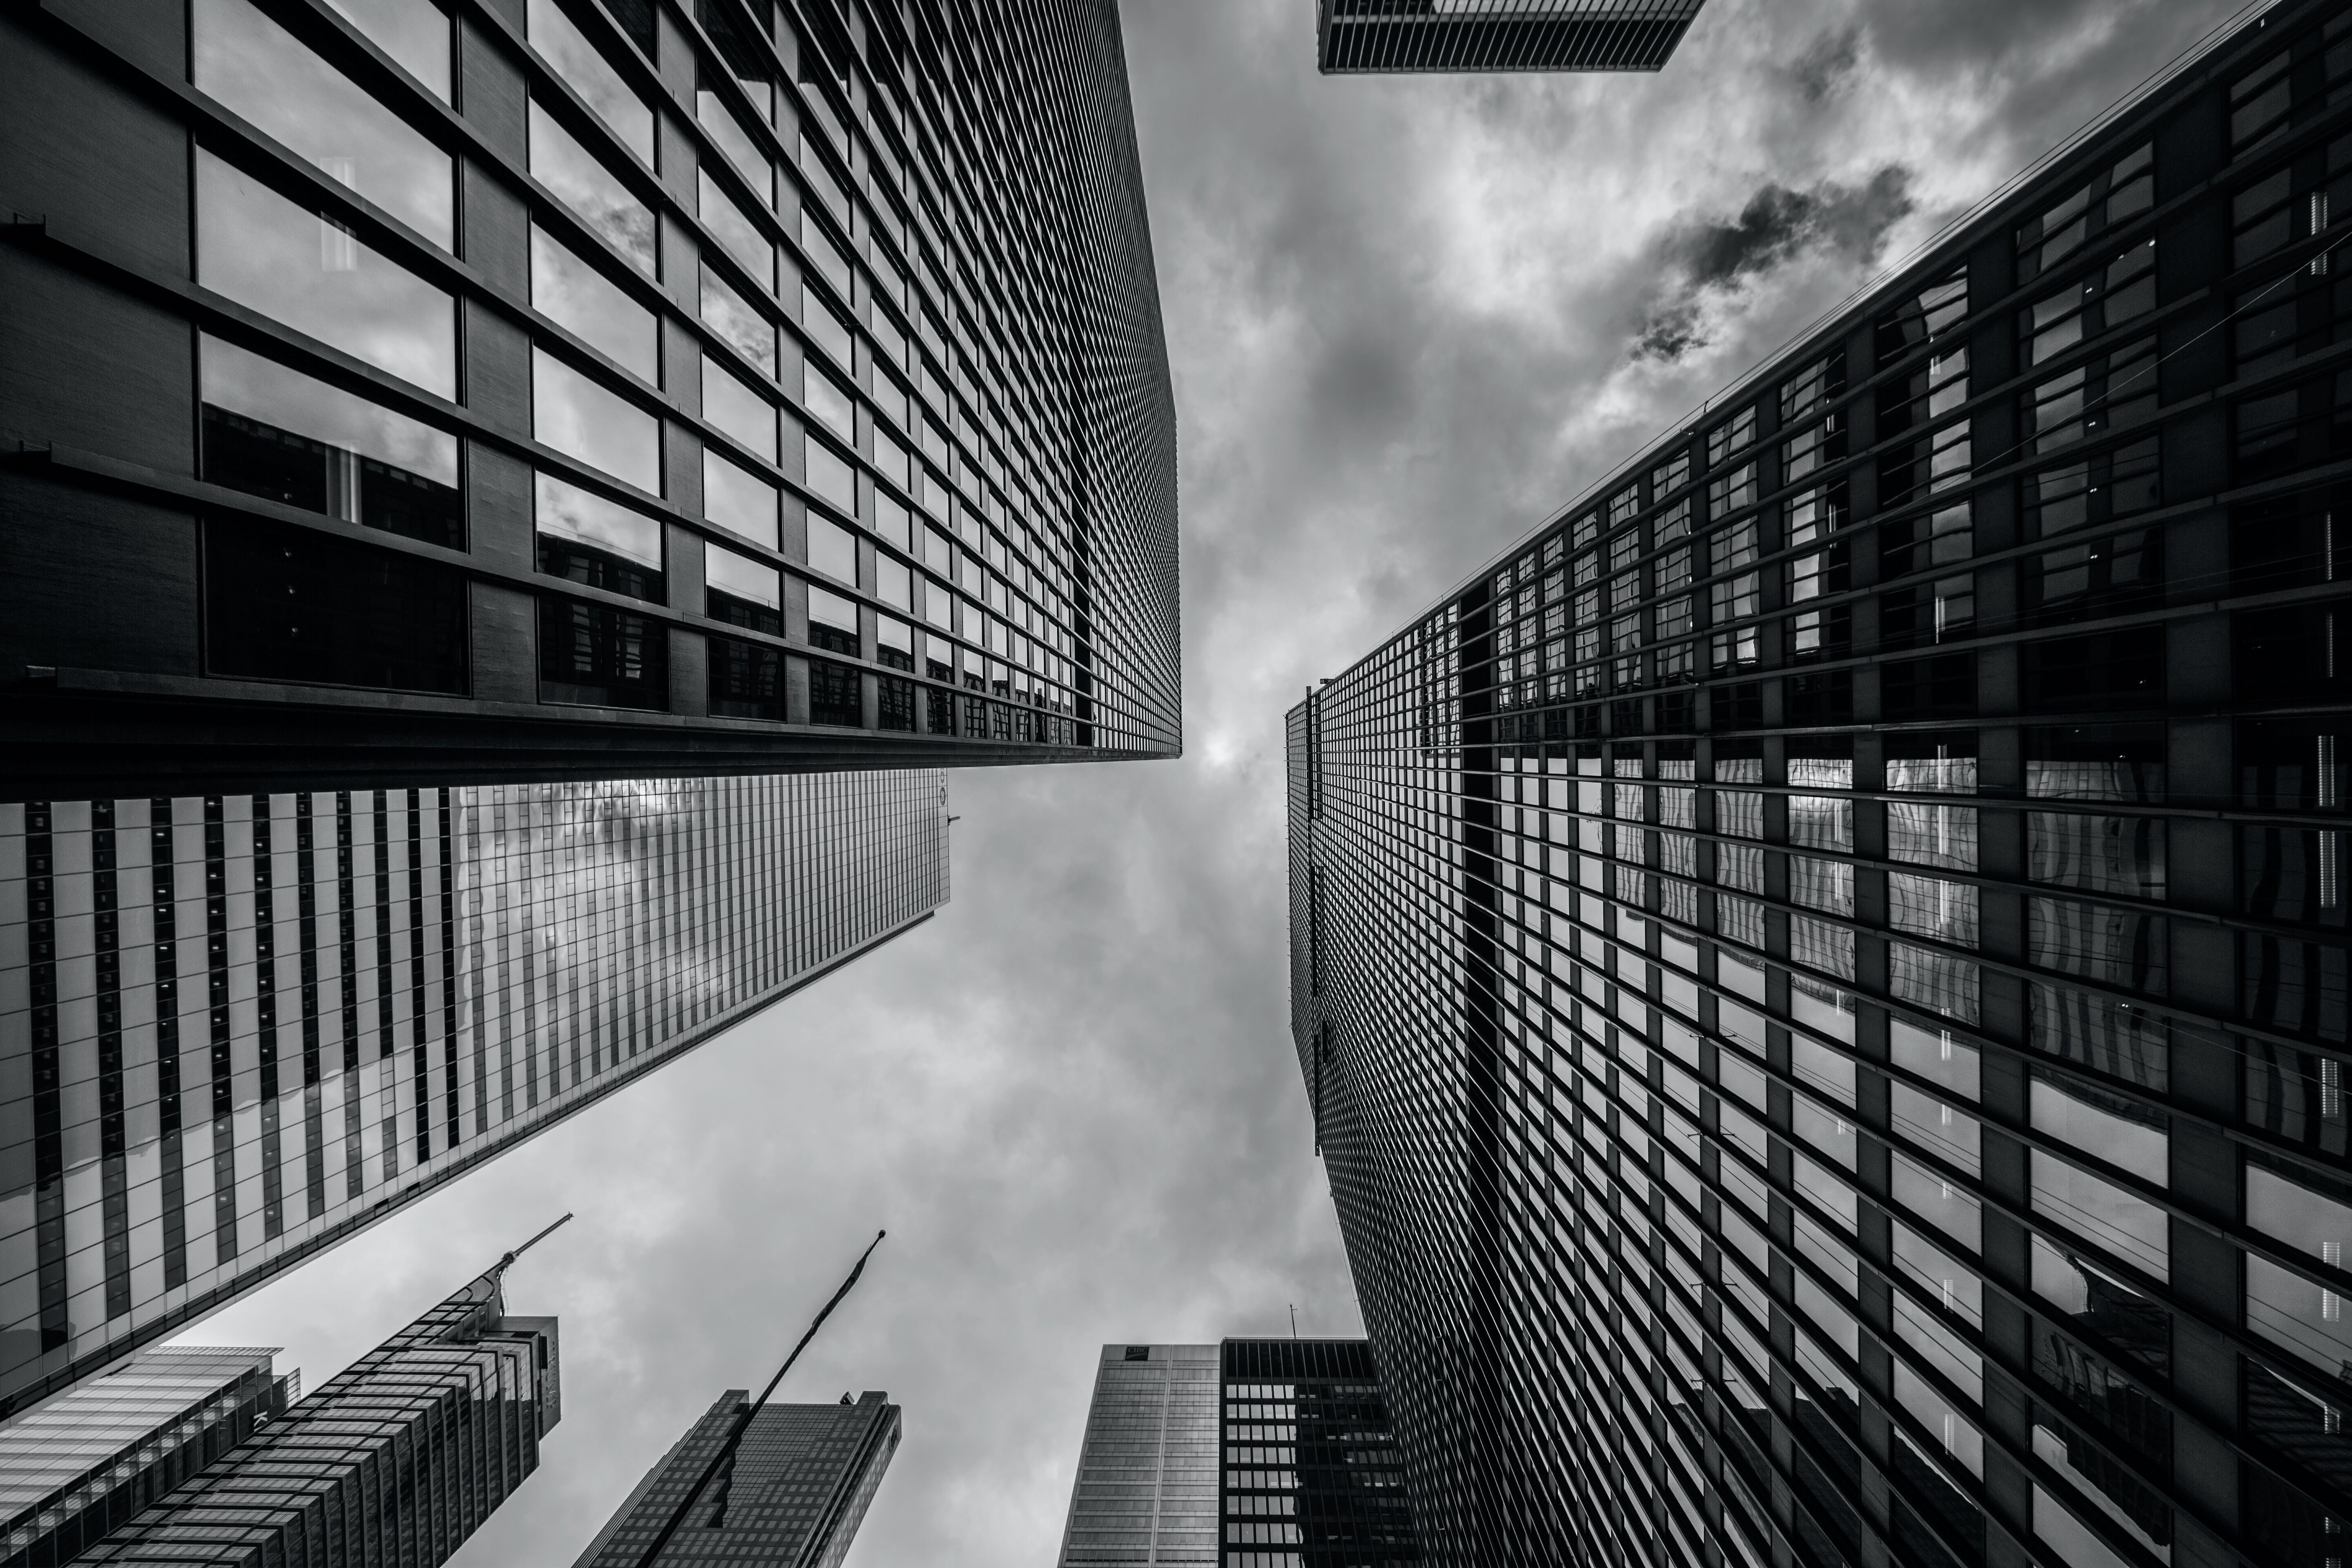
By intersection points, I’m referring to the points at which the diagonals intersect with one another (at the two bridge peaks in the photo below):
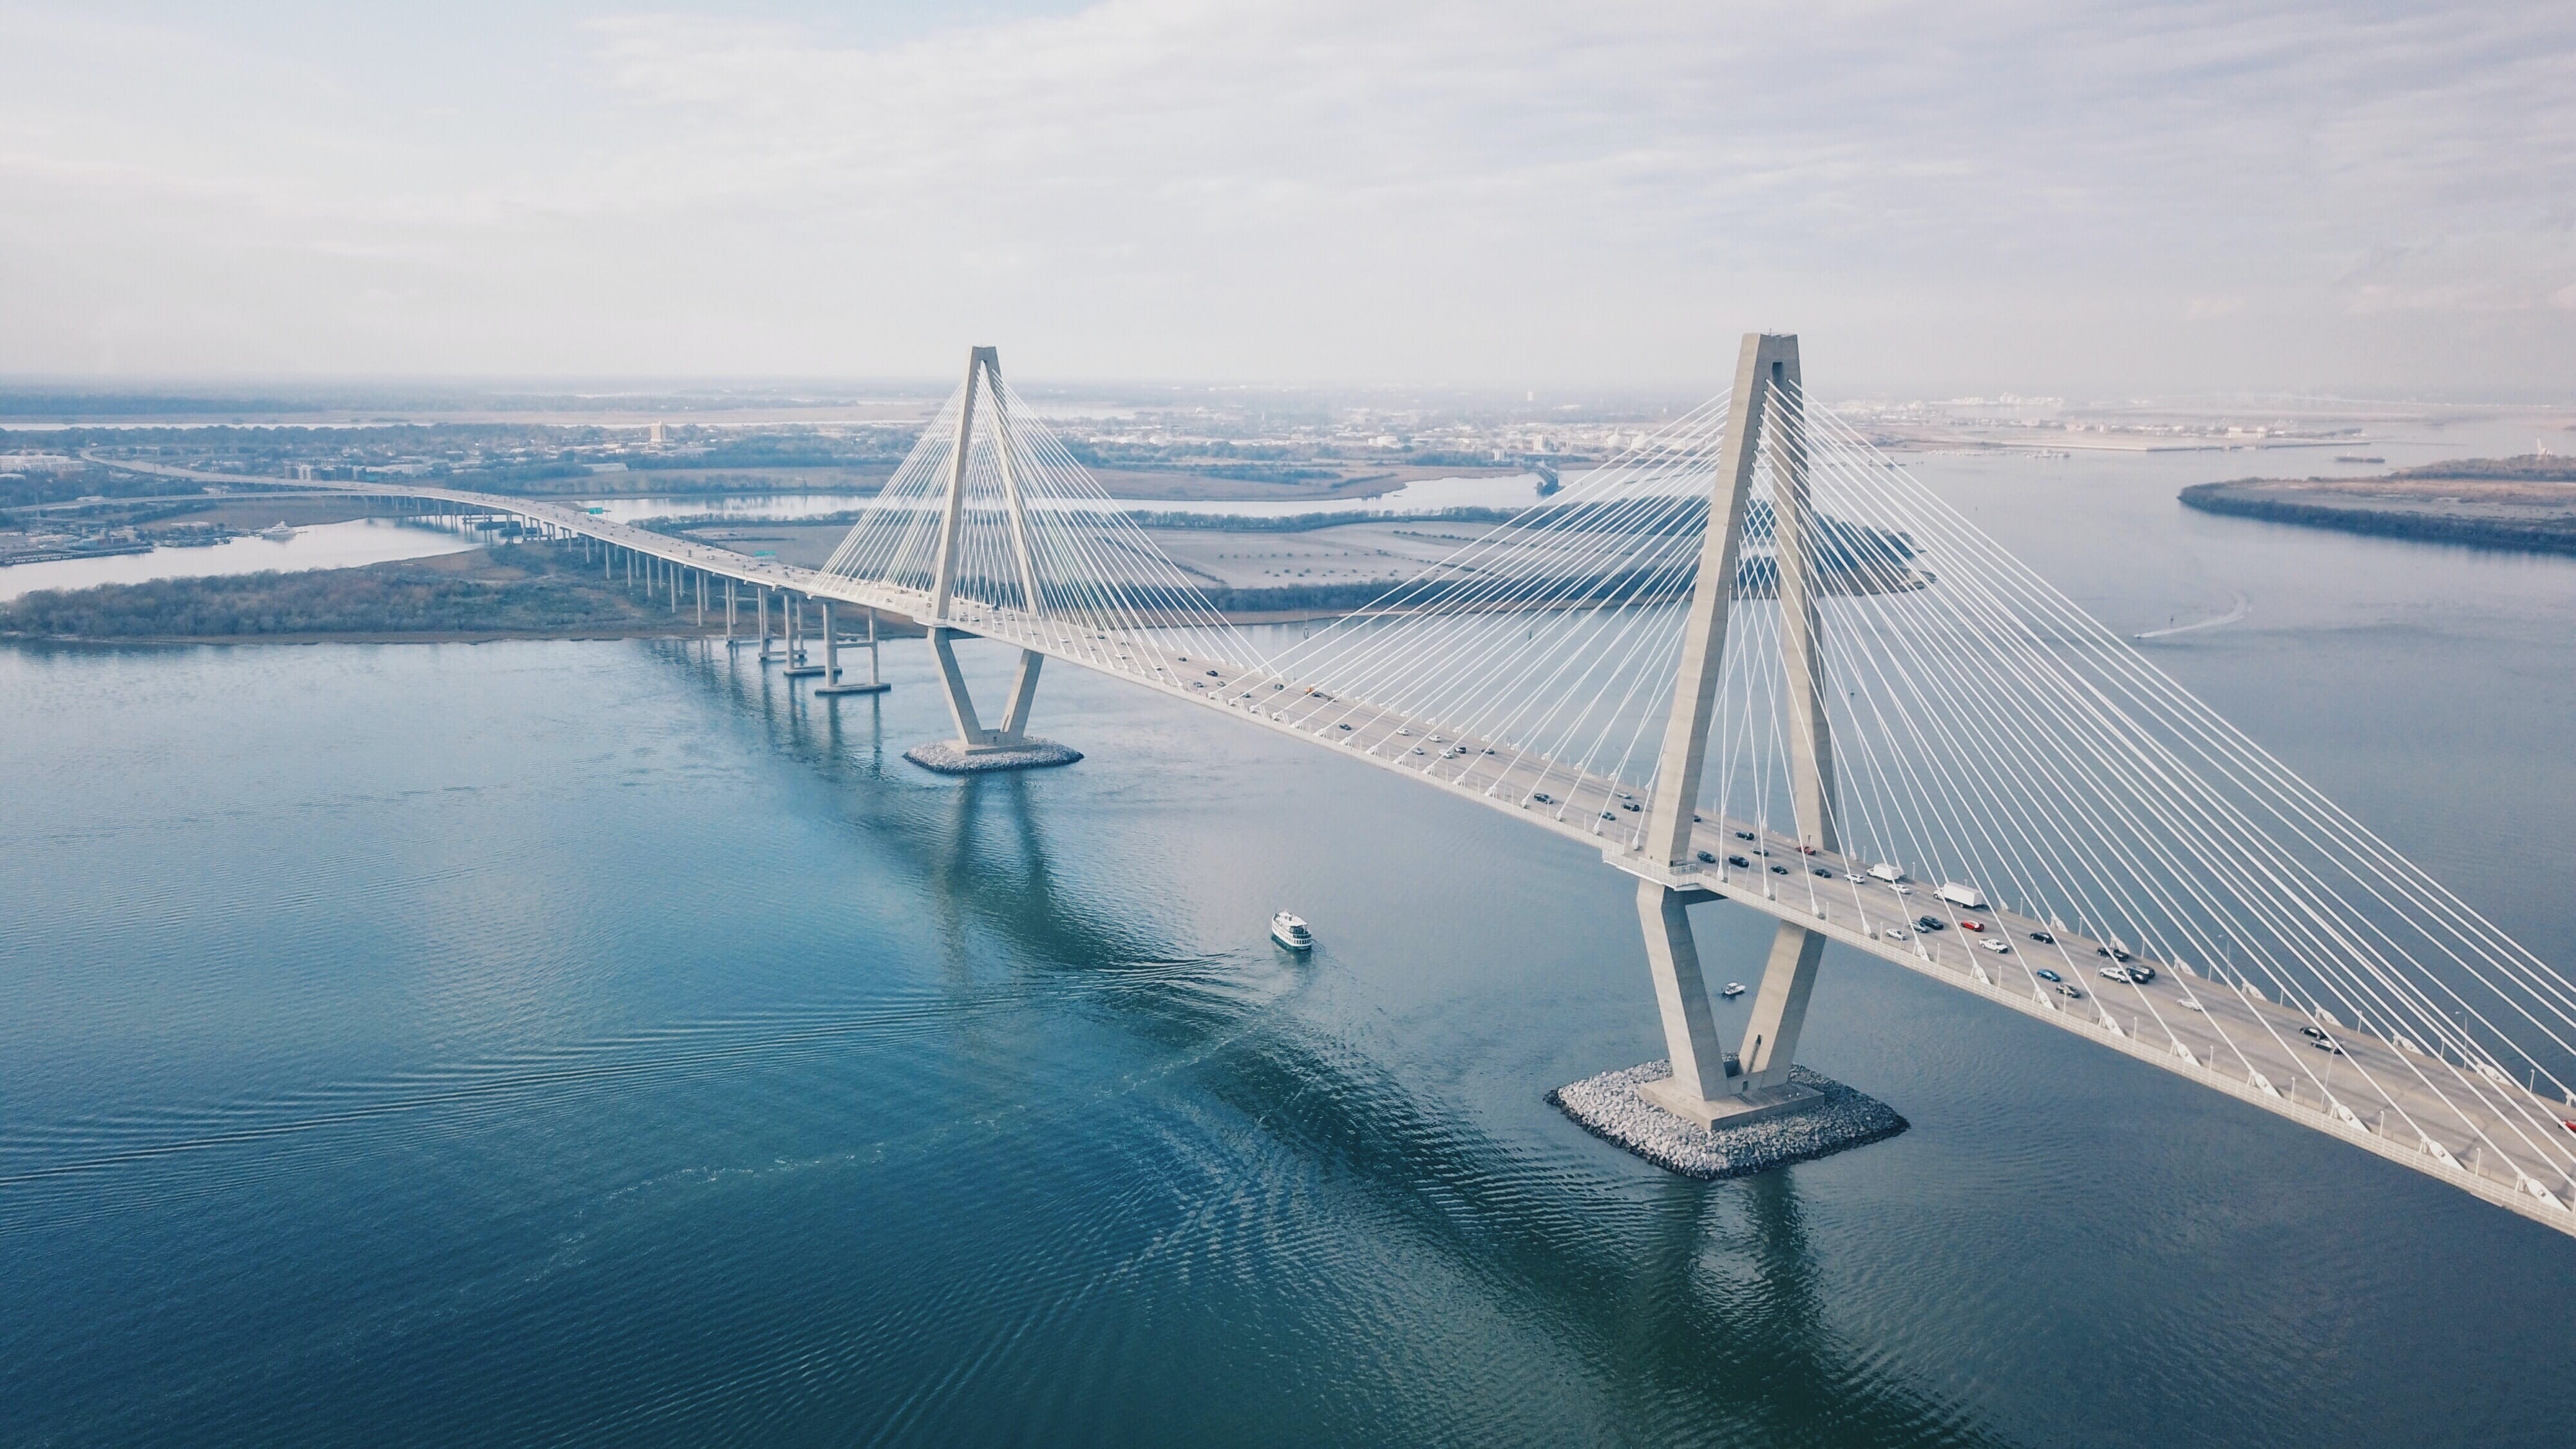
These are compelling areas of a composition because they easily draw the eye–especially if you’ve used the advice from the previous tip and included lines along your image’s diagonals.
Now, you can position your main subject at one of the intersection points, while also including a line or two moving along the diagonals toward the subject.
Or you can use both intersection points to include two points of interest (along with the diagonal lines, if you’re so inclined!).
Note that the golden triangle intersection points are almost identical to the rule of thirds power points, and these are called “power points” for a reason:
They help your subject stand out!
Always be aware of the intersection points within a potential golden triangle scene. And, when possible, use them to place your main subject.
Position Your Subject Within a Triangle
I’ve been talking lots about using the edges of triangles to create a dynamic composition.
But there’s another way you can use the golden triangle:
You can position compositional elements within a triangle so that they’re carefully contained by the triangle and don’t bleed over into other portions of the image.
For instance, you could let the sky occupy the entire top triangle.
Or you could shoot a still life with a tablecloth that’s revealed in the bottom triangle.
Also note that you can fit multiple compositional elements into a triangle; you don’t have to stick to a single item with a triangular shape.
Flip the Golden Triangle Around
Here’s your final golden triangle photography tip:
Rotate the golden triangle overlay.
Because while you can definitely capture beautiful shots using a single golden triangle overlay, by changing the orientation you can change the way you think about composition, and you can end up with some fresh options.
For instance, you can flip the golden triangle overlay completely so that the lines are running in opposite directions.
Or you can turn it on its side, so you get a portrait orientation golden triangle (which can also make for some great photos!).
Golden Triangle Photography: The Next Steps
The golden triangle isn’t the most common compositional guideline out there.
But it’s still very, very powerful.
And you can actually use the golden triangle for especially unique images because it’s not well-known by many photographers.
So remember the golden triangle overlay!
What is the golden triangle?
The golden triangle is a compositional technique that urges you to position your key photographic elements along imaginary triangles in your scene. It comes with a helpful overlay, which you can access in Lightroom (I explain this further in the above article!). You can use the golden triangle to create balanced, dynamic, sophisticated compositions.
Is the golden triangle better than the rule of thirds?
That depends on the scene you’re photographing. Both the golden triangle and the rule of thirds are helpful in different ways; the rule of thirds makes for balanced, off-center compositions, whereas the golden triangle promotes more flowing, dynamic compositions. Some scenes will lend themselves to golden triangle photography, whereas others will do better when paired with the rule of thirds.
Is the golden triangle a photography rule?
Not really. The golden triangle, like the golden ratio and the rule of thirds, is a photography guideline. It’s useful for creating balanced compositions, but there are many ways of creating balance, and sometimes the goal is to create tension by avoiding balance. So don’t think of the golden triangle as a rule you must follow; instead, think of it as a helpful tool in your photographic toolbox.
Why should you use the golden triangle?
The golden triangle is great because it promotes compositions that are balanced, but that also have a lot of movement (also referred to as dynamism). This forces the viewer to engage with the photo, and results in a more pleasing experience overall.
You don’t have to use the golden triangle all the time, and there will be instances where it’s best to work with another composition technique entirely (such as negative space, when aiming for minimalistic compositions). But the golden triangle is a good guideline to keep in mind!