Adobe Lightroom is a great tool for photo editing, and many of its features help you work quickly. One such feature is the preset, a way to save image adjustments and apply them to other photos.
But how can you make your own presets while editing? Adobe actually makes it pretty easy. In this simple, step-by-step guide, we share the entire process. By the time you’re done reading, you’ll know how to create presets in Lightroom like a pro.

How to Create Presets:
Why Should You Make Presets?
Presets are saved image adjustments. You can apply these saved settings to any image just by clicking your preset of choice.
Presets in Lightroom are amazingly helpful. They’re so helpful, in fact, that if you fail to make presets, then you’re doing yourself a disservice. You can instantly apply pre-made edits to a whole batch of images (in a process known as batch editing), and this will speed up your workflow significantly.
Presets also keep your photography style and aesthetic consistent. Since your own presets tend to be aligned with your specific equipment and way of shooting, they’ll ensure you get the same custom look day after day.
Plus, some photographers do quite well selling the presets they’ve created! This offers a bit of extra encouragement to save your edits as presets.
One thing to remember, however: Before you put a preset out there for sale, test it out on a few different types of photographs to make sure the edits work well across the board. Small tweaks will always be necessary, but you shouldn’t need to do too much editing from shot to shot.
Related Posts
How to Create Presets in Lightroom Classic

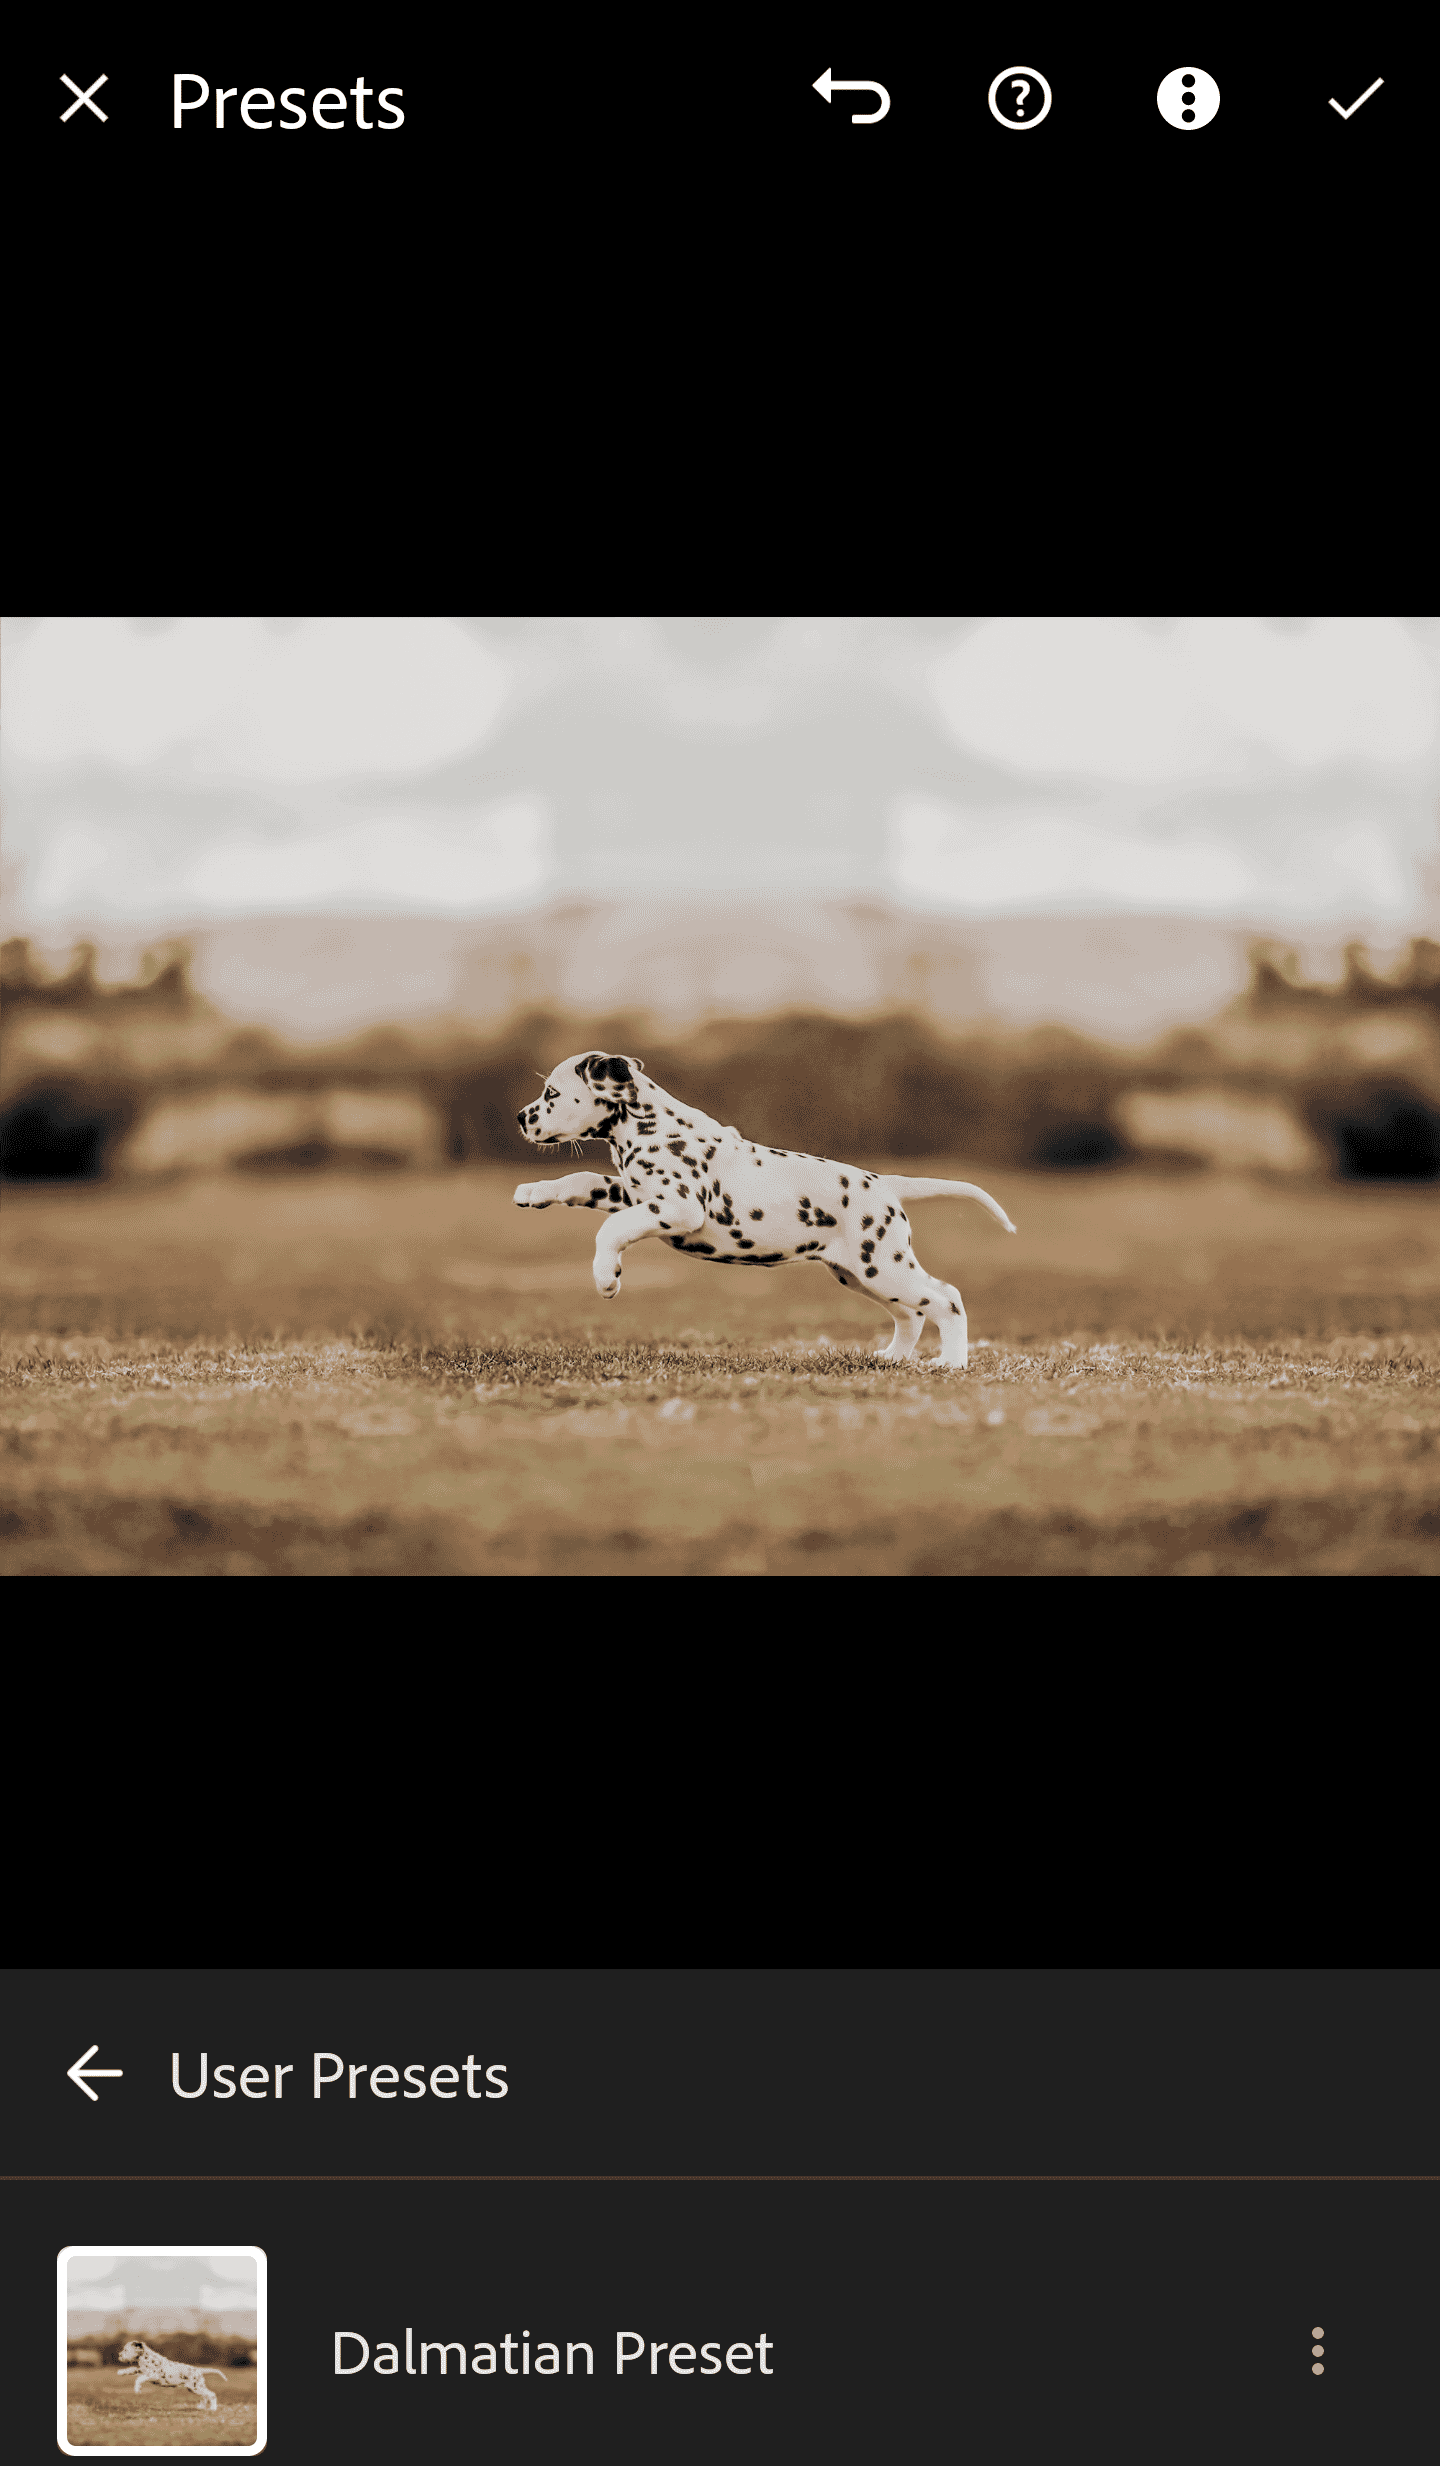
In this section, we’re going to use this puppy photo to demonstrate preset creation in Lightroom Classic. First, we’ll make a few adjustments. Then we’ll save those adjustments as a preset.
Step 1: Import the Image and Edit as Needed
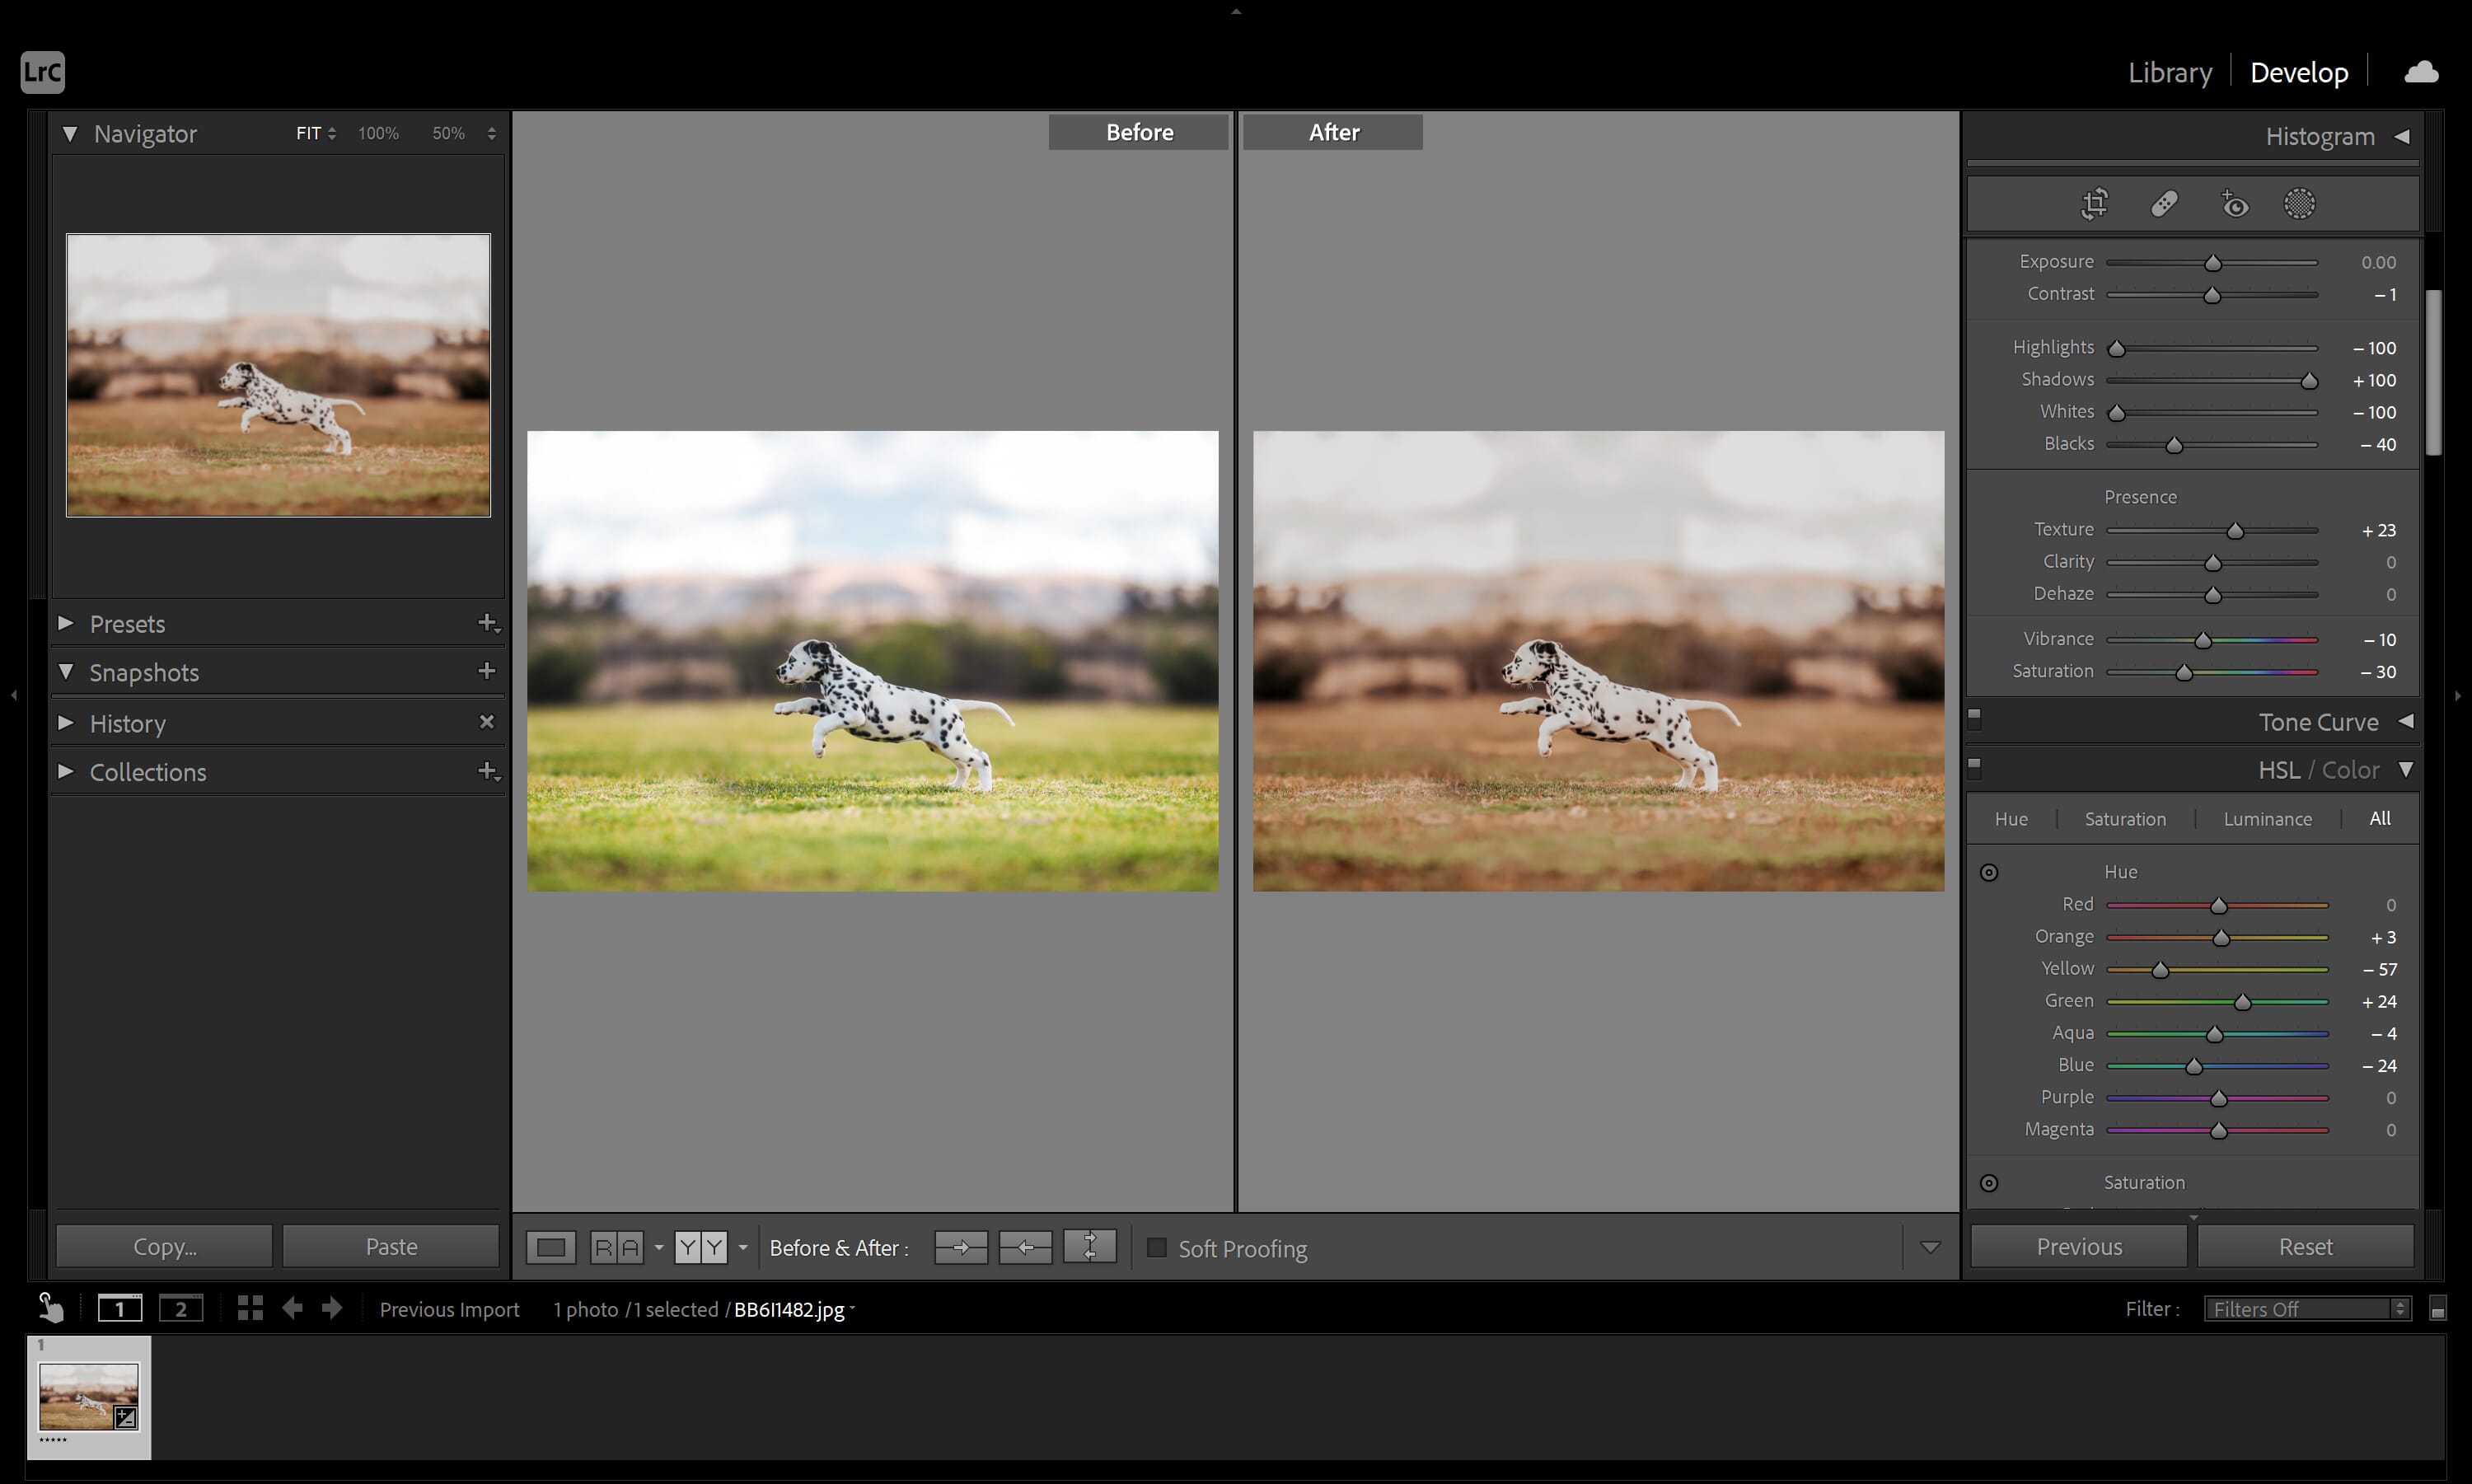
The first step is to import a photo. Then jump over to the Develop module (located in the upper right-hand corner of your screen).
Go ahead and play with the sliders until you’ve achieved an edit you like.
Step 2: Select the “Create Preset” Button
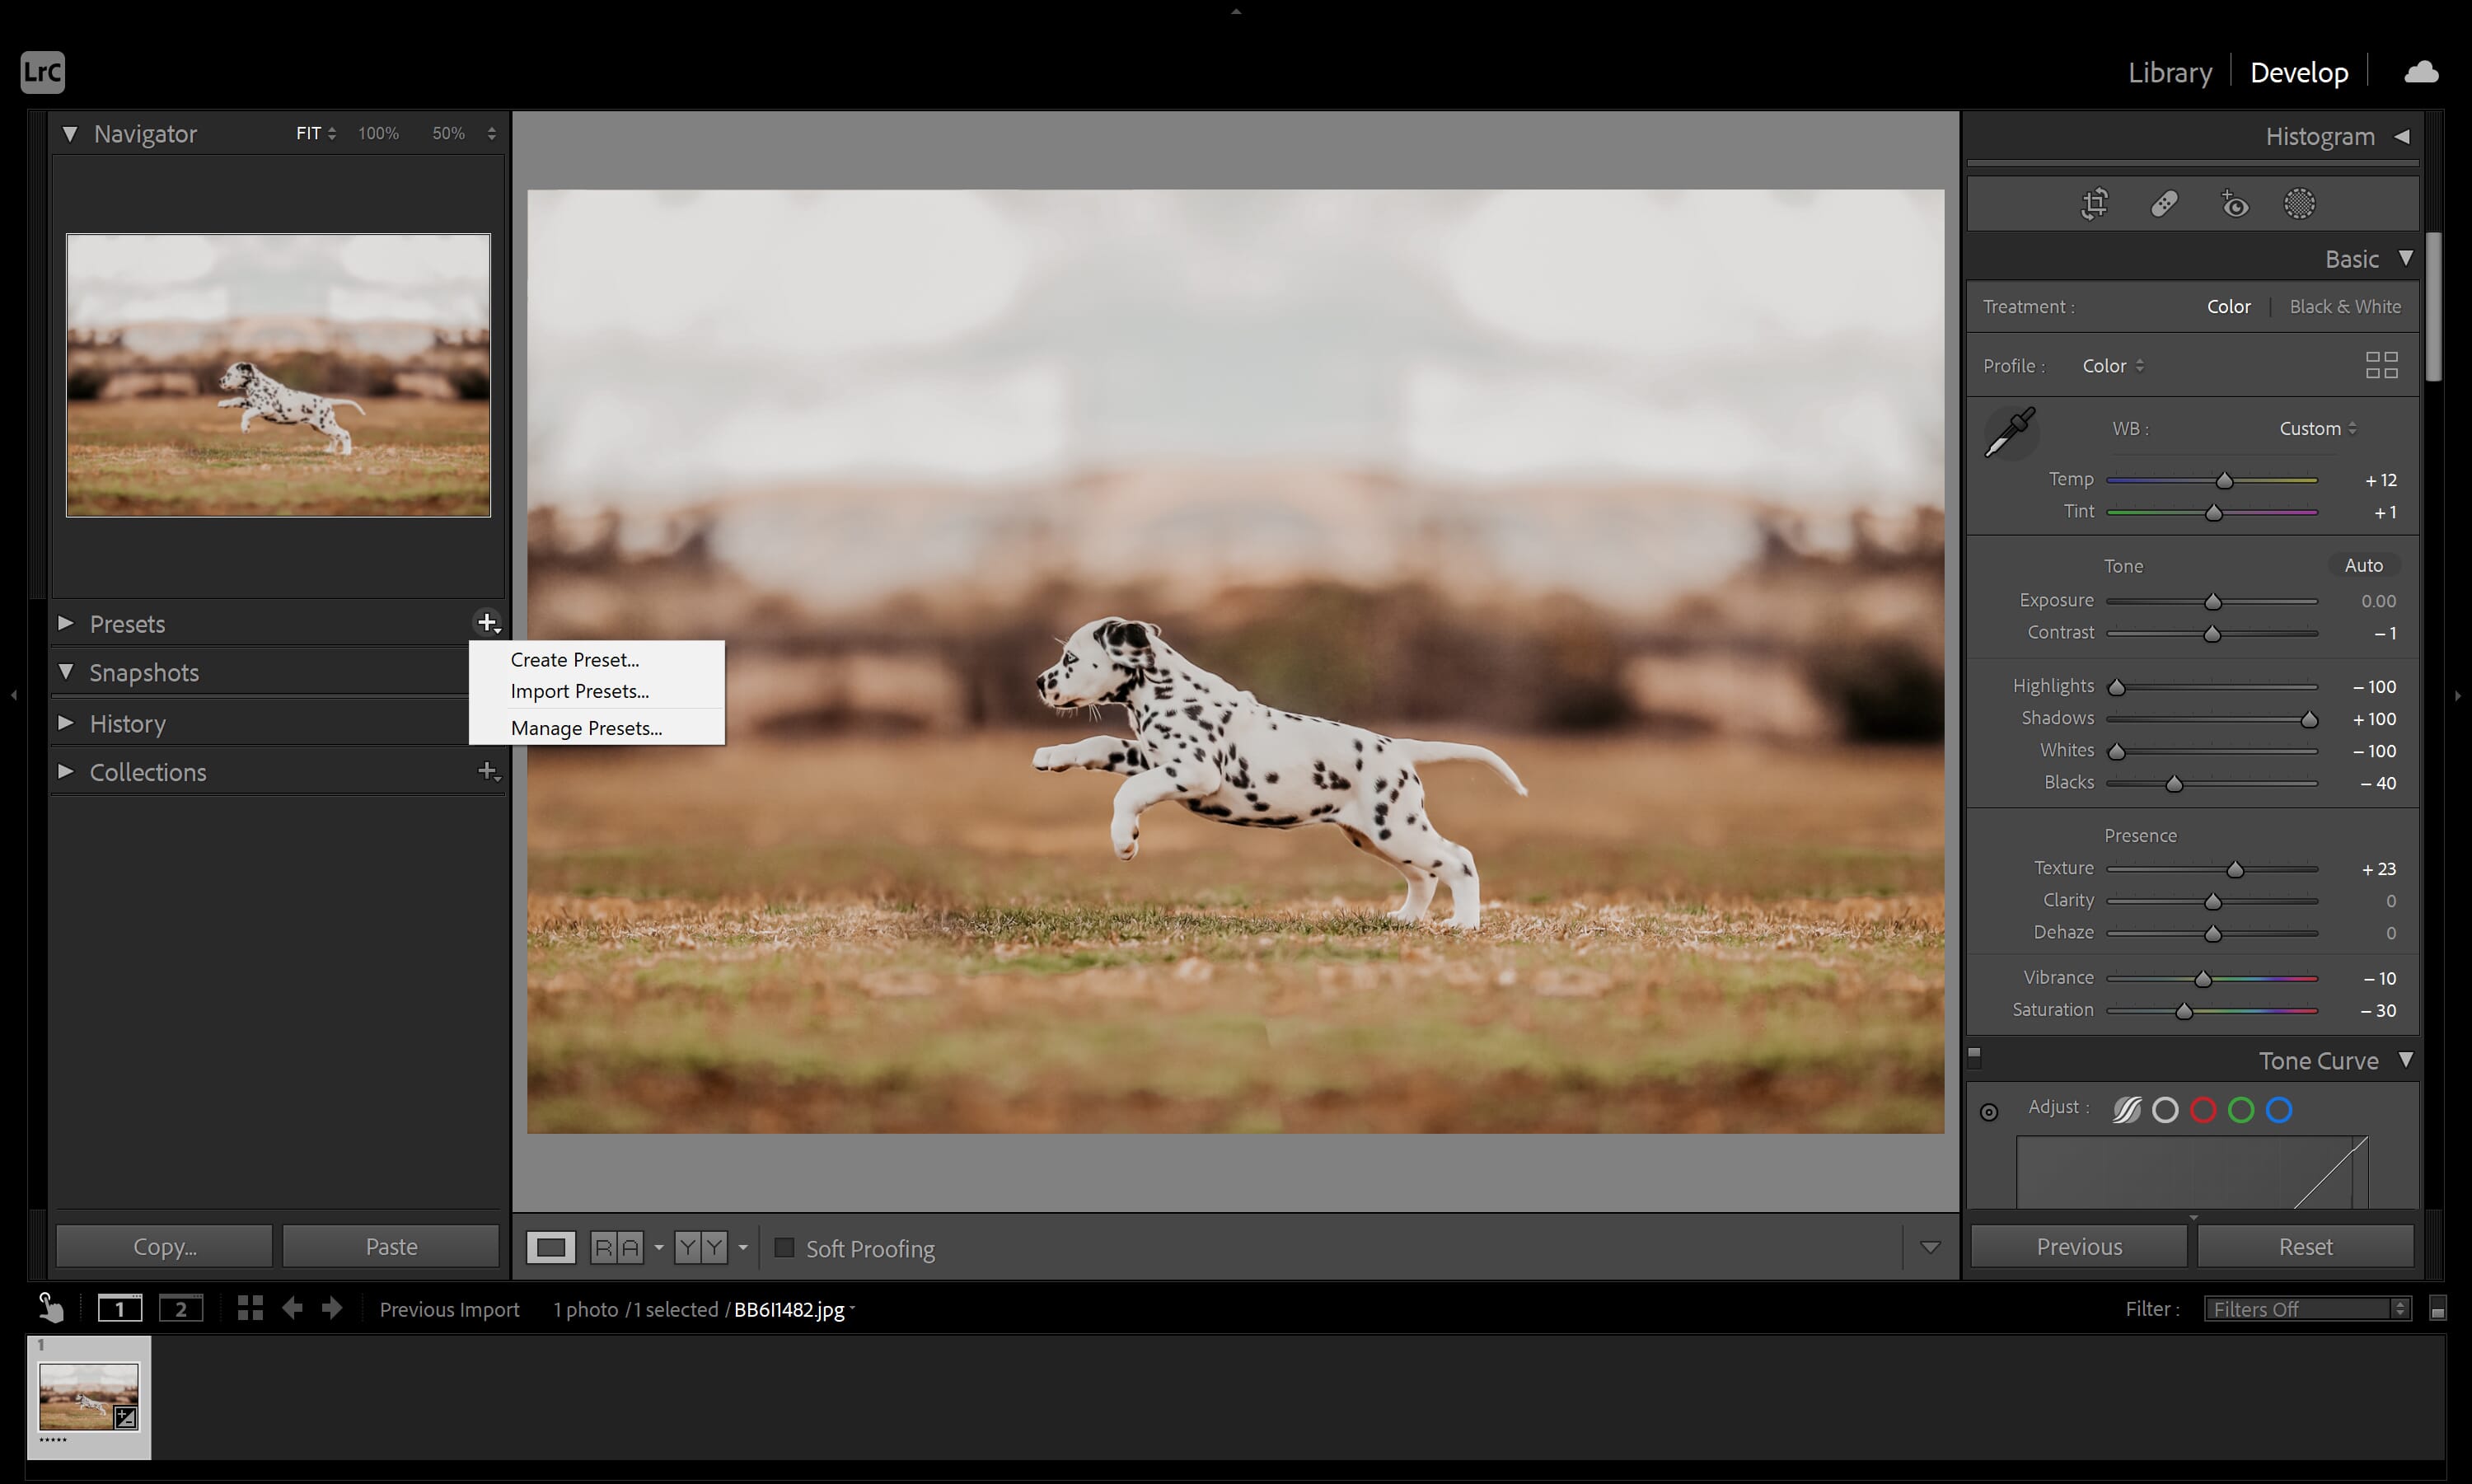
Find the preset section on the left-hand side of your screen. Click the little Plus (+) icon, which will pull up a menu with three options: “Create Preset,” “Import Presets,” and “Manage Presets.”
We need to click “Create Preset.” (If you’ve purchased or downloaded presets, you would use the “Import” option. If you want to organize your presets, you would use the “Manage” option.)
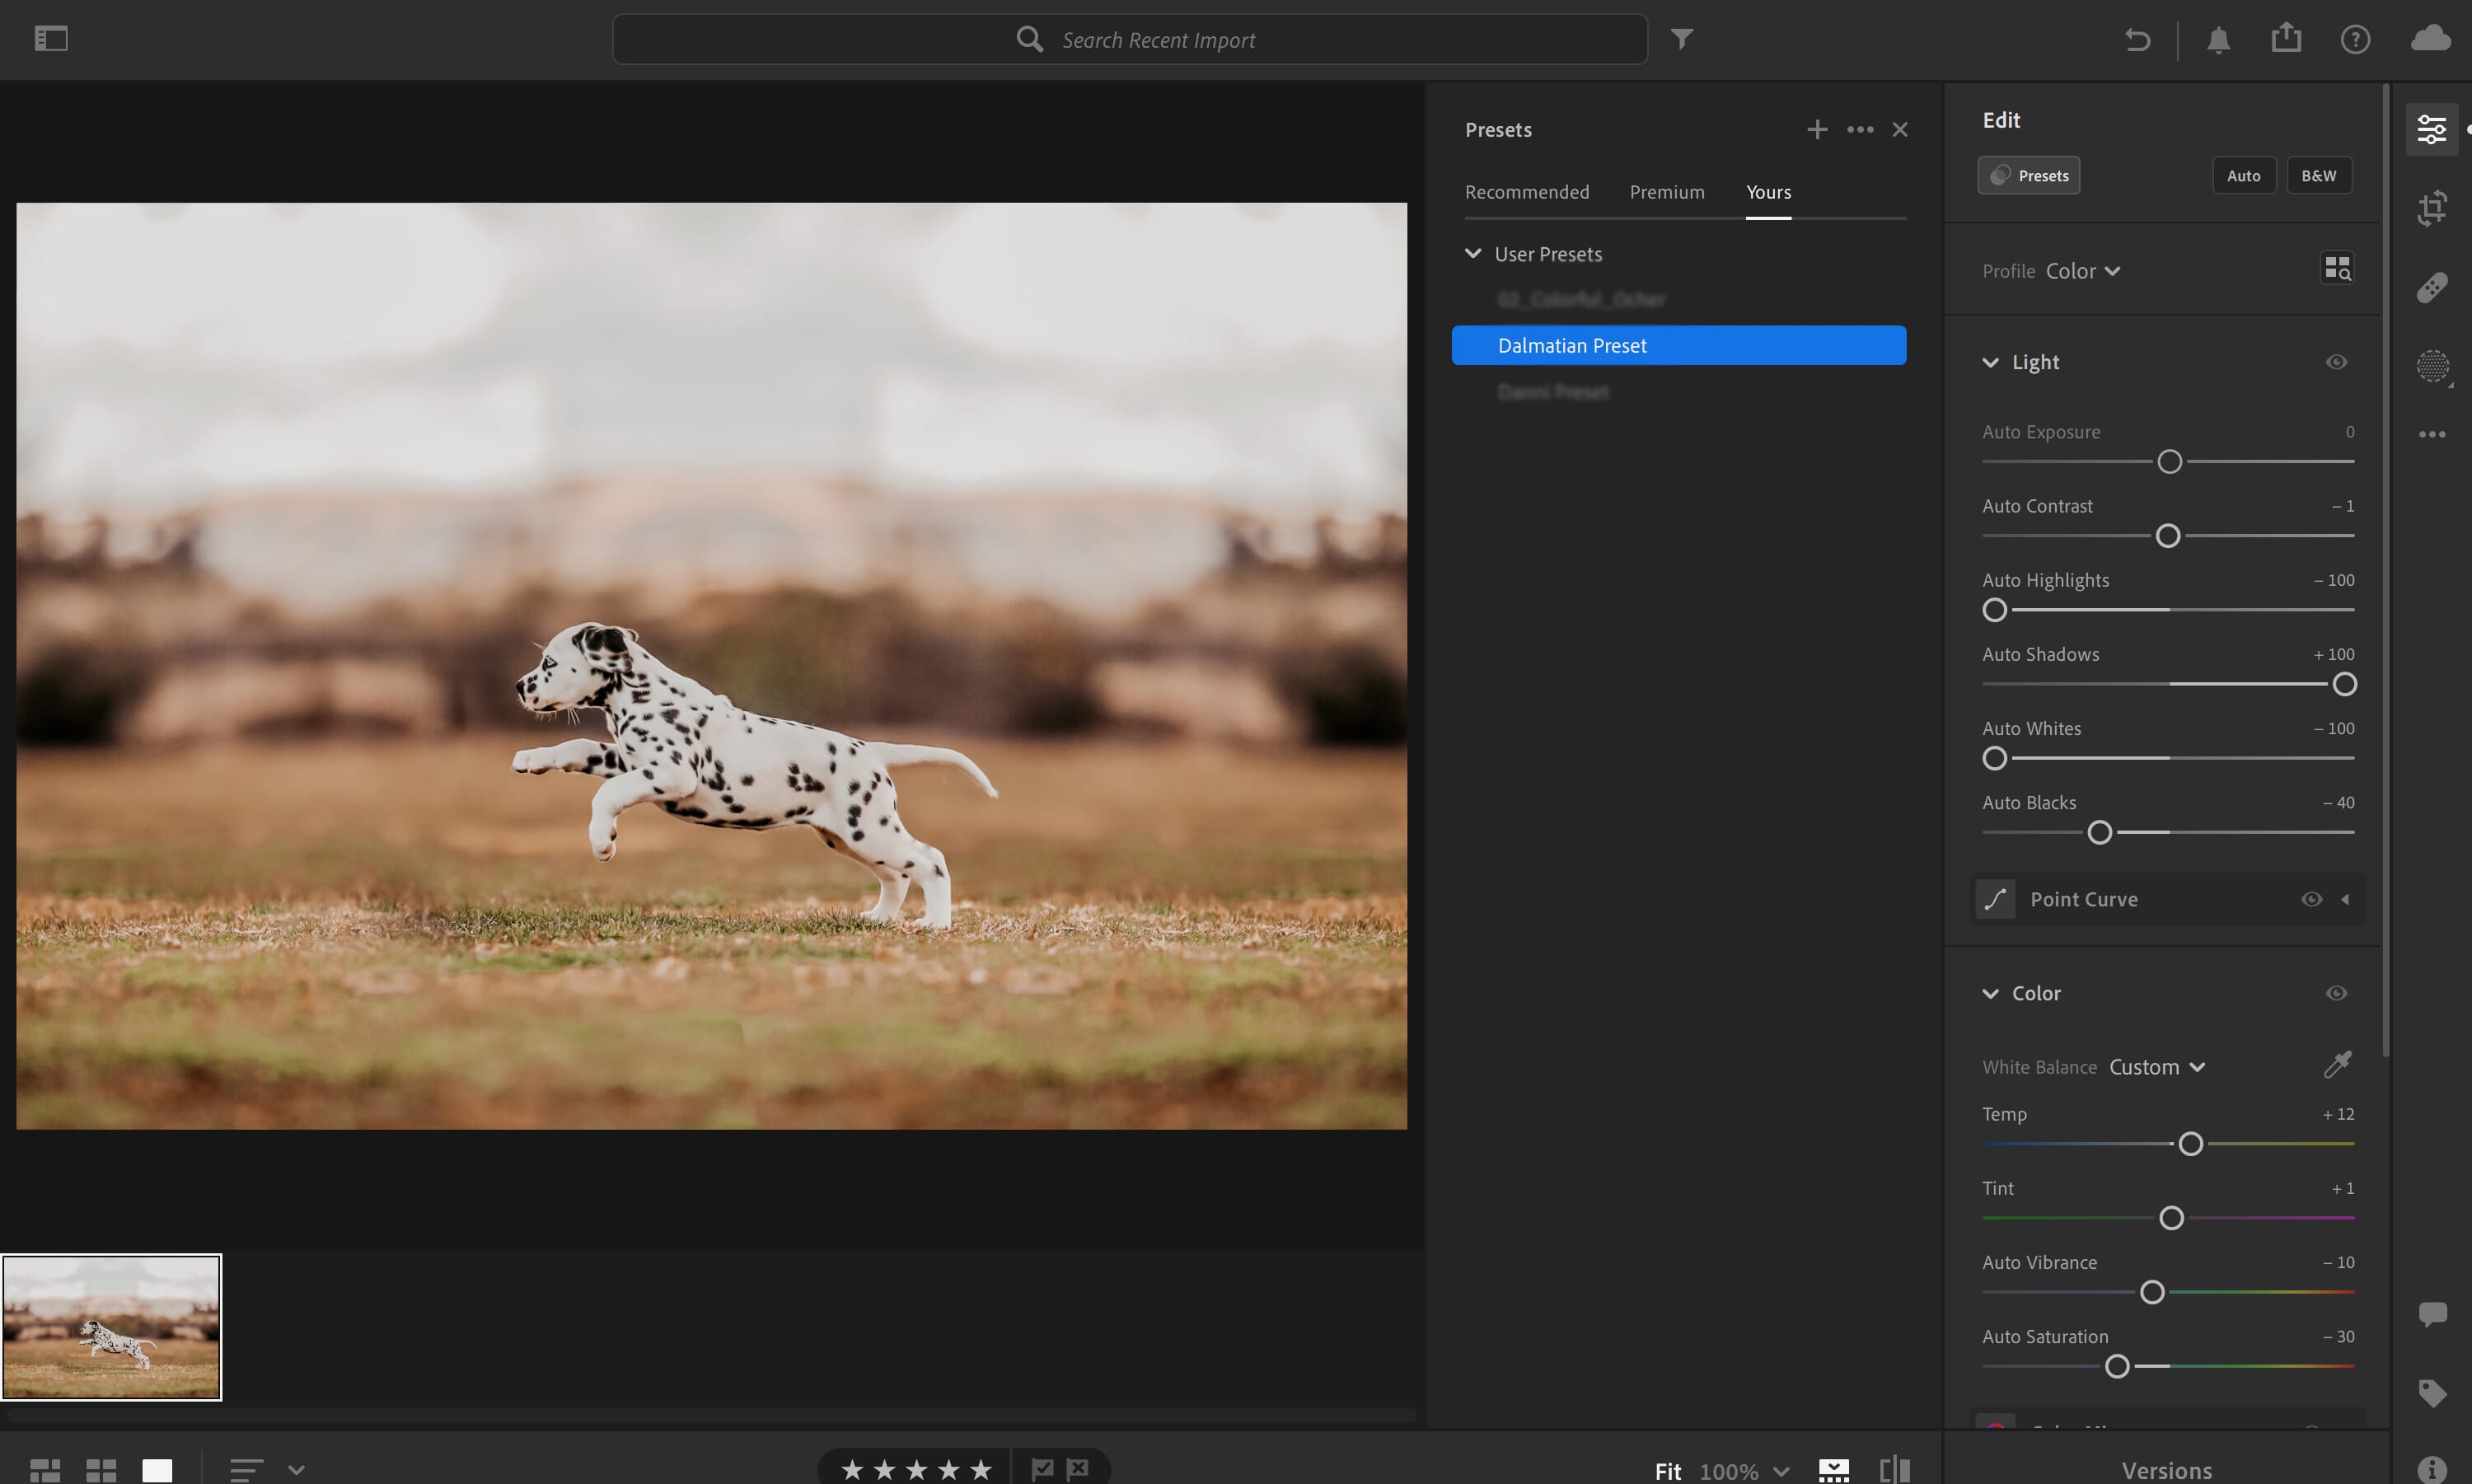
Step 3: Select Your Saved Edits in the Preset Settings Window
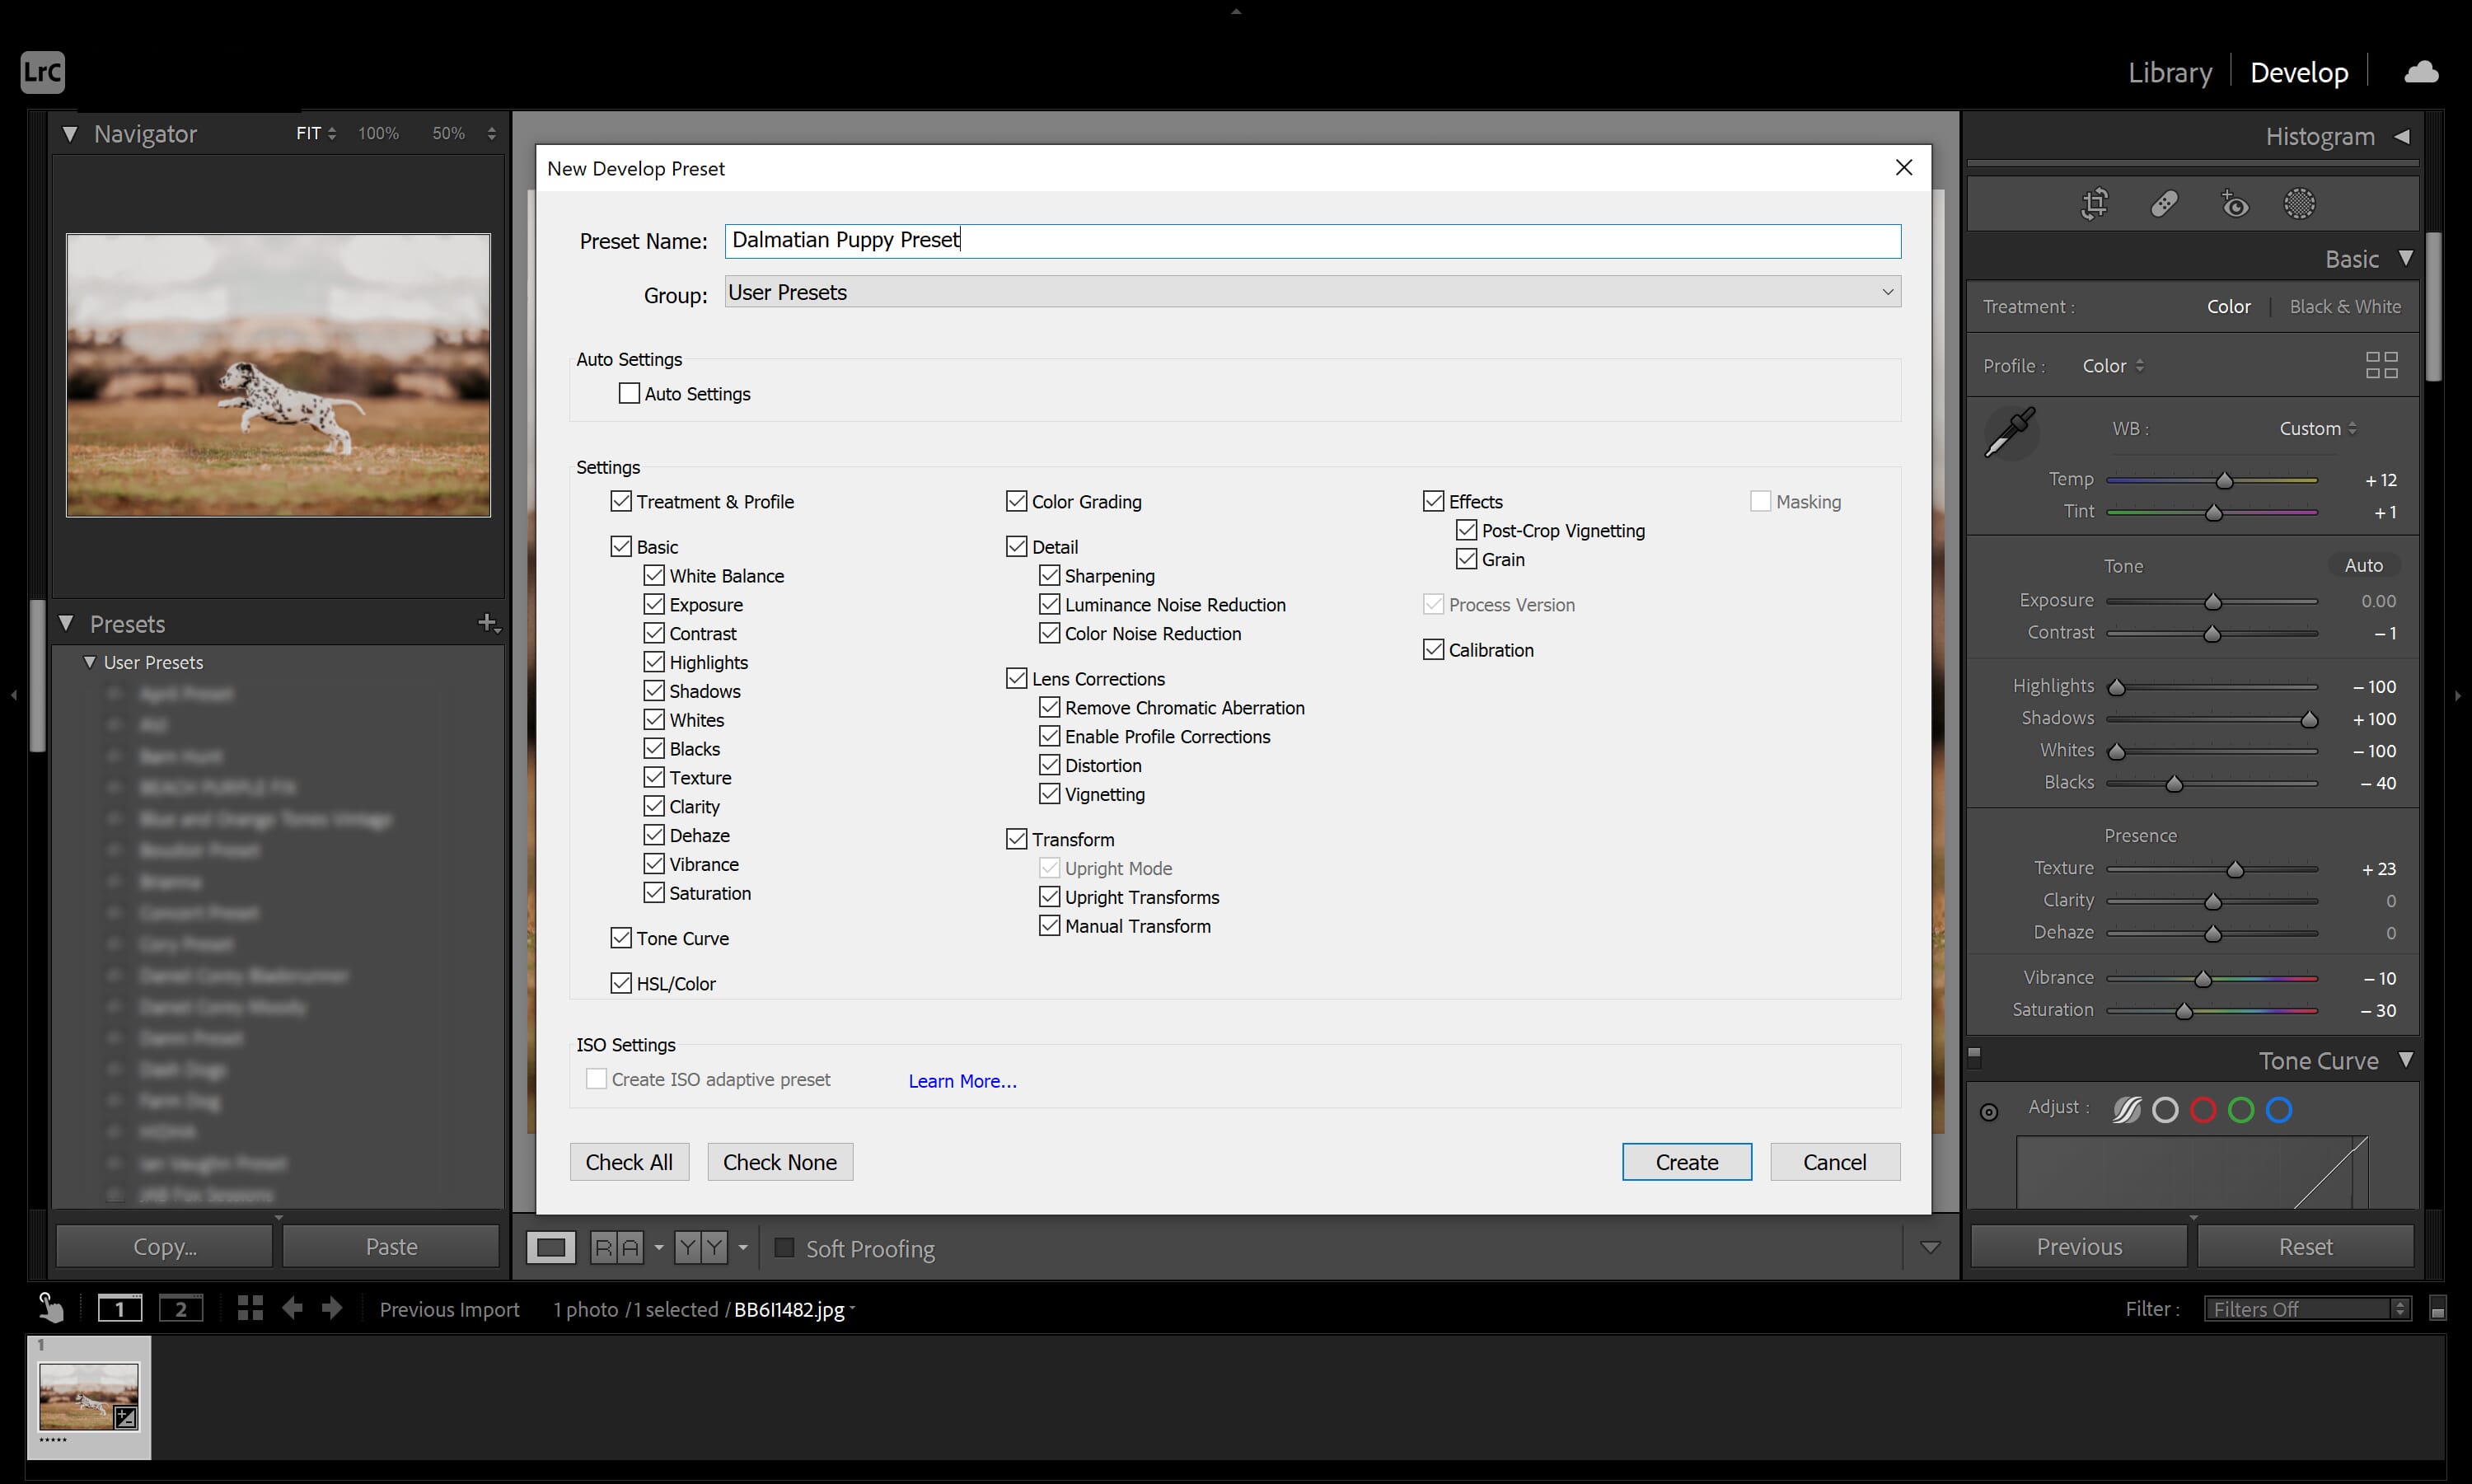
A preset window will appear that asks which settings you want to save. Check all that apply! Sometimes it’s best to save only color or tonal adjustments; other times, you may want to save every adjustment. It’s really up to you.
Name your preset something recognizable. You can organize presets by grouping them into different categories, though I usually just put mine into the User Presets category and call it a day.
Step 4: Save Your Preset
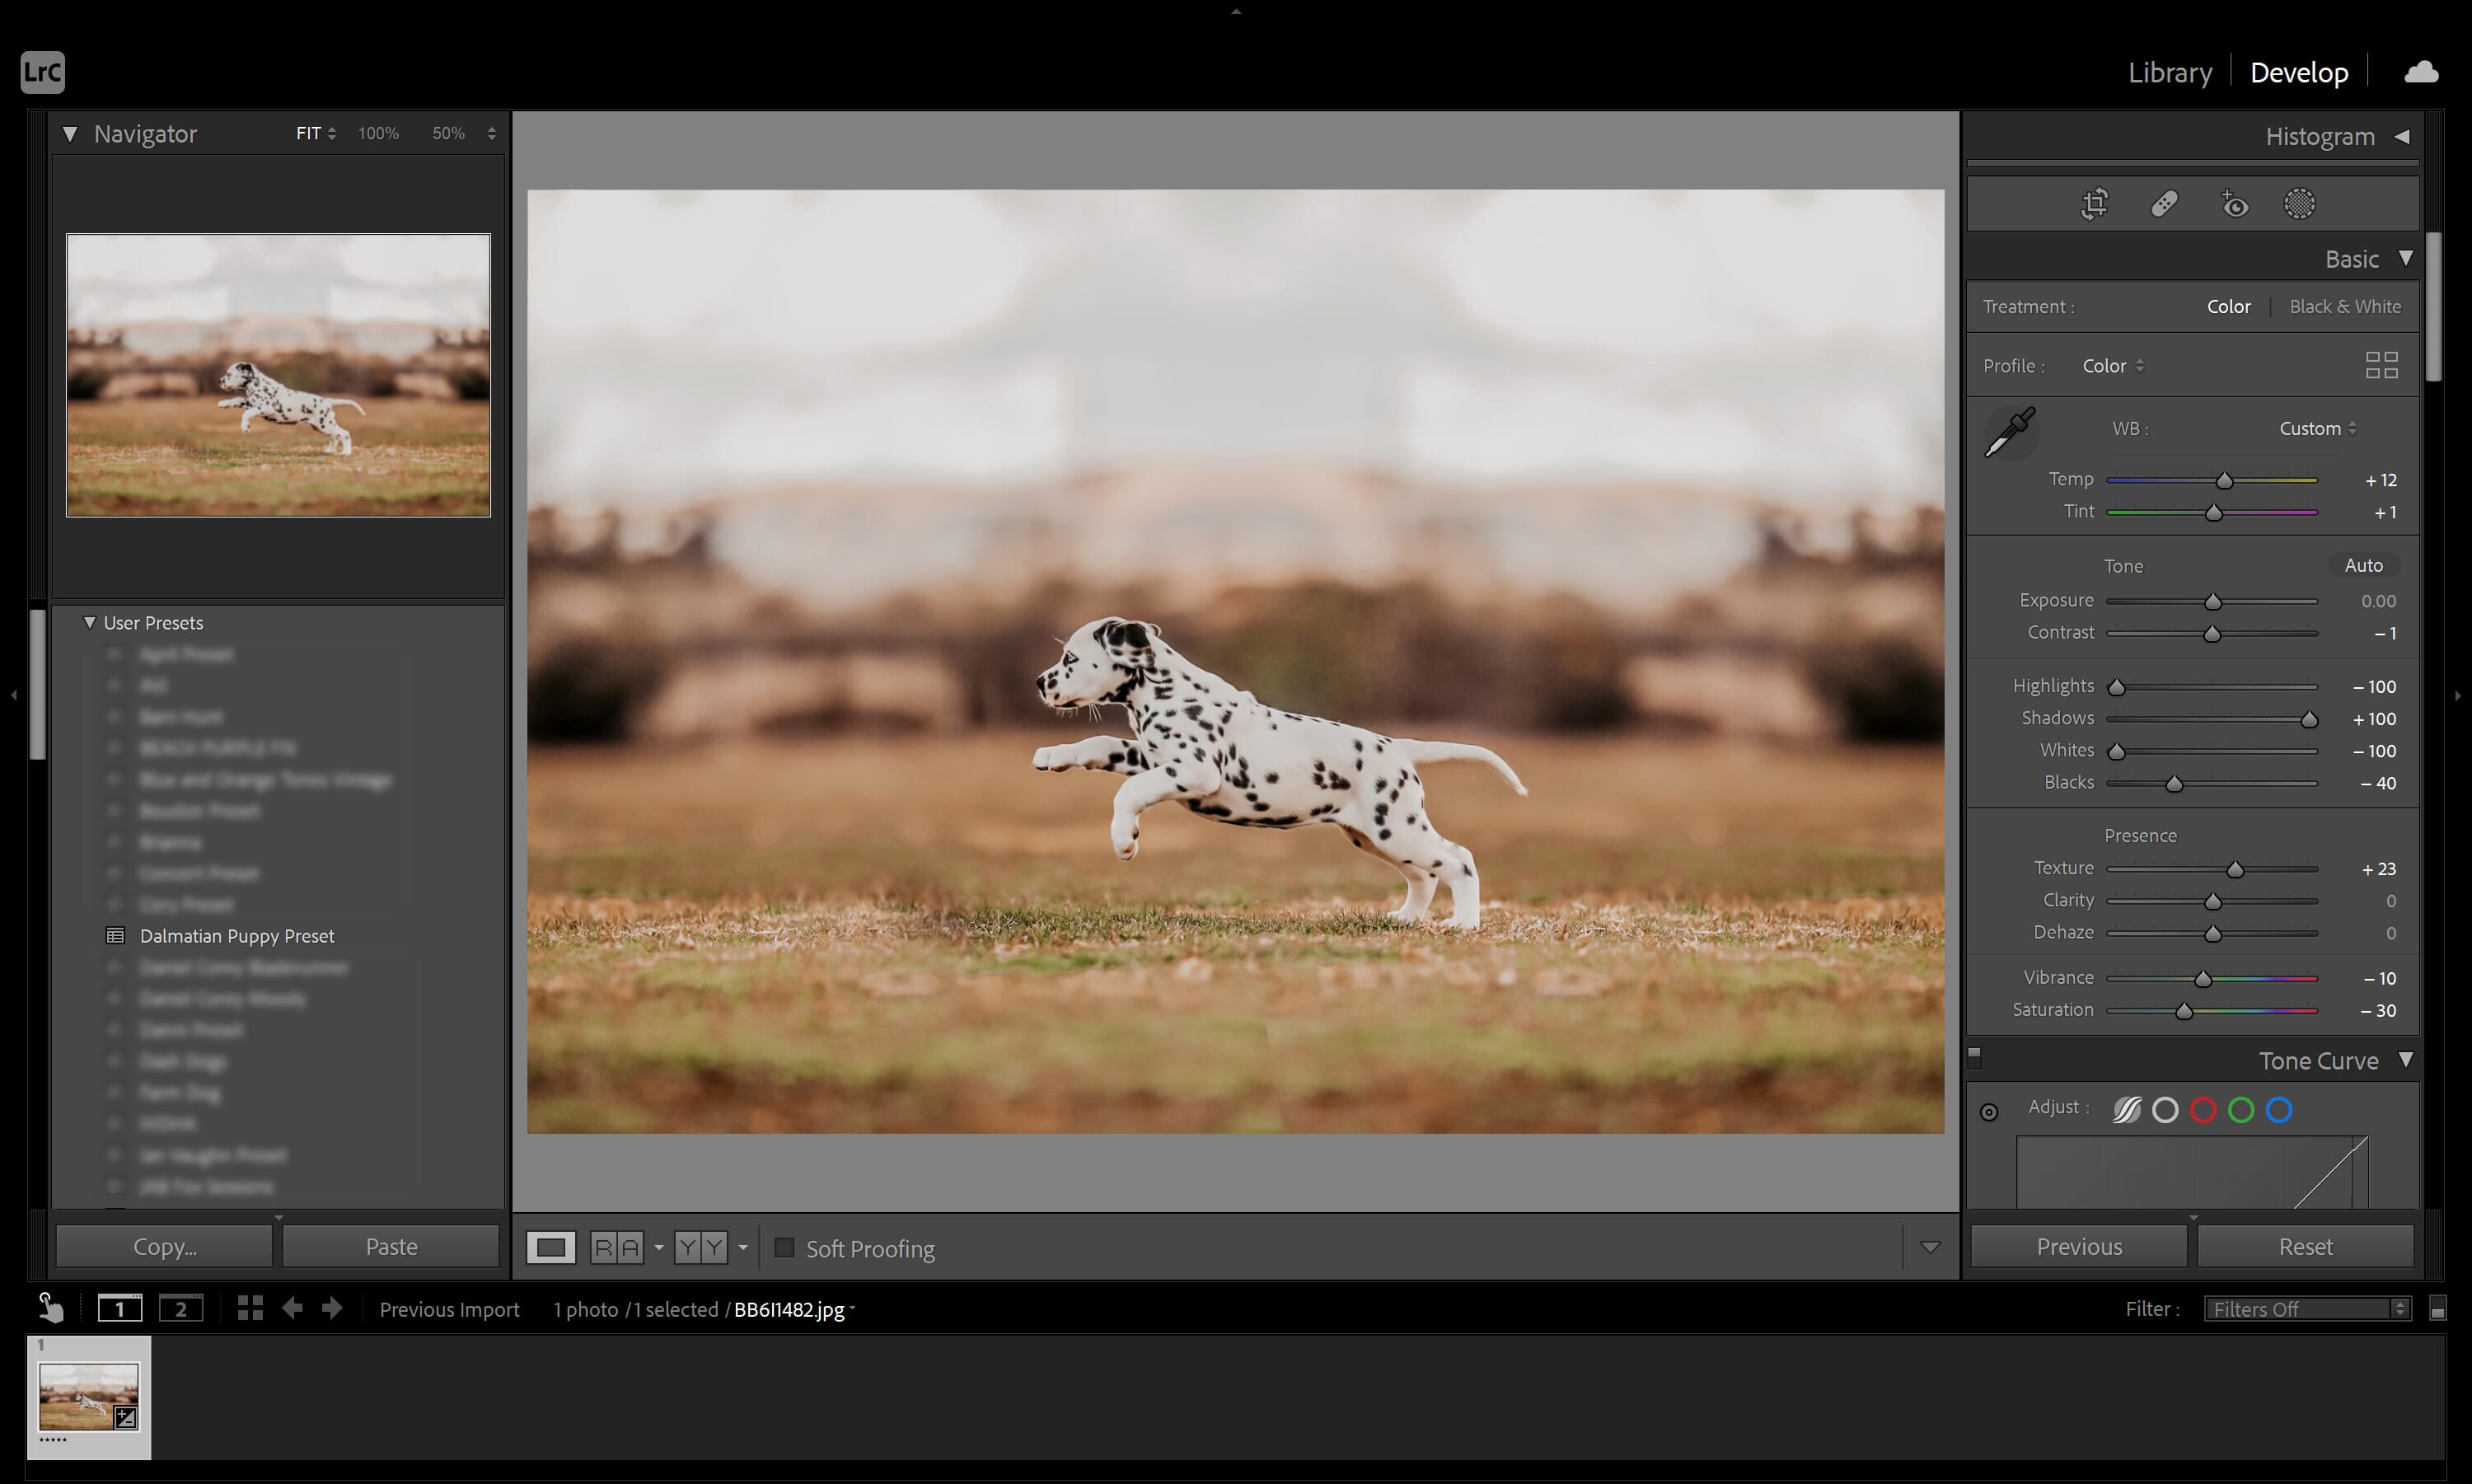
Click the “Create” button. And you’re done! You’ll be able to find your new preset in the Presets dropdown box.
Bonus Step: Export Your Preset
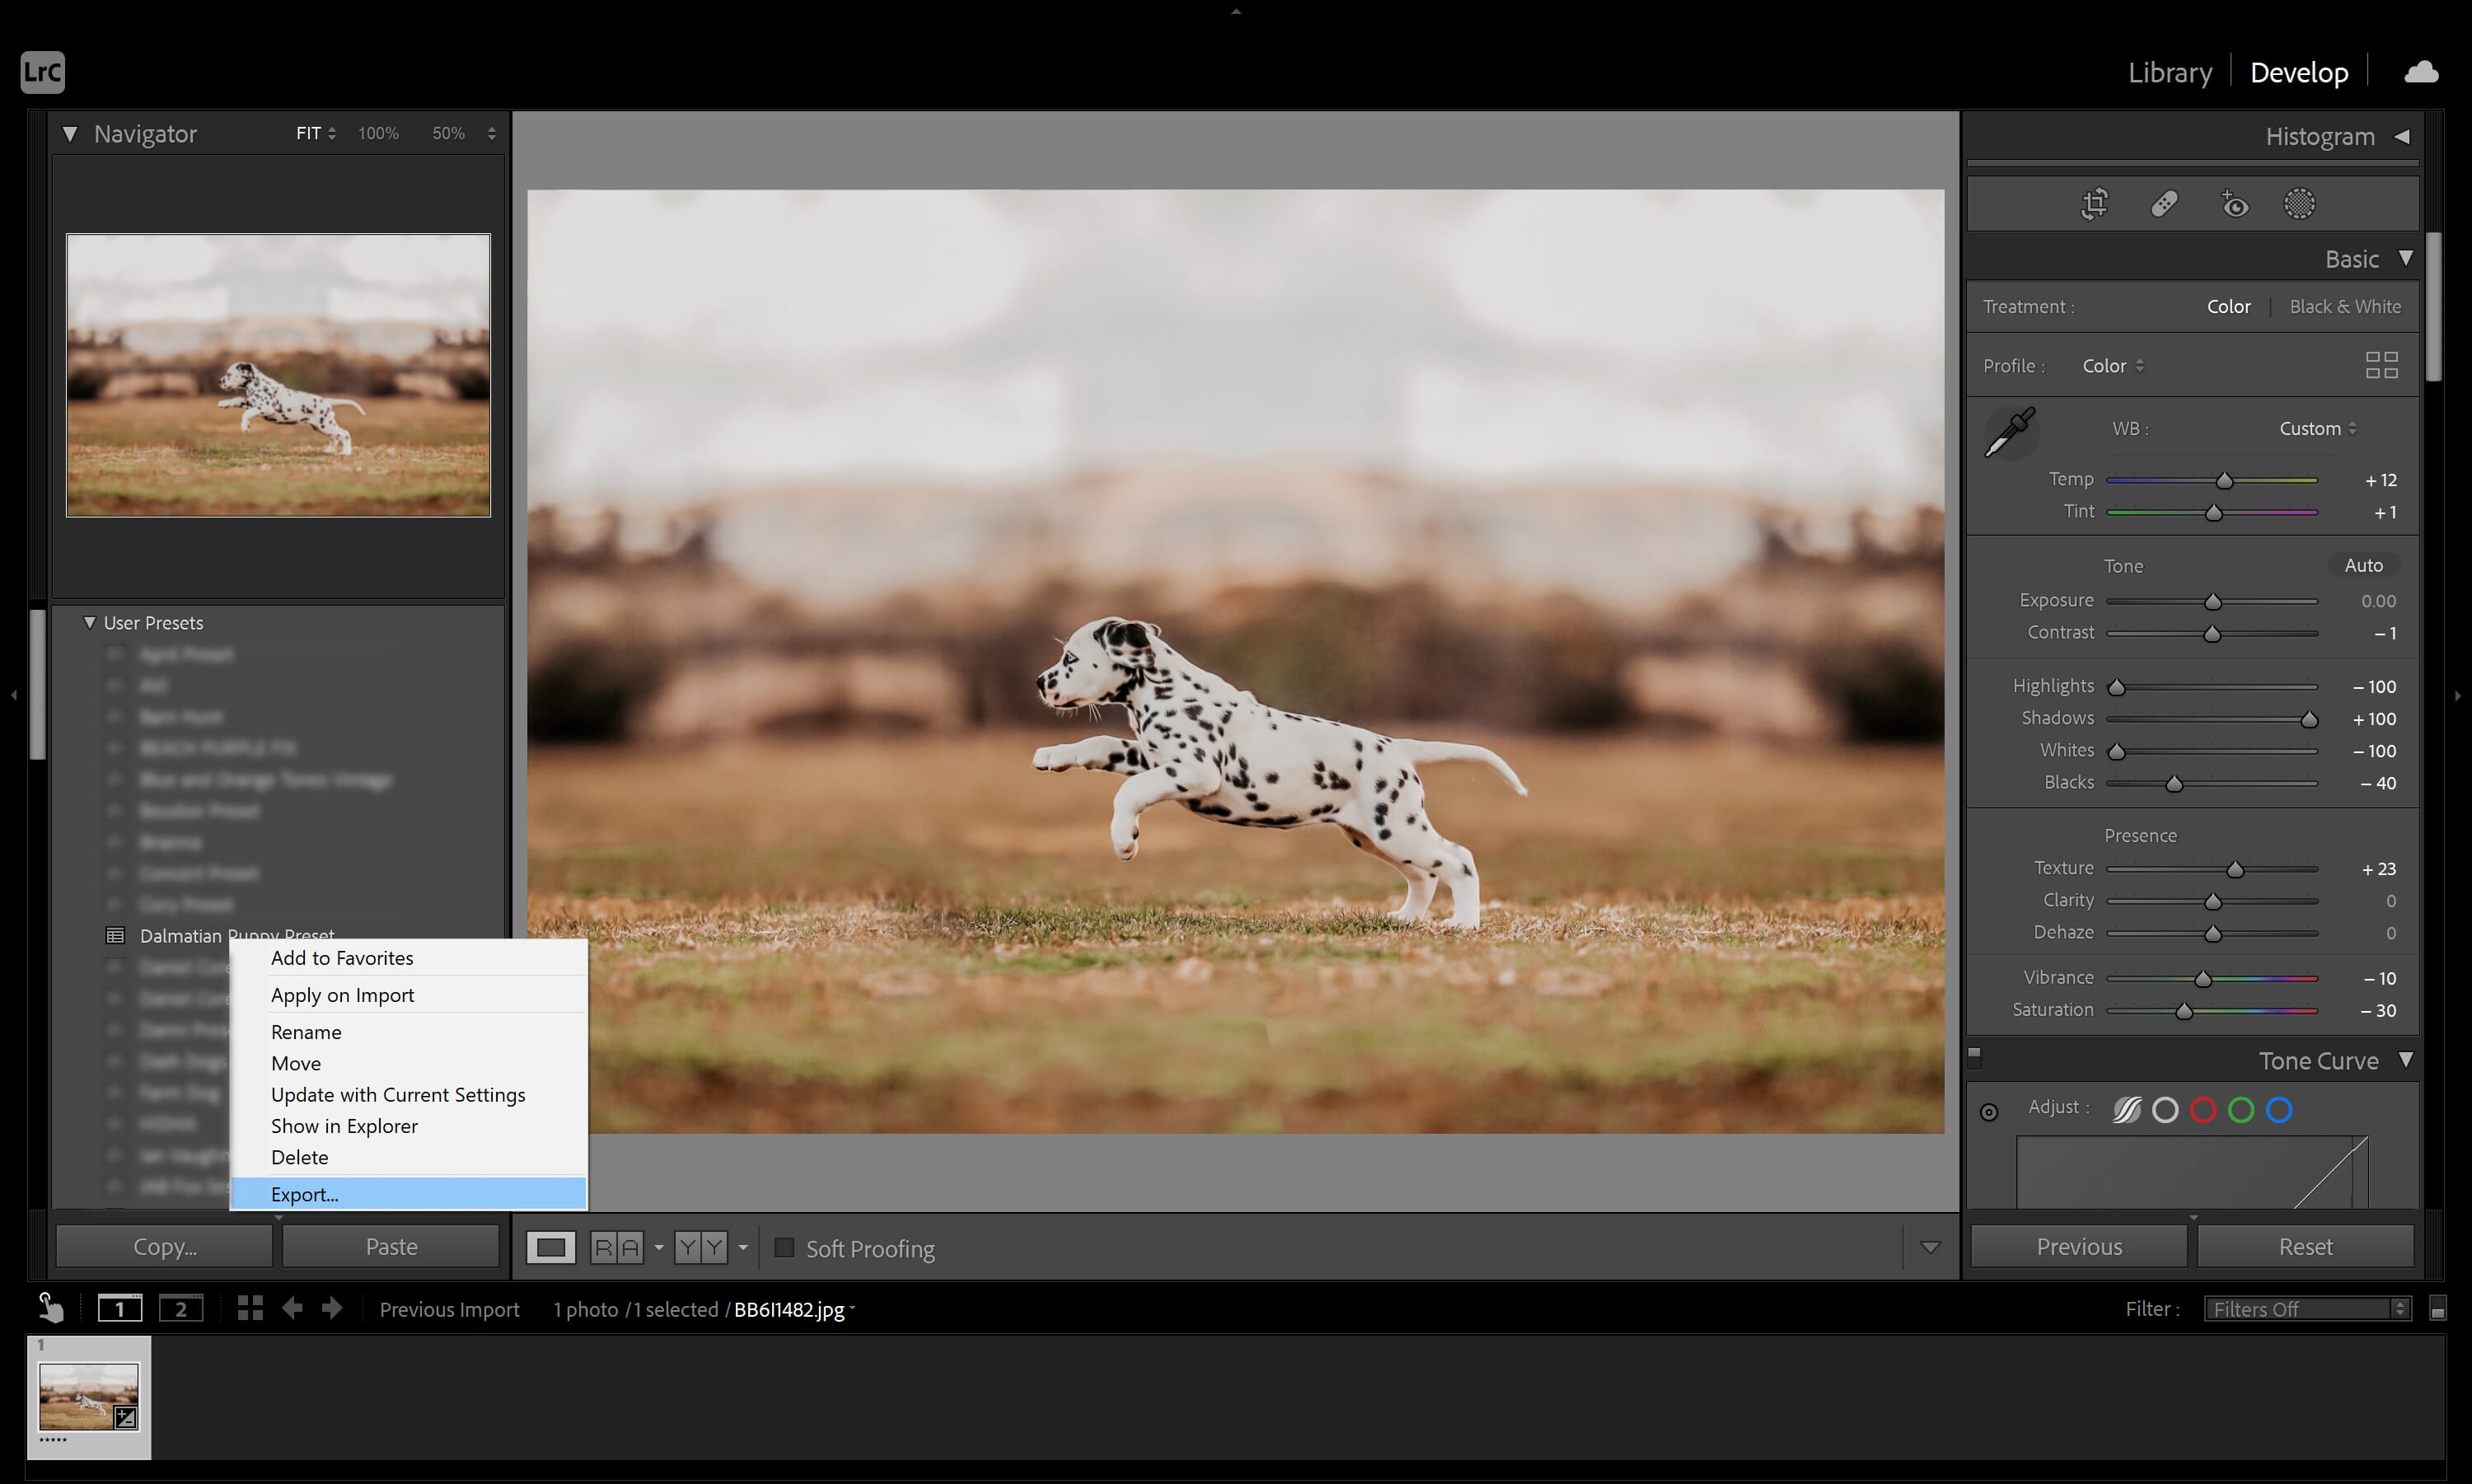
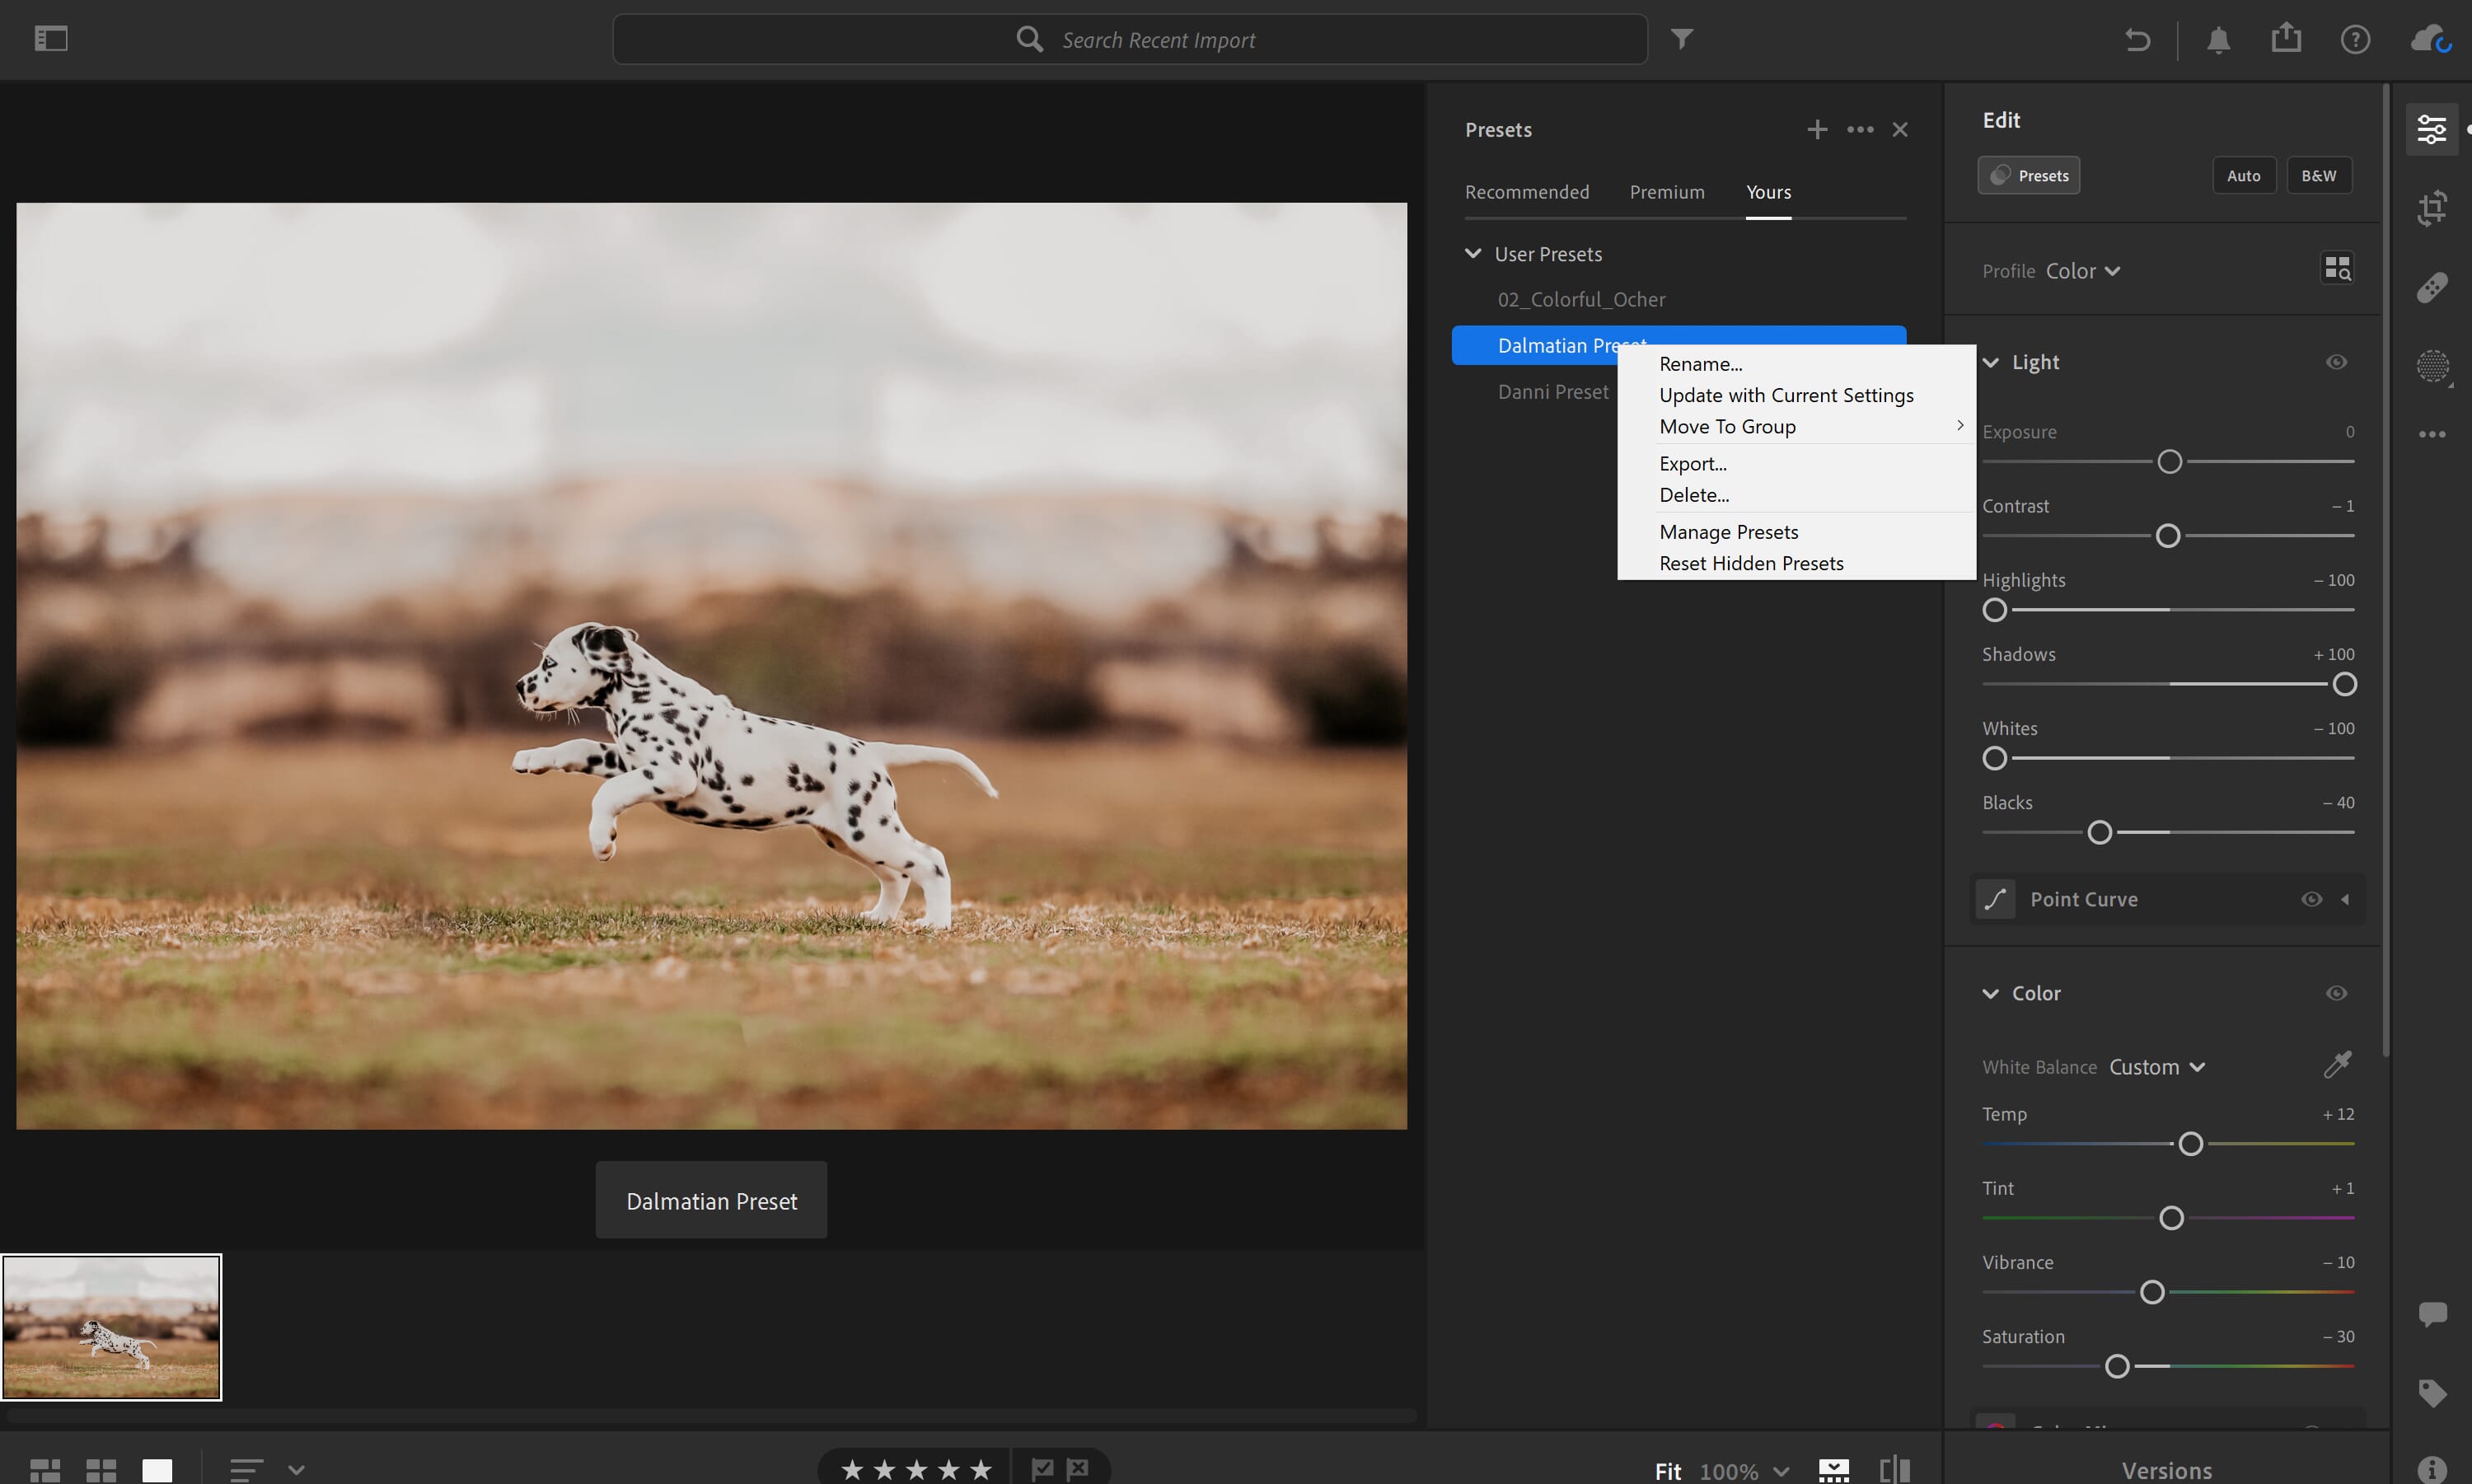
At this point, you can use your preset to edit photos – but what if you want to get it out of Lightroom? Just right-click (PC) or Command+click (Mac) on the preset itself to bring up a dropdown menu with several different options.
Click “Export,” and the preset will download to your desktop in a Lightroom file format.
How to Create Presets in Lightroom
Do you use Lightroom rather than Lightroom Classic? No problem! In this section, we’ll explain how to create a preset in the newer, mobile-focused version of Lightroom.
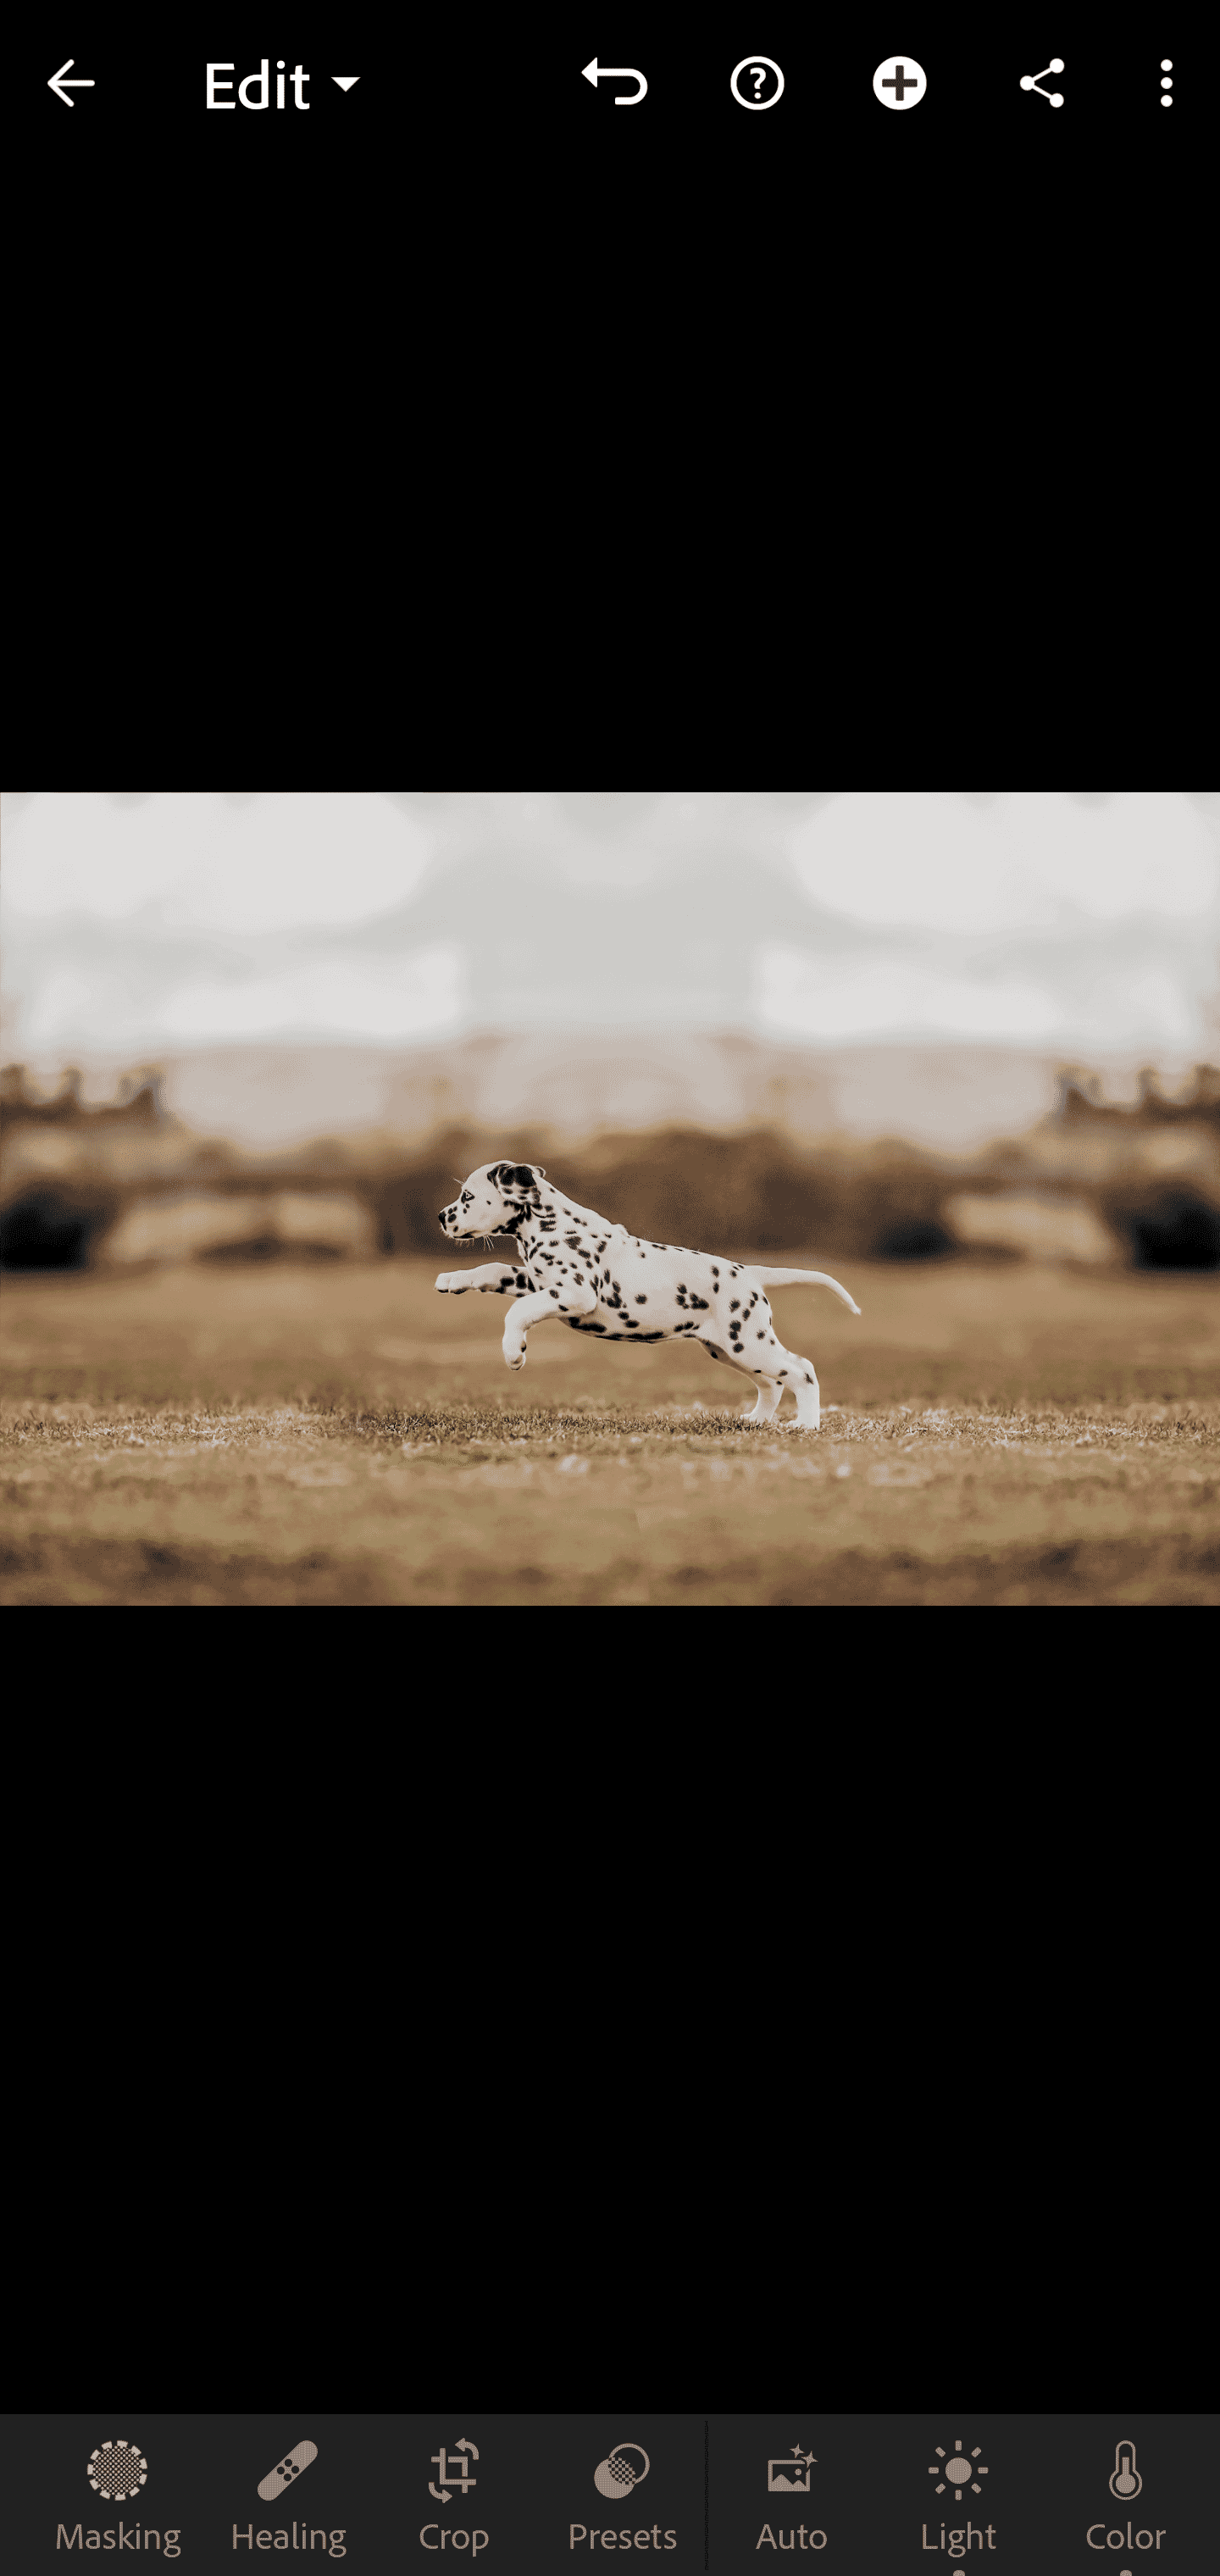
Step 1: Edit Your Photo
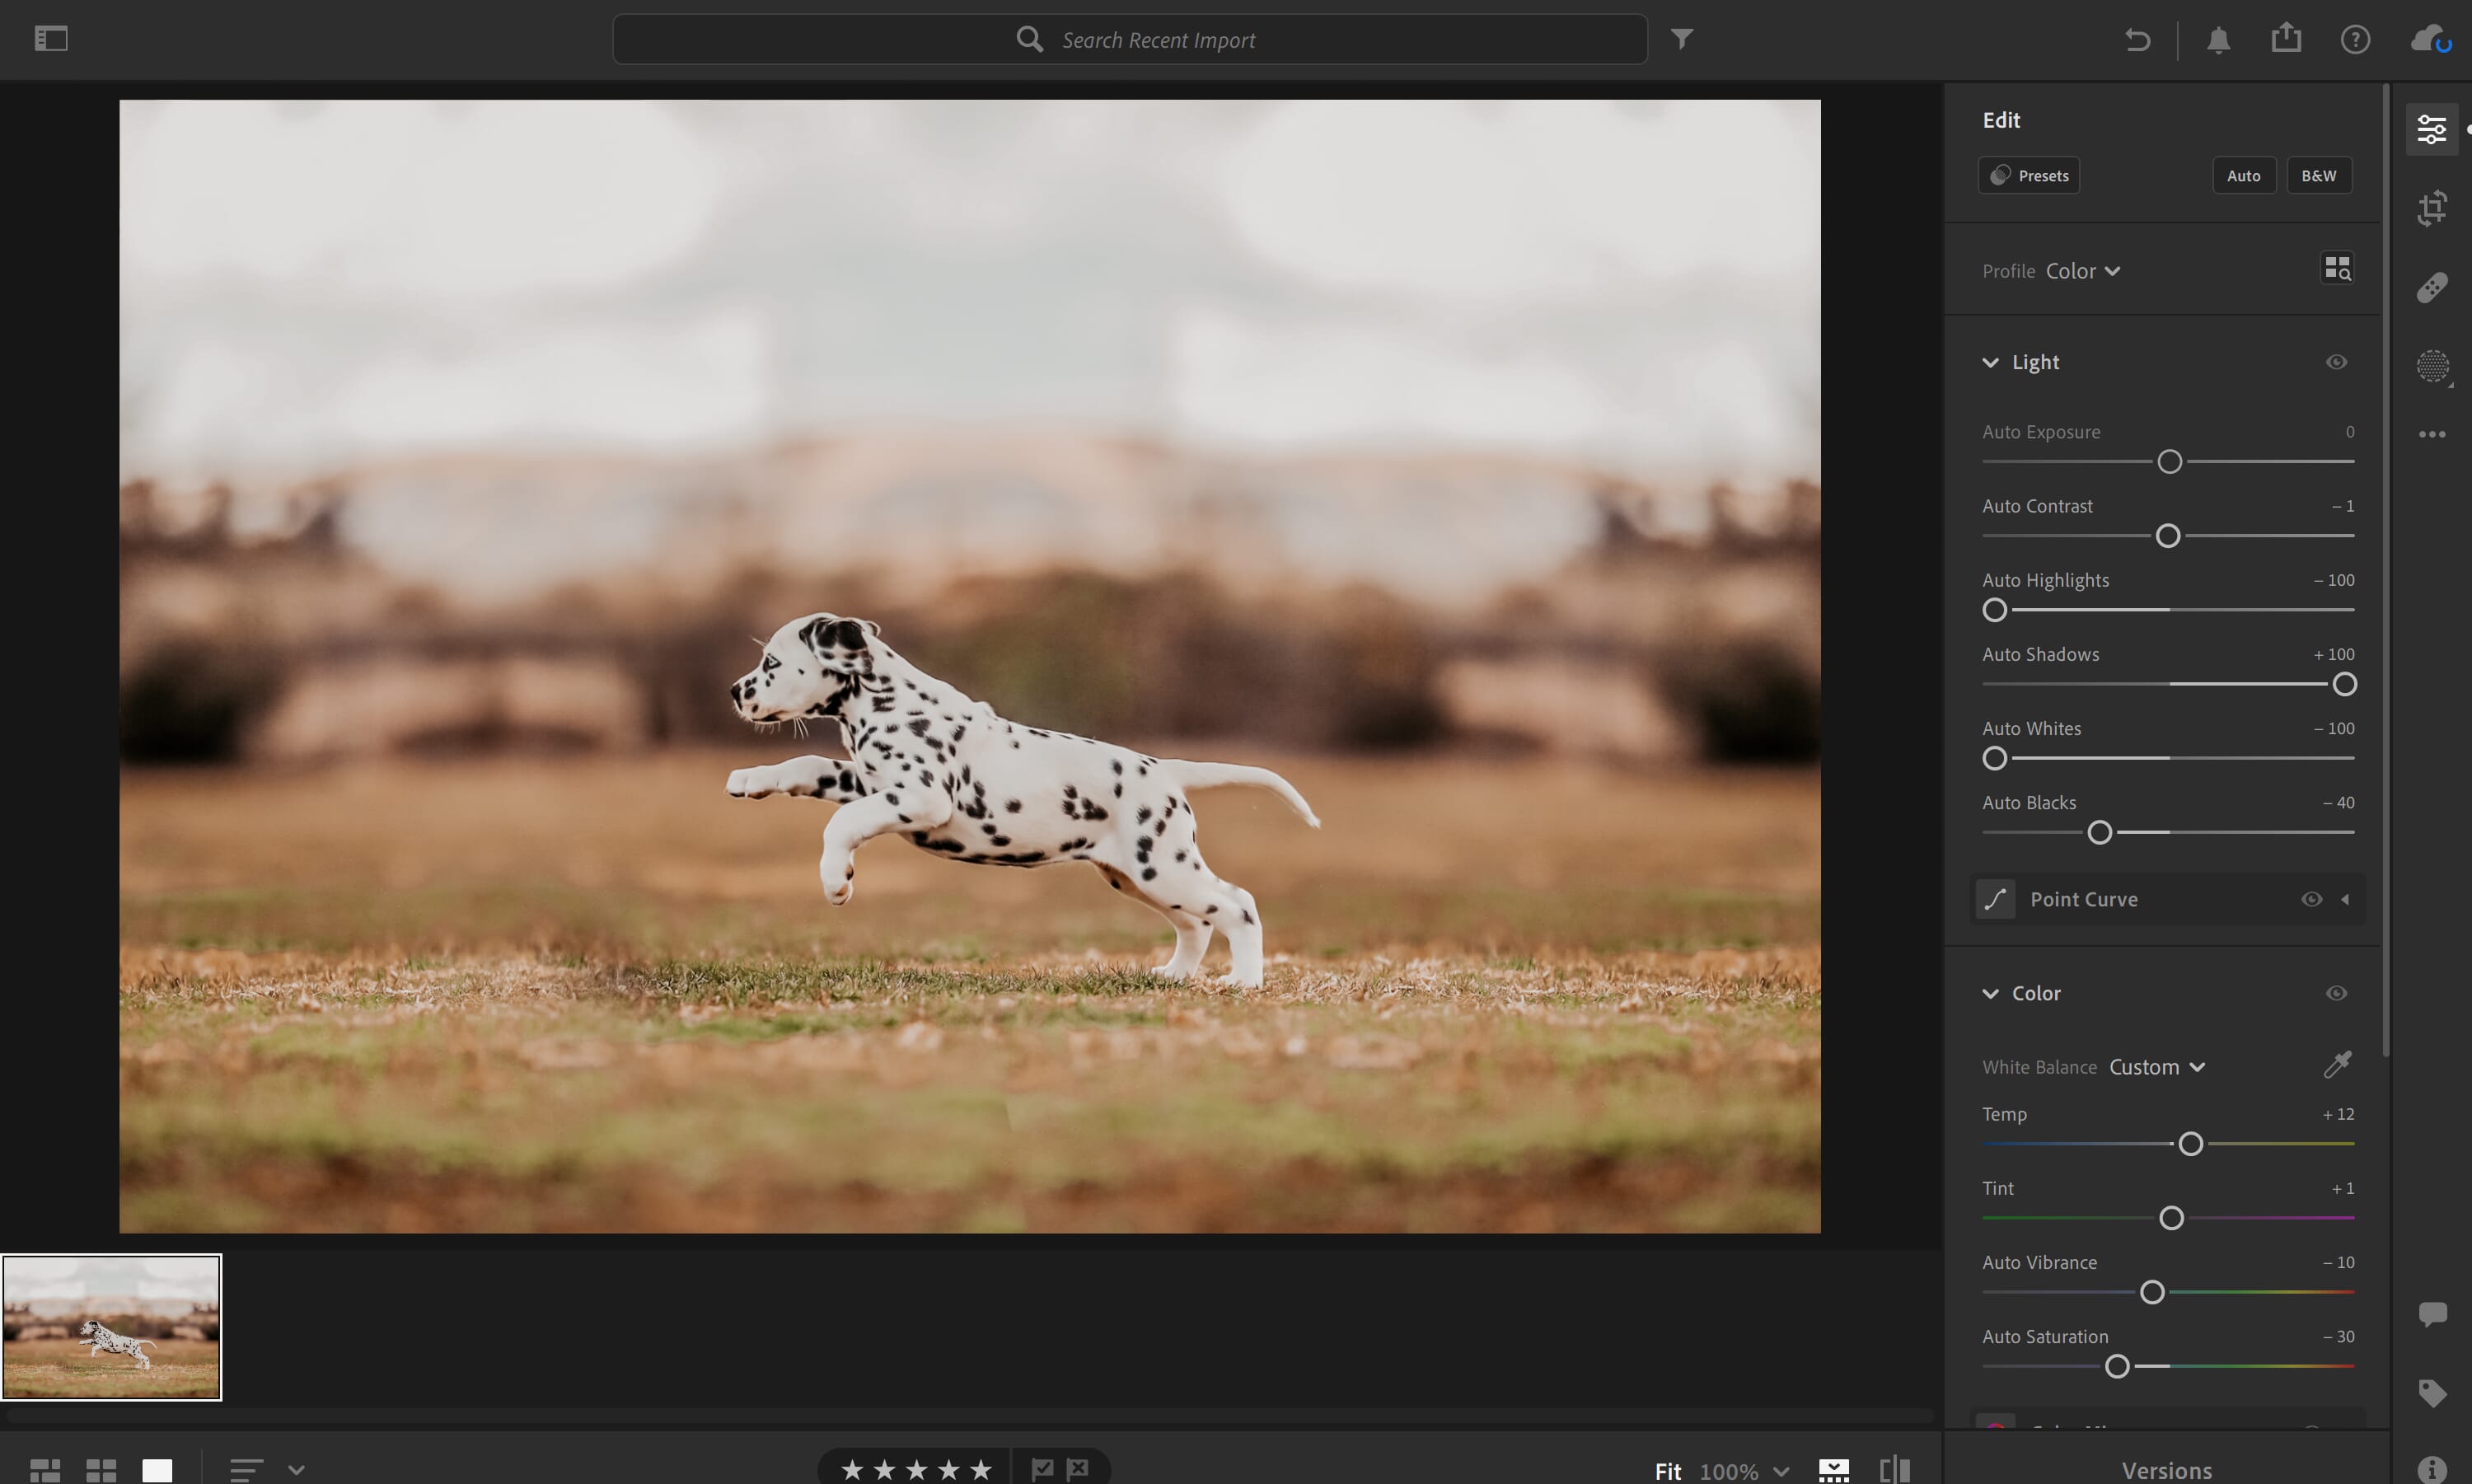
For consistency, we used the same tools to edit the puppy photo in Lightroom.
Step 2: Click the “Presets” Button and the Plus Icon
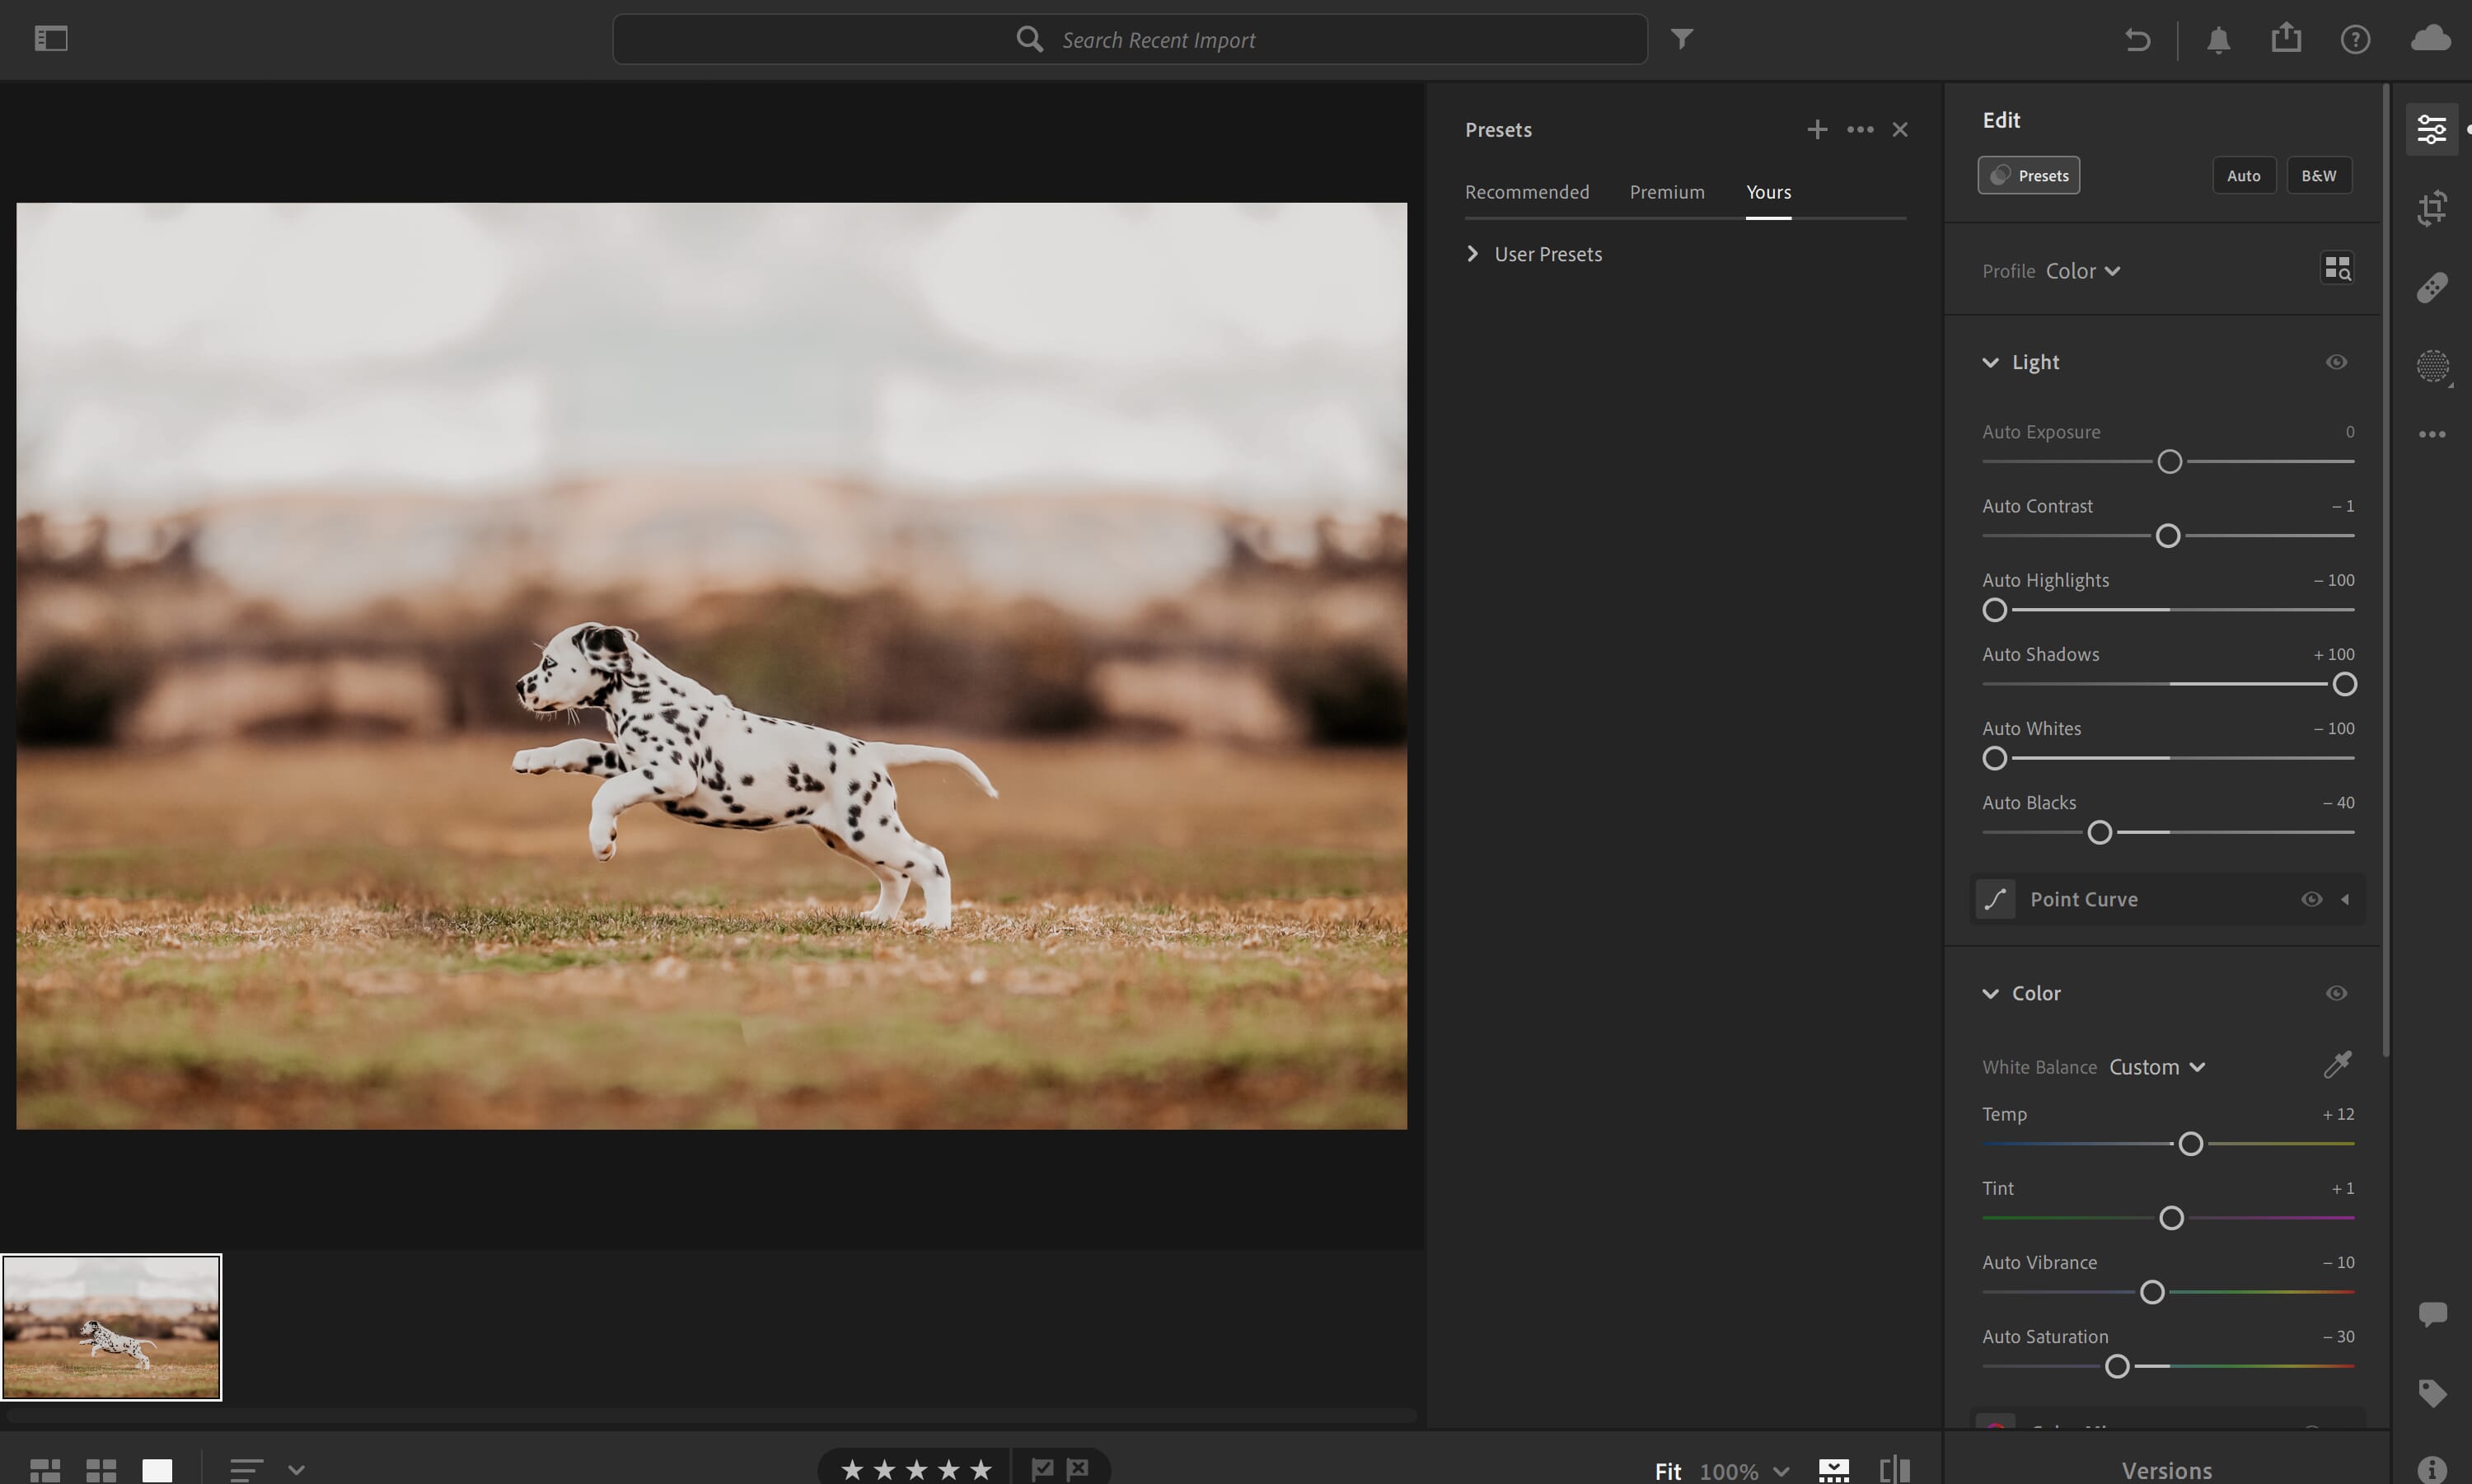
Click the little “Presets” button; it’s located directly under the word “Edit.” This will bring up all of your presets.
Then, just like in Lightroom Classic, click the Plus (+) icon.
Step 3: Save Your Settings
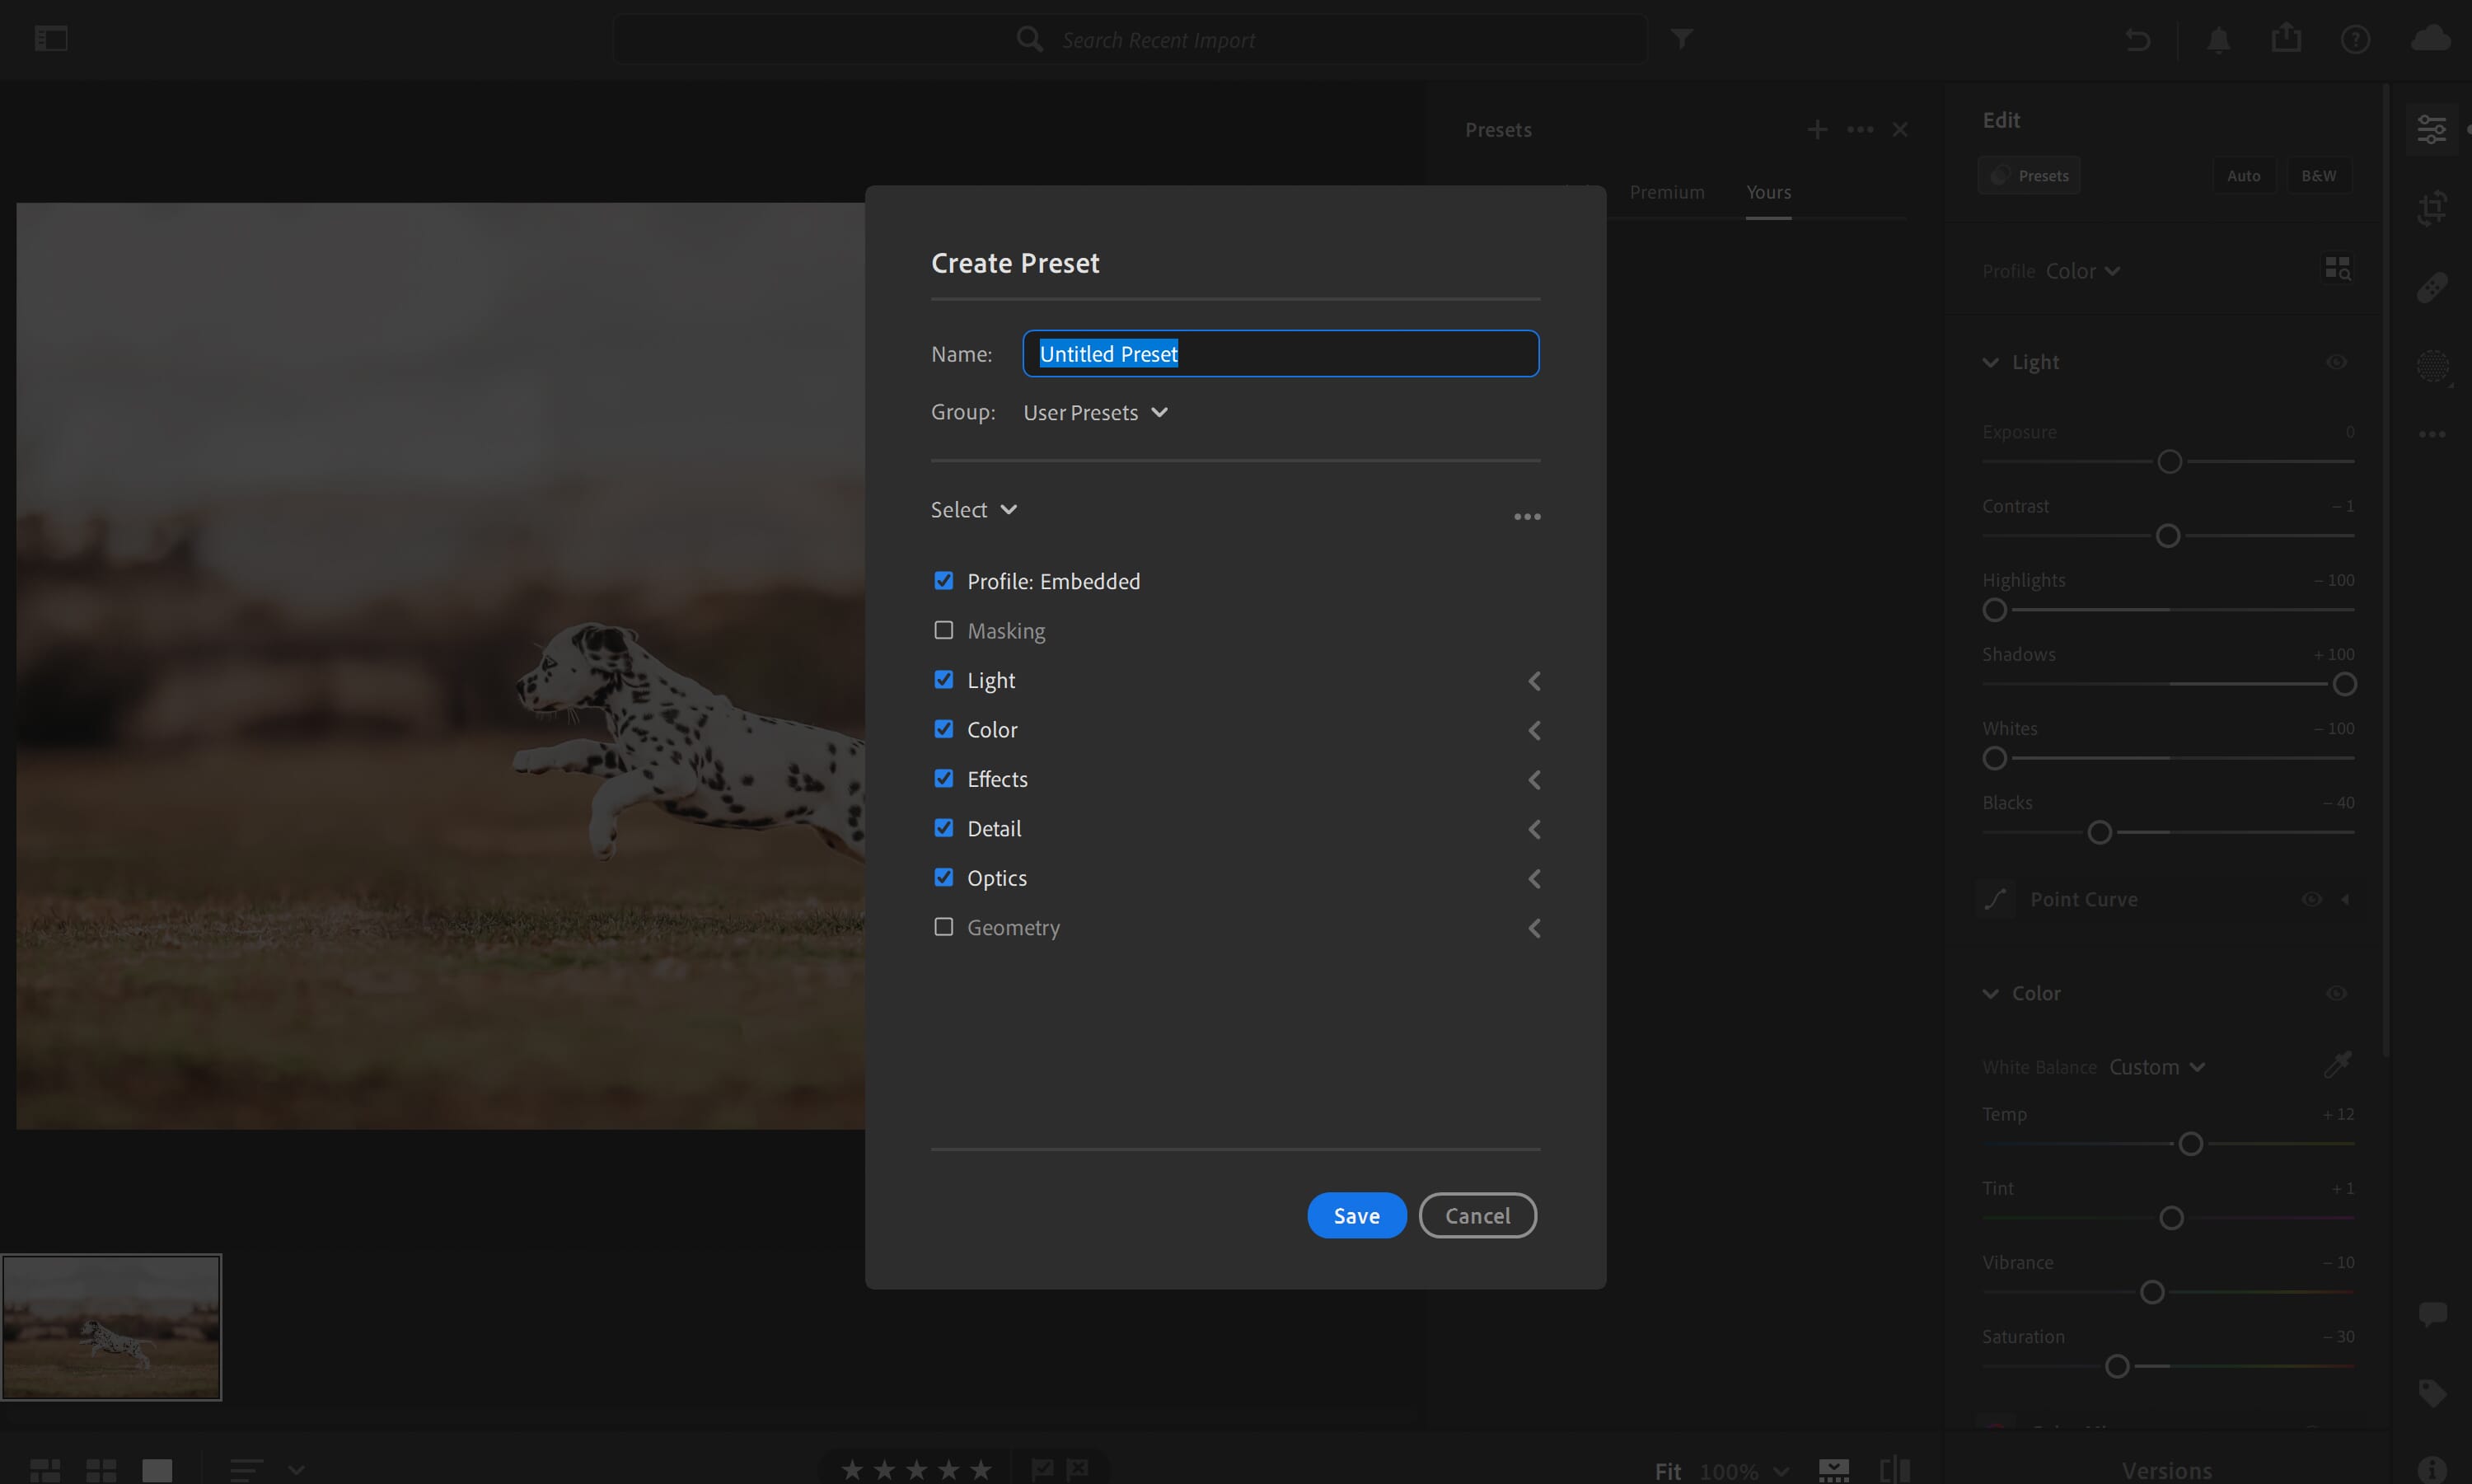
A window will ask which adjustments you want to save as your preset. Select all relevant changes, then click “Save.”
The new preset will appear in the Presets tab.
Bonus Step: Export Your Preset
To export, your preset, just right-click (PC) or Command+click (Mac) on the preset itself. Find the “Export” option in the dropdown menu, then give it a click.
How to Create Presets in Lightroom Mobile
Want to make a preset in Lightroom Mobile? In this section, we’ll show you what to do.
Step 1: Open the Image and Make Your Edits
We’ve made the same adjustments to our puppy photo. Go ahead and make the adjustments you want to include in your preset.
Step 2: Tap the Three Vertical Dots and Select “Create Preset”
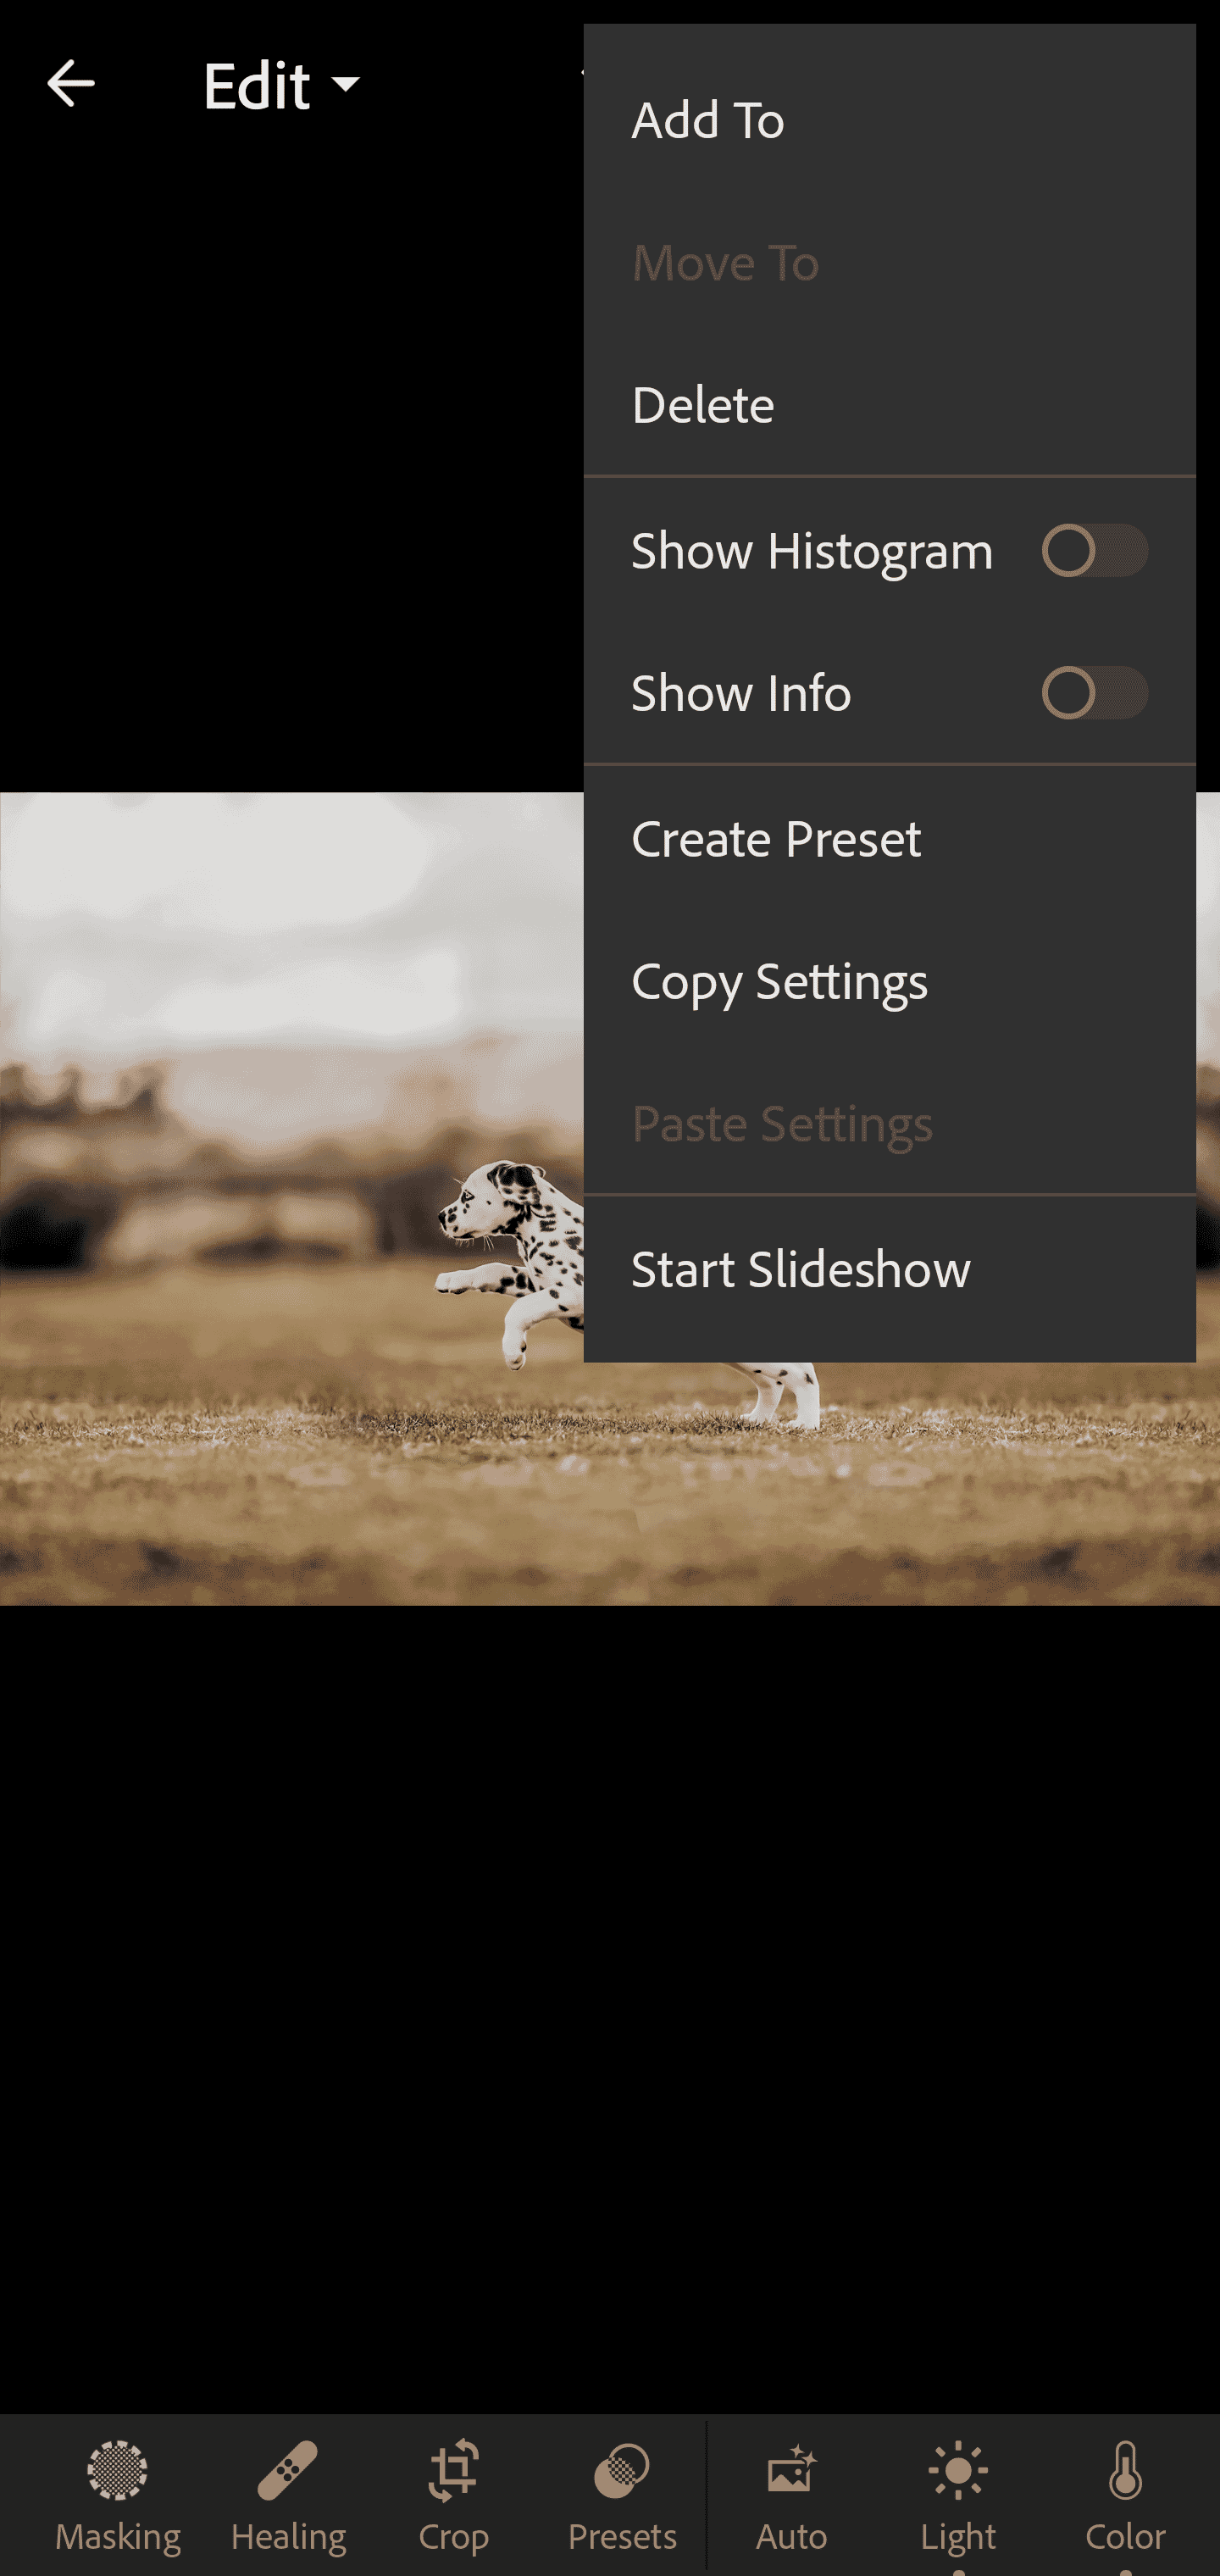
Tap the three vertical dots in the right-hand corner of your Lightroom Mobile application. This will bring up a menu; select “Create Preset.”
Step 3: Select the Relevant Adjustments
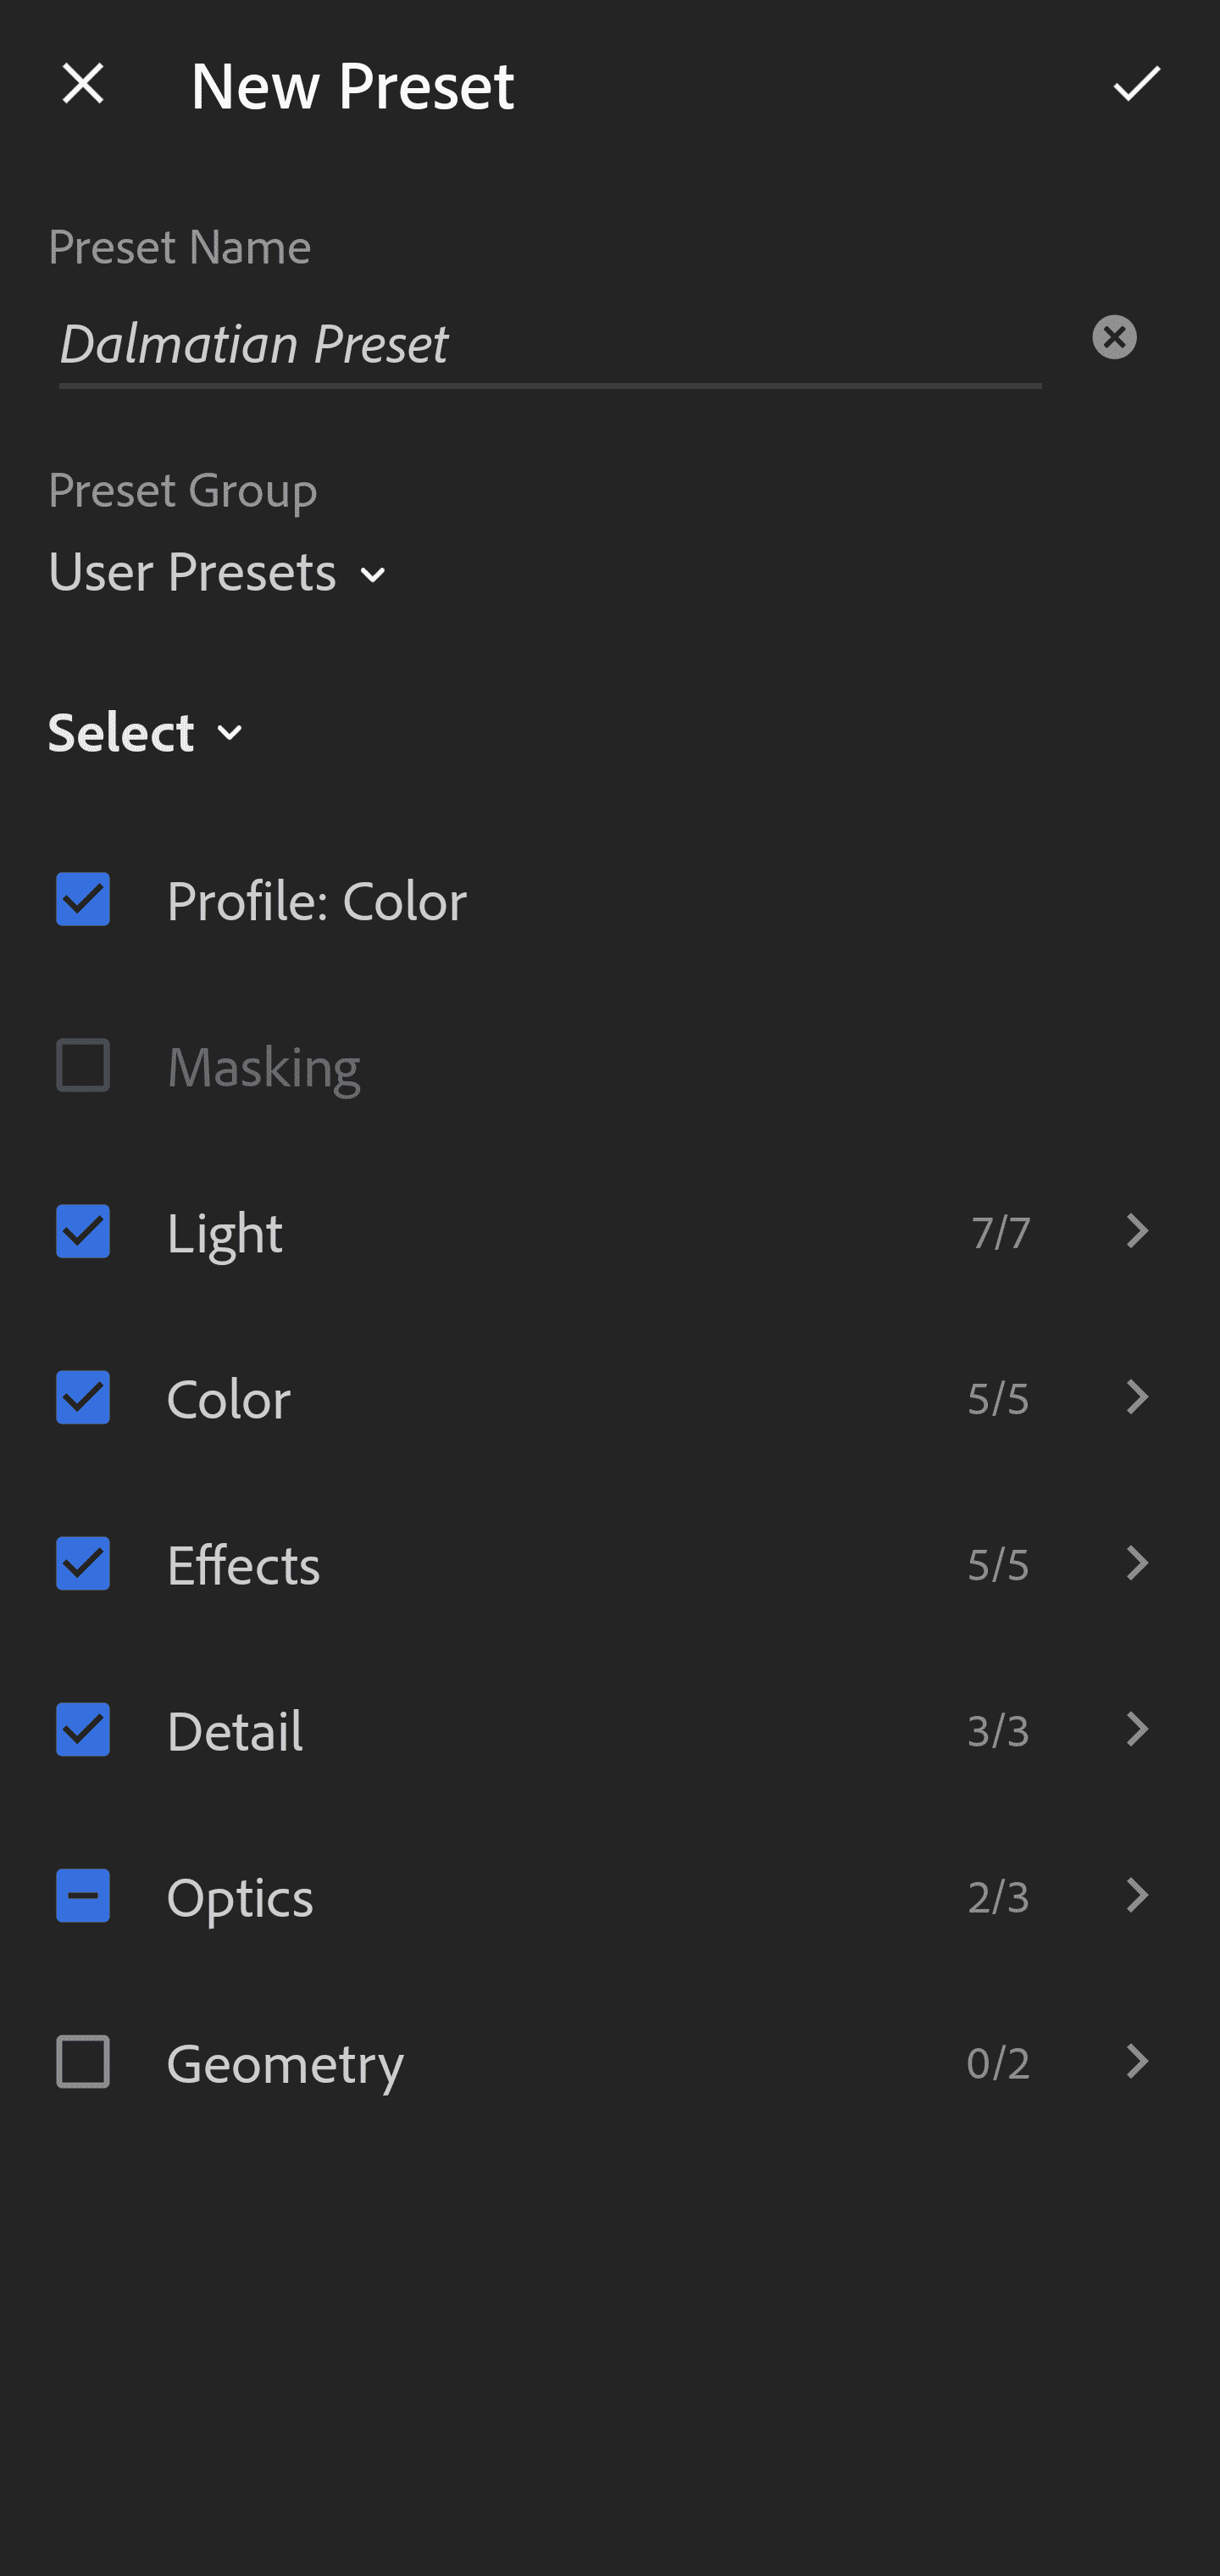
A window will prompt you to identify the adjustments you wish to save. You’ll also need to choose a preset name and preset group.
Step 4: Save Your Preset!
Tap the checkmark at the top of the screen. Once the preset is saved, you’ll find it in the Presets tab at the bottom of your Lightroom Mobile application!
Can You Use Presets Across Platforms?
Adobe is big on maintaining consistency across platforms, so you can use Lightroom Classic presets in Lightroom, Lightroom presets in Lightroom Mobile, and so on.
To add your Lightroom presets to Lightroom Mobile, simply create the desired presets in Lightroom. Lightroom automatically syncs with the mobile application.
If you have a preset in Lightroom Classic that is not in Lightroom, just export the preset from Classic to your desktop. Then import it into Lightroom. That’s it!
Create Beautiful Edits with Lightroom Presets
If you get into the habit of creating presets whenever you edit, you’ll soon have plenty of presets to use. This will speed up your editing time significantly (and might even make you some money). Enjoy!