If you want to know how to edit photos in Photoshop, then you’ve come to the right place.
In this article, I’m going to take you through photo editing in Photoshop–so that, by the time you’re done, you’ll be able to quickly and comfortably enhance your images using Photoshop’s powerful tools.
Now, Photoshop is a complex photo editor. And it can sometimes seem overwhelming, especially if you don’t have much experience with post-processing programs.
That’s why I’m going to give careful, step-by-step, replicable instructions. So don’t worry about not being able to follow along; this tutorial is designed for photographers with little-to-no Photoshop experience.
How to Edit Photos in Photoshop:
When Should You Use Photoshop to Edit Your Photos?
There’s a common misconception among photographers just starting out with Photoshop:
That advanced editors only work with Photoshop, whereas less-experienced editors stick to more beginner-friendly programs such as Lightroom or Luminar.
But this is wrong.
In reality, most professionals use both Photoshop and Lightroom to edit photos.
How does this work?
First, they use Lightroom for quick and dirty edits, especially if they’re producing an image for display on social media.
And then, if they’re ready to do a very in-depth edit, they move over to Photoshop.
In fact, many photographers will use both Lightroom and Photoshop to edit a single image. They’ll start in Lightroom with some basic adjustments, then move over to Photoshop for advanced (often targeted) edits.
In other words:
While Photoshop is incredibly powerful, and can certainly satisfy most of your editing needs, don’t think that you must choose between Photoshop and Lightroom.
Both programs work well, and both programs, together, will keep your photos looking as strong as possible.
And before you start editing in Photoshop, not that the program does come with one warning you should be aware of:
Photoshop Is Not a RAW Editor
Adobe Photoshop CC cannot edit RAW files.
Which means that, if you shoot in RAW (and I recommend shooting in RAW!), you’ll need to first edit your images in another program, then move into Photoshop to finish the job.
Now, does this mean you have to use a program such as Lightroom or Luminar before moving to Photoshop?
No. Because Photoshop actually comes with a companion RAW editor, Adobe Camera RAW–and Adobe Camera RAW automatically opens when you attempt to work with a RAW file in Photoshop.
(The Adobe Camera RAW interface is essentially identical to the Lightroom interface. So if you’ve used Lightroom, you’ll do just fine in ACR.) Therefore, Photoshop’s inability to handle RAW files isn’t a big deal.
But you should know about it because you’ll need to incorporate some sort of RAW edit into your workflow, either through a standalone RAW editor such as Lightroom, or Photoshop’s companion RAW editor, Adobe Camera RAW.
Related Post: The Best RAW Converter Software
Now let’s take a look at what you’ll see when you open Photoshop:
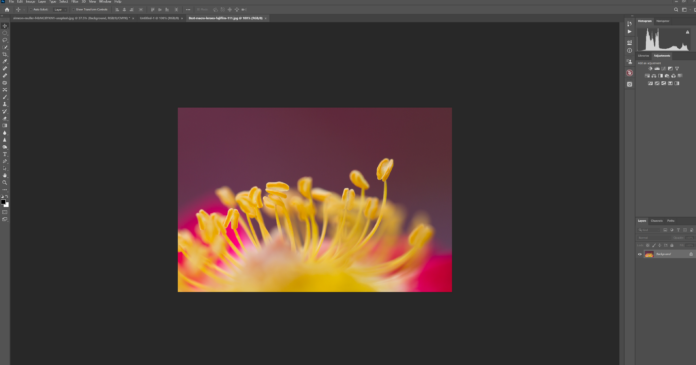
The Photoshop Interface: A Quick Look
Here’s the Photoshop interface:
(Note that the interface is fully customizable, and you can rearrange panels to your heart’s content. However, the interface displayed above is pretty standard among Photoshop users.)
At the center of the window, you’ll see your open photo.
And if you have multiple photos open, you can move between them via the tabs at the top.
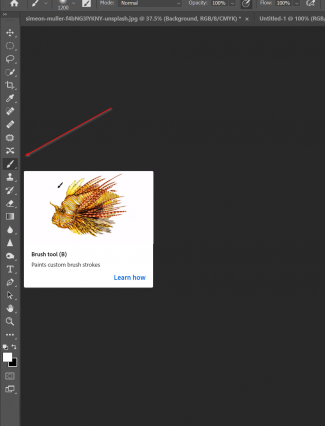
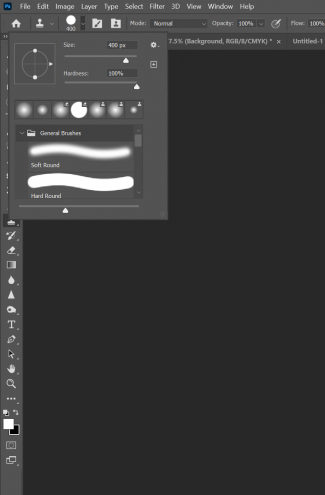
On the left-hand side, you’ll see your panel of tools, which includes selection tools, cloning tools, the Brush tool, and more:
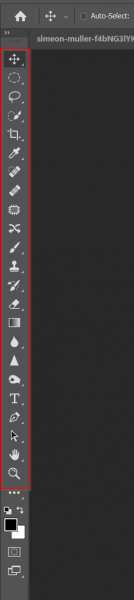
When you click on a tool, the Options Bar will change to reflect adjustments you can make to that tool:

On the right-hand side is your histogram, as well as your adjustment layer icons:
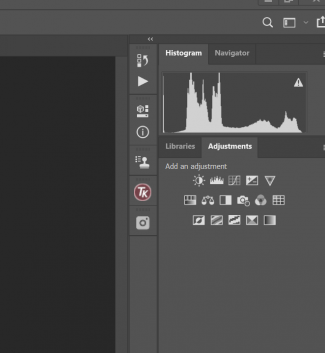
And on the bottom right is your Layer panel, which displays all your current layers:
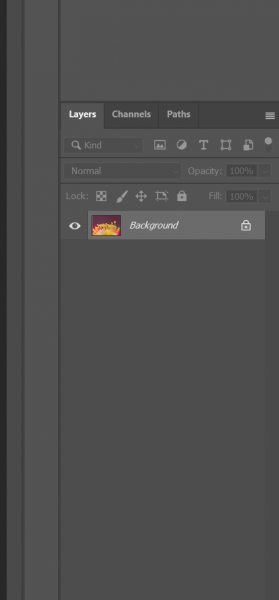
This is where most of your edits will appear.
Photo Editing in Photoshop: Understanding Layers
Photoshop is a destructive image editor.
In other words:
When you make an adjustment in Photoshop, it’s permanent. The adjustment gets baked into your image, and you can’t simply go back and make changes.
This is a problem.
Or it would be a problem, if it weren’t for layers.
You see, layers are a convenient way around Photoshop’s destructive editing. A layer goes over your image, and allows you to apply edits without permanently affecting the underlying image.
Put another way, a layer is a transparent piece of paper that covers your image and allows you to make adjustments without actually drawing on the original image.
Make sense?
So, once you create a layer, any adjustments made to the layer are permanent–but they only permanently affect the layer, not the original image. If you decide you don’t like an adjustment made to a layer, you can just delete the layer and create a new one.
When it comes to layer editing, I’d recommend you create new layers frequently. Whenever you move on to another stage of editing, it’s good practice to create a new layer (and it can be a good idea to create new layers even more frequently).
How do you create layers?
Simply head to the menu, and select Layer>New>Layer, and hit OK.
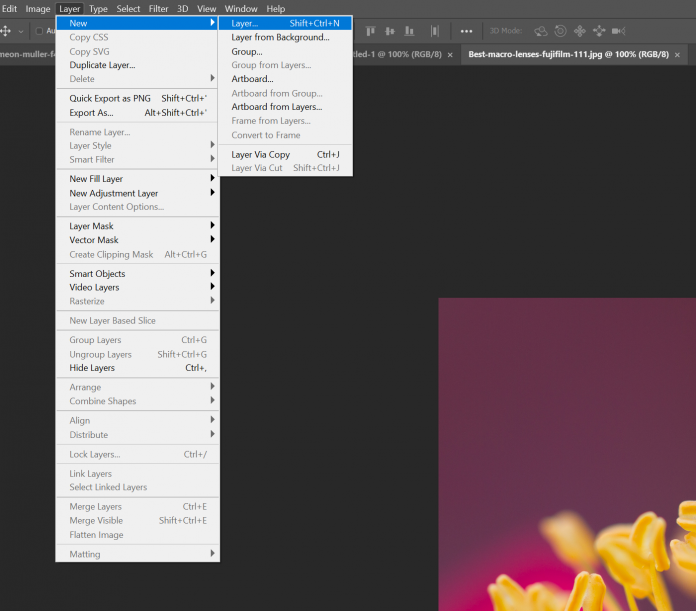
This will create a basic layer, which is completely blank. Note that you’ll need to apply edits to this layer by painting on it, adding text, etc.
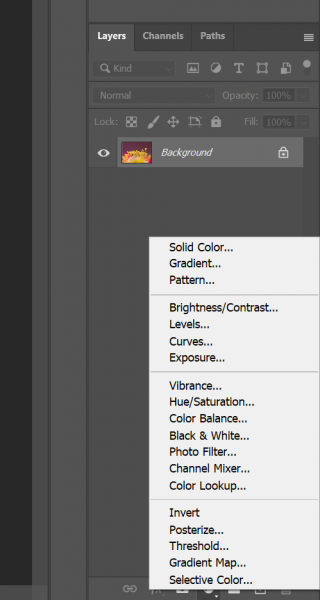
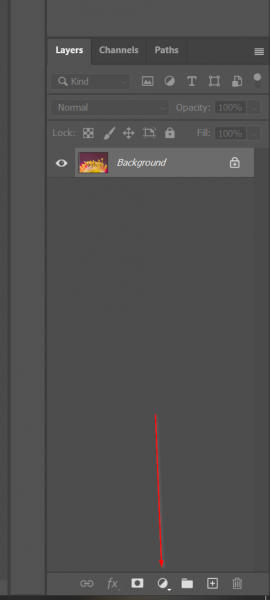
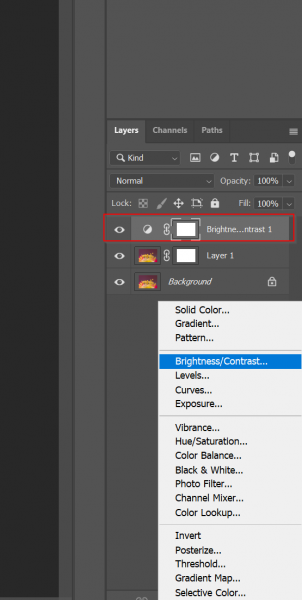
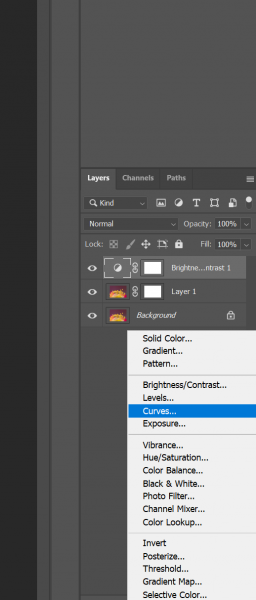
Alternatively, you can create an adjustment layer by heading down into the Layers panel, selecting the half moon icon, and clicking on an adjustment layer option:
What Are Adjustment Layers?
Adjustment layers are a specific type of editing layer offered by Photoshop.
Because while a standard layer is just blank, an adjustment layer allows you to make specific edits to your image.
So if you want to use a layer to increase the brightness of your photo, you can use a Brightness/Contrast adjustment layer, which allows you to boost or reduce both the brightness and contrast.
And if you would like to use a layer to increase the saturation of your photo, you can use a Vibrance Layer, which allows you to boost or reduce both the saturation and vibrancy.
These adjustment tools are built into specific adjustment layers–so if you add a Brightness/Contrast layer, you can only use it to adjust the brightness and contrast. You cannot use it to change the saturation or the color toning or anything else.
As explained in the previous section, to create an adjustment layer, simply click on the half moon icon in the Layers panel:
Then selecting your desired adjustment layer.
It’ll immediately appear in the Layers panel.
Editing in Photoshop: What Are Masks?
Masks are a slightly more advanced Photoshop editing function.
But while you may not use masks frequently as a beginner, you should at least know what they can do.
Masking is all about creating targeted adjustments. They work by blocking out certain parts of a layer, while letting other parts of the layer affect the underlying image.
So if you wanted to brighten the center of your image but not the edges, you could use a Brightness/Contrast adjustment layer to boost the brightness of the whole image. Then you’d apply a mask that blocked the edit from showing through along the edges of the frame (but that allowed the edit to show through in the center of the image).
But how do you do this?
First, you select the layer to which you want to add a mask.
(Note that adjustment layers actually come with masks automatically, so you can ignore this step when working with this type of layer.)
Then simply tap the Mask icon in the bottom right-hand corner, and a mask will appear next to your selected layer.
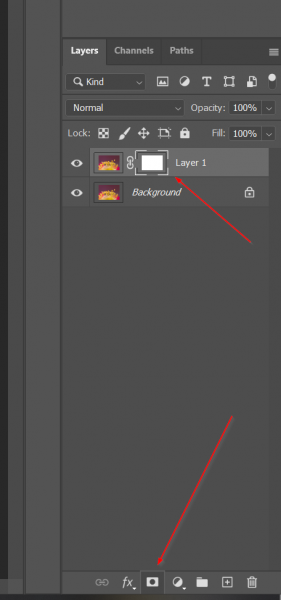
In the case of the Brightness/Contrast example above, you’d need to create a Brightness/Contrast layer.
And you’d immediately see the mask next to it:
At this point, your mask will be white, which means that any edits will be applied across the entire scene.
To selectively apply edits, first click on the mask.
Then tap Cntrl + I (Command + I on a Mac) to invert the mask and make it pure black.
Click on the Brush tool:
And paint white in the areas you want the edit to appear.
A Step-By-Step Photoshop Workflow
Now that you’re familiar with basic Photoshop functions, let’s go through a simple, step-by-step photo editing workflow.
I’m going to assume that you’re working with a JPEG, but if you’ve started with a RAW file, you’ll first edit it in a program such as Adobe Camera RAW, then bring it into the main Photoshop window.
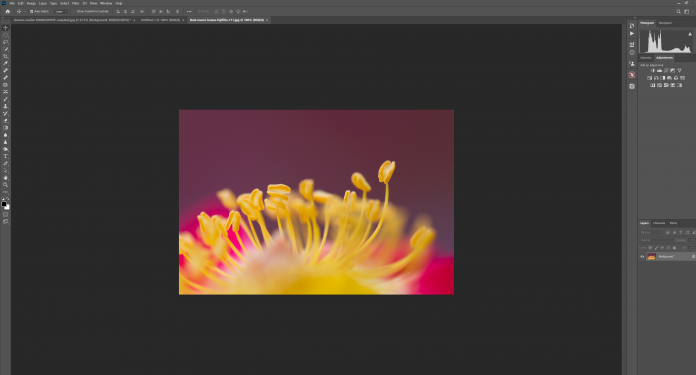
Step 1: Crop and Straighten for the Best Composition
I always recommend you start your editing off with a crop.
Here’s why:
Even though it’s a good idea to get your composition right in the field…
…you’ll often notice better compositions when you can see your image displayed on-screen.
So it pays to at least think about different cropping options and how they might improve your compositions.
Fortunately, cropping in Photoshop is very easy.
Just select the Crop tool, then drag at the edges of the crop overlay to change the crop:
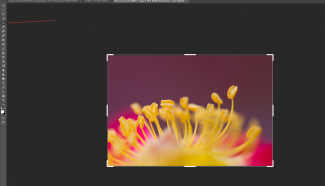
And drag up or down at the corners to rotate/straighten the image.
Related Post: Best Photoshop Overlays
If you decide your photo needs straightening but are struggling to do it manually, you can also select the Straighten tool from the Options Bar:

Then drag it across a part of your photo that should be straight.
And watch as Photoshop magically straightens your image!
Step 2: Use Curves Adjustment Layers to Control Exposure and Contrast
Now it’s time to consider your image’s exposure and contrast.
First, take a look at your histogram.
Generally speaking, the peaks should be centered toward the middle of the graph.
But if they’re skewed to the right or the left, or your image is just looking too bright or too dark overall, you’ll want to create a Curves adjustment layer.
Head down to the adjustment layer icon, then select Curves:
Then drag the tone curve upward if you want to increase exposure:
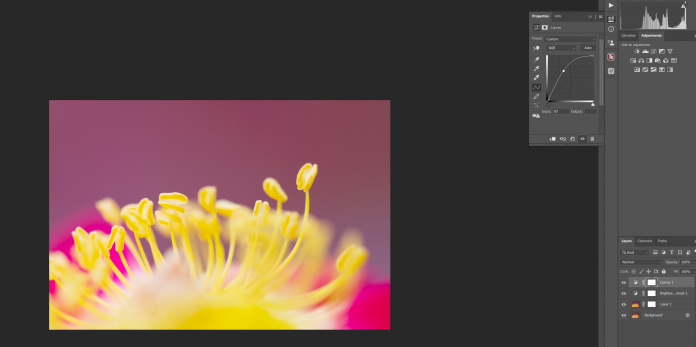
Or downward if you would like to decrease exposure:
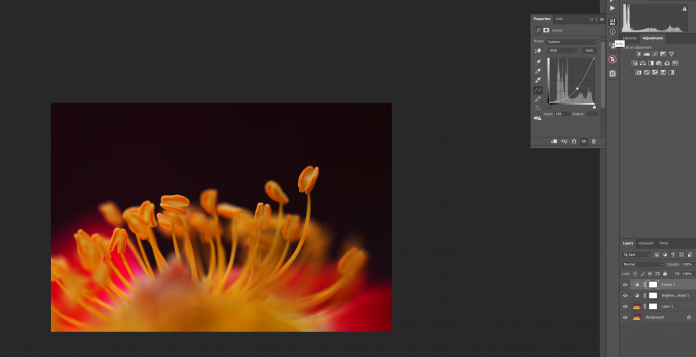
You can also increase contrast–to give your image some pop!–by creating another Curves layer and plotting an S-curve:

Step 3: Boost Colors With a Vibrance Adjustment Layer or a Hue/Saturation Adjustment Layer
Once you’ve dealt with the tones in your photo, I’d recommend boosting the colors, especially if they’re looking a little flat.
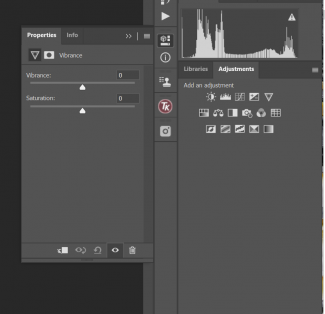
So create a Vibrance adjustment layer:

Then increase the saturation and vibrance until the colors start to look more intense.
If you want to target specific colors (e.g., boost the yellows without touching the blues), you can always create a Hue/Saturation adjustment layer:
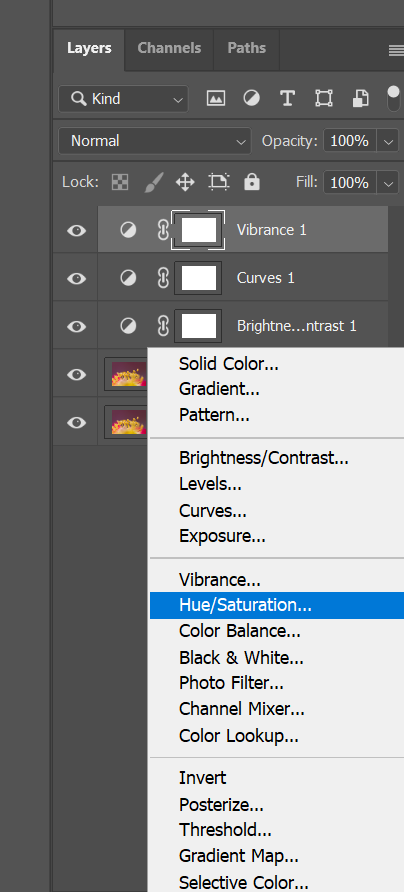
Then select a specific color and increase its saturation:

You can also adjust the hue of individual colors:

As well as the lightness:
All of these adjustments are a great way to get granular with your color toning and make sure you get the best result possible.
Step 4: Add Color Grading With a Color Balance Layer
Color grading is a great way to add a mood or an editing style to your images.
And Photoshop offers some of the best color grading tools on the planet.
Specifically, I’m a huge fan of Photoshop’s Color Balance tool, which allows you to selectively adjust the color of the highlights, midtones, and shadows in your images.
Here’s how it works:
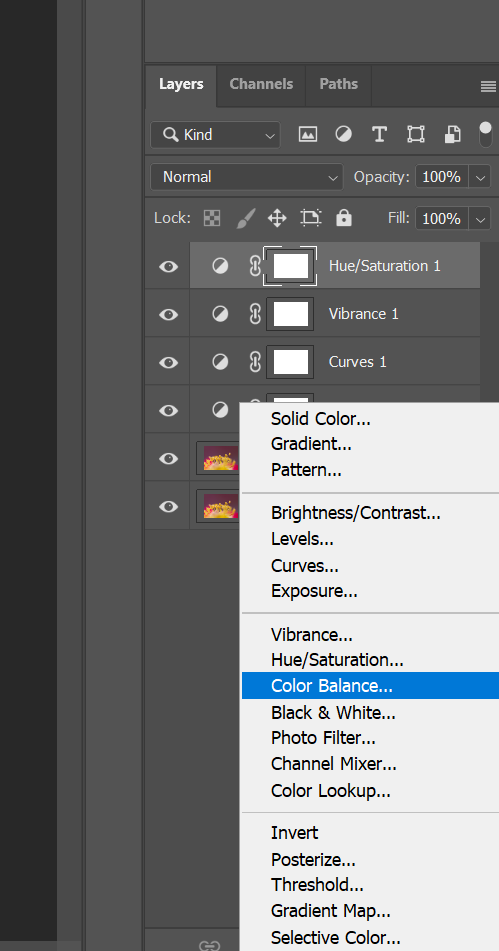
First, create a Color Balance adjustment layer:
Then select the Shadows:
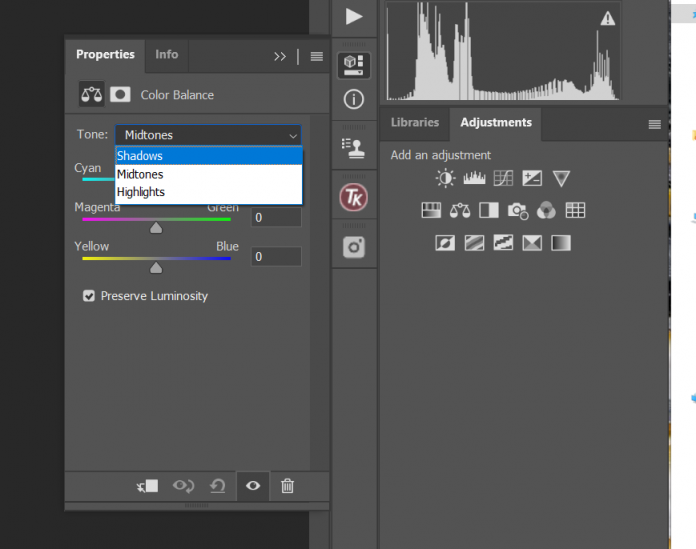
And rock the different sliders back and forth until you reach a value you like.
(Cooler shadows, such as blue or green, tend to work well.)
Then head to the Highlights:
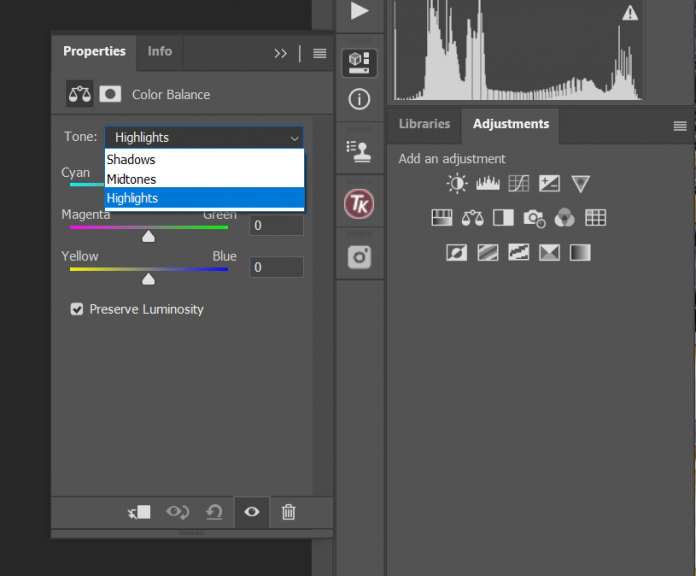
And do the same.
(Warmer highlights, such as orange or yellow, tend to look great.)
If your image colors still needs a bit of adjusting, you can head to the midtones and follow the same process:
You’ll end up with a beautiful result!
Step 5: Remove Unwanted Objects With the Spot Healing Brush Tool and the Clone Stamp Tool
Photoshop excels at removing unwanted objects.
I’m talking about annoying signs behind your subject, blemishes on flowers, distracting exit signs in the back of buildings, people standing off to the side of your subject, and more.
First, look over your photo and find any areas you want to get rid of.
Next, select the Spot Healing Brush tool:

And paint over the areas you would like to get rid of (using a brush that’s only slightly bigger than the item).
Photoshop will clean them up in moments!
Now, the Spot Healing Brush tool does an impressive job on isolated objects.
But what about objects that are connected to other parts of the scene? For instance, if you want to get rid of a sign that’s overlapping with your subject?
That’s where the Clone Stamp tool comes in.
Select this:

Make sure your brush is hard-edged:
Then hold Alt (or Option) to select an area of your photo that you wish to copy from.
Finally, carefully paint the copied area over the unwanted object–and watch as it disappears!
Step 6: Include a Vignette to Enhance the Main Subject
I always like to finish my images off with a vignette (i.e., by darkening the edges of the photo).
Why?
Because vignettes are great for focusing the viewer’s attention on the main subject. They push the viewer away from the edges of the frame and toward the interesting material in the middle.
You can create a vignette a few ways.
One option is to create a Brightness/Contrast layer, drop the brightness, then make sure the edit only shines through around the edges of the image (via a mask).
Another option is to create a blank layer, then paint around the edges of the layer in black with a huge, soft brush.
Though, you’ll often want to reduce the opacity to prevent the vignette from becoming too obvious.
Whichever way you choose, make sure you keep things looking subtle. The best vignettes are felt but not seen!
Saving and Exporting From Photoshop
Once you’ve finished editing an image in Photoshop, you’ll want to either save it, or export it for display.
The standard method of saving files in Photoshop is as PSDs, which saves layers for future editing.
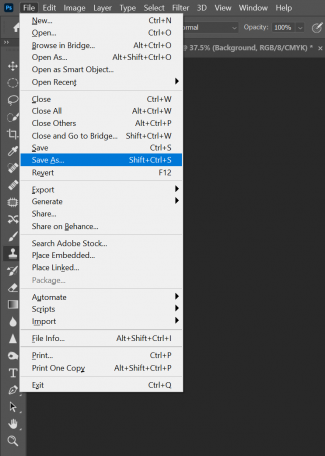
So, simply select File>Save As, then give your photo a name, choose a location, and make sure PSD is indicated at the bottom before hitting Save.
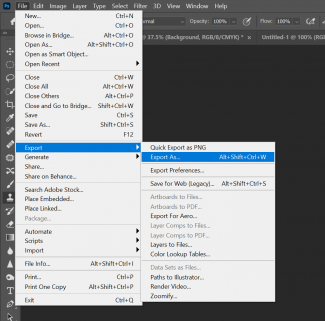
But if you want to export for display, you can always select File>Export>Export As:
Then follow Photoshop’s prompts to determine the image’s dimensions and more:
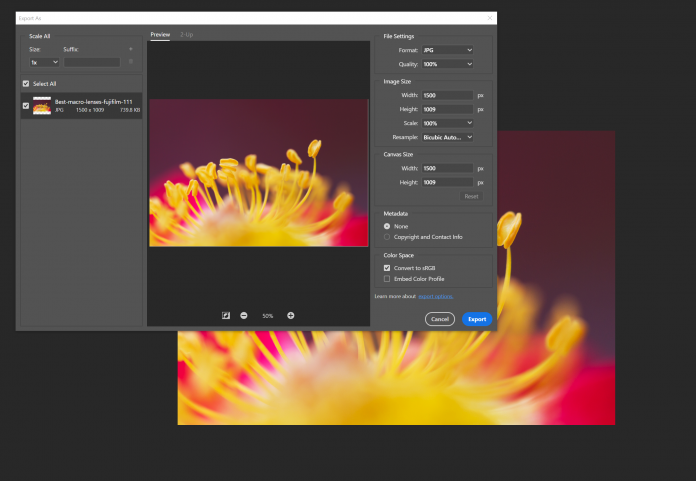
Then click Export!
How to Edit Photos in Photoshop: The Next Step
Now that you’ve finished this article, you know all about how to edit photos in Photoshop for great results.
And you’re well on your way to becoming a Photoshop expert.
Because Photoshop isn’t hard–it just takes time, and practice, to get right.
So start editing.
And see what you can create!
Is Photoshop difficult to learn?
Photoshop is more difficult to learn than most photo editors. It is a very complex program that involves quite a few tools and options. However, getting started in Photoshop isn’t especially difficult, and you certainly don’t have to learn all of its ins-and-outs (after all, Photoshop caters to both photographers and graphic designers, which means that there’s a whole suite of options that you won’t need to touch). Photoshop is definitely worth learning if you want to do careful, local editing on your photos, or you’re just after a lot of control – so even if it seems overwhelming, I recommend you stick with it! You’ll get familiar soon enough.
How do you get good at editing in Photoshop?
To get good at Photoshop, you’re going to want to use a mix of tutorials and practice. The tutorials will ensure that you know which tools and techniques to use, while the practice will ensure that you use those tools and techniques smoothly. There are plenty of great Photoshop tutorials out there, but the workflow I give in this article will certainly set you on the right track!
Can Photoshop edit RAW files?
Technically, no. Photoshop cannot handle RAW files-however, when you try to open a RAW file in Photoshop, the image will instead open in Adobe Camera RAW, which is Photoshop’s companion RAW editor. Adobe Camera RAW is quite powerful, and if you’re familiar with Lightroom Classic, you’ll recognize it. Why? Because Adobe Camera RAW is identical to Lightroom Classic Develop module! Of course, ACR doesn’t include the organizational capabilities of Adobe Lightroom Classic, but it does do an impressive job of editing RAW photos and preparing them for Photoshop.
Do you need to edit your photos in Photoshop?
No, you definitely don’t. Photoshop is mighty, but you’ll often find that you don’t need Photoshop power; instead, you’ll do just fine editing your photos in Lightroom. Photoshop does certain things that Lightroom cannot do (such as focus stacking and compositing), but Lightroom is very far-reaching. Personally, I’d recommend you start editing every photo in Lightroom, then only move over into Photoshop if the need arises.
Are there any good Photoshop alternatives?
The best Photoshop alternative out there is Serif’s Affinity Photo. It’s pretty cheap, too – so if you’re uncertain whether Photoshop is right for you, you could always start with Affinity and see what you think. However, the interfaces are quite similar, and the Affinity learning curve is similarly steep, so bear that in mind before purchasing. Also, it’s worth considering the integration options; because Photoshop is an Adobe program, you won’t find anything better than the Lightroom-Photoshop integration.
Should you edit in Lightroom and Photoshop together?
In general, yes. While you can use Photoshop as a standalone editor, and while you can also use Lightroom as a standalone editor, you can often get the best results by using the two programs together. I’d recommend you organize your photos in Lightroom and do basic editing there. Then, once you’ve hit a wall – that is, you have a photo that needs advanced adjustments – you move over to Photoshop. You can always go back to Lightroom to add finishing touches! Note that Lightroom and Photoshop are designed to work together, so going back and forth between Lightroom and Photoshop is quite seamless.
Thank you for this very clear guide to photoshop. Do you have similar articles on lightroom classic? If you do an article on lightroom it will be much appreciated.
Chandi Senaratne
Hi Chandi,
Yes, we have a complete guide on How to Edit Photos in Lightroom. You can also see other editing tips and guides on things like how to batch edit, create Lightroom presets, and find the best Lightroom alternatives here: https://stg-photoworkout-pwstaging.kinsta.cloud/best-lightroom-alternatives/.
Thanks for giving a clear information, I believe Photoshop is the best software for professional photo editing.
You consistently try to explain how to get beautiful results in Photoshop and seriously it’s beautiful presentation. But I want to know about Photoshop Editing Types. Hope to get a satisfactory answer from you.