Some people are wired with an innate ability to organize. For the rest of us, keeping a tidy workspace can take a little bit guidance and a whole lot of practice.
As a creative, you may be wondering whether a lack of organization truly impacts your overall productivity. After all, it might only take 10 minutes to dig up that pack of gels you ordered six months ago. Nevertheless, that adds up over time. Every minute spent searching through clutter takes away from time that could be spent getting closer to your goals. The stress that comes with navigating an unorganized studio adds up as well, and that can ultimately affect your functionality as an image-maker.
If you’re ready to make the changes necessary to become a more efficient artist, consider these ten small steps that you can take today to bring a bit of order to your workspace.
✔ Repurpose a tackle box for storing the small things
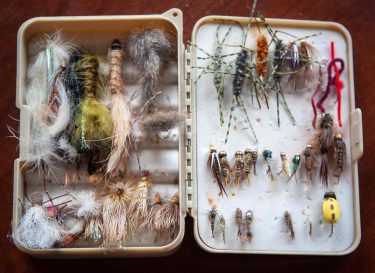
Have a fisherman in your life? You may want to ask if they have an old tackle box lying around.
There are plenty of storage solutions out there designed specifically to meet photographer’s needs. For better or worse, most of them don’t go far beyond designating compartments for lenses, a camera body, and perhaps a laptop. But as any photographer knows, there are tons of small items that any photographer should have on hand for a shoot.
The average camera bag often offers little more than a communal pocket for essentials such as clips, remotes, and spare batteries. Instead of allowing everything to get jumbled, a tackle box can provide a quick storage solution. Already compartmentalized and ready to endure the elements, it’s more than capable of keeping your equipment separate and organized. As an added bonus, the inclusion of a handle makes it easy to transport in studio and on location.
If you find that a tackle box is a bit too clunky for your purposes, you may want to at least consider grabbing a memory card wallet. Small enough to fit in a pocket or purse, these pouches make it easy to keep track of CF and SD cards. For event and wedding photographers specifically, they can offer a piece of mind. In the event of a corrupt card, they provide backup. Should you run out of space on the card inside of your camera, a memory card wallet makes it easy to smoothly switch out and continue shooting.
✔ Keep tabs on external hard drives
In the digital age, physical organization is far from the only thing a working photographer has to take into consideration. Technological innovations make it easier than ever to take hundreds and thousands of images in a very short period of time. As overall image quality continues to increase, so too does the size of every individual image file. Our computers are not built to store extensive photo libraries, so prolific photographers are often forced to seek a separate device for storing images.
With the help of software such as Adobe Lightroom, it’s easy to organize images in a way that makes sense to you. But, if you surpass the space provided by one hard drive (which, at some point, you most likely will), it’s not easy to tell what a drive may contain at a glance. The more images you collect, the more this becomes problematic.
Related Posts
Therefore, it makes a lot of sense to actually attach a label to the outside of a drive describing what it contains. If you want to take things an extra step, you may want to consider investing in multiple drives to separate personal work from client files. From there, you can shelf drives chronologically in a place that’s easy to access – that way, should a past customer call asking for a file from a wedding three years ago, you can have it ready at hand within a matter of minutes.
✔ Hang backdrops to capitalize on floor space
Backdrops are a necessary evil for any studio photographer. Sure, a colorful, clean background beats out a dull lifeless wall any day of the week. Even so, backdrops are cumbersome, heavy, and worst of all, large enough to take up significant studio space. As one of the largest pieces of equipment a photographer can have on hand, finding a place for a backdrop can be a challenge.
Investing in a wall or ceiling mount system can make a world of a difference in keeping seamlesses out of the way and easy to access. Consider a model that includes a chain pulley – this will allow you to raise and lower your material without having to climb up to your mount and make adjustments by hand. What’s more, convenience isn’t the only advantage a mount system has to offer. Keeping your seamless on a fixed pole and off the ground significantly extends its life, preventing dirt, tears, and warping.
If you prefer to use fabrics like muslin in your shoots, there are still solutions out there. Installing a rod and equipping your material with some curtain hangers is one of the most effortless ways to tackle the issue. However you go about it, keeping backdrops out of reach or to the side can make a major, immediate difference in reducing overall clutter.
Related Post: Best Backdrops
✔ Create a bench for clients that doubles as storage space for larger items
If you’re bringing clients to your home photo studio, one of the most important things you’ll want to take into consideration is their overall comfort. For this reason, many photographers take special care to include a comfortable place for clients and guests to sit while prep takes place or a shoot is in progress.
But why not kill two birds with one stone? A dual purpose “waiting area” can be useful even after everyone has left the set.
Instead of a standard couch or set of chairs, consider investing in a bench for spectators to rest. They’re easy to customize and modify, and many designs provide storage space beneath the surface meant to be sat on. That space can easily be utilized for storing larger items such as strobe heads or tripods. As such, you can maximize the amount of usable space in your studio. Items that don’t need to be used for a shoot can remain safe and out of sight inside of the bench, allowing for a neat and orderly workspace without actually having to sacrifice gear.
Related Post: 20 Photography Tips for Beginners
✔ Mount hooks to the wall to create a rack for light stands
Much like the backdrop mentioned earlier, light stands are a necessary evil in a photographer’s studio. In short, they’re ugly and they take up a lot of space. But without them, it’s difficult to support the large, expensive strobe and continuous lights safely and securely. If you have a home studio of your own, you’re likely seeking out a way to get the unused light stands in your workspace out of the way.
Luckily, it’s easy enough to create a rack that will keep them stacked neatly off of the floor. First, buy a few large utility hooks. Mount them to the wall of your studio. If you’re strapped on space, a garage or shed can get the job done just as easily. Arrange them in a way such that each hook has another hook mounted parallel, positioned a couple of feet away. Fold each stand down, then simply lie it across the utility hooks.
Depending on the size of the hooks that you’re mounting, a set of two hooks could easily support the weight of two or three light stands. If you have any extra hooks, you can mount them as well to hang reflectors and other large light modifiers.
✔ Dust off the label maker

It should come as no surprise that label makers can come in handy from time to time.
There are a few ways a label maker can be utilized around a photographer’s studio. For starters, colors labels can be used to signify where in the studio a piece of equipment belongs. Alternatively, you can use labels to spell out what’s stored in a specific drawer or closet. For an assistant or visitor not familiar with your workspace, this can be incredibly helpful. You can also use labels to differentiate gear that looks almost identical at a passing glance. For instance, it’s easy to label a lens cap with the focal length and aperture of its corresponding lens. Rather than searching through your camera bag to find the right piece of glass, the label serves as an instant indicator of what it is that you’re looking at.
Related Post: The 7 Best Cameras for Youtube Videographers
Label makers are also useful for marking gear with your name, address, email, phone number, etc. Should you misplace your camera outside of your studio, having that information accessible dramatically increases your chances of it being returned.
✔ Keep cords and chargers tidy
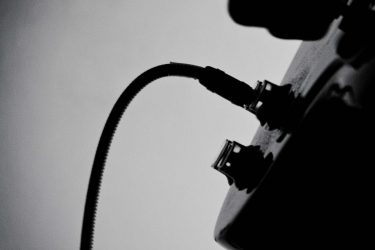
If you’ve ever found yourself stuck between of jumbled mess of wires, you’ll understand just how important this tip is. As the number of electronics you own grows, the more extension cords, chargers, and connectors you are bound to accumulate. To keep everything in order, it’s essential to keep any cables that you may have lying around stored separated.
Try out the Over/Under cable wrapping technique – you’ll find that makes maneuvering anything large and unruly easier to handle. Smaller cords are a bit more flexible and can be secured with something as simple as a twist tie. You may also want to consider investing in velcro cable ties for your largest pieces. If you want to take an extra step, color code each tie to its corresponding piece of equipment
No matter how you decide to go about it, it’s recommended that you wrap up any cables that aren’t being used for reasons that extend beyond general tidiness. Doing so can significantly extend the life of the cable, making it less susceptible to frayed wires and kinks.
✔ Put together your own mobile tethering station
Tethering stations are not an uncommon sight among professional visual and audio artists. In the case of photographer’s, the primary reason revolves around the convenience of being able to see image enlarged immediately.
However, for active photographers constantly moving around, a stationary tethering station can be restrictive. Luckily, putting together a mobile tethering station is a lot easier than one might expect. Any sort of cart with a supportive, flat surface get the job done. For those looking to go all out, there are even mobile desktop stands strong enough to support large LCD monitors. You may also want to consider investing in a station that includes cubbies or drawers. That way, it becomes easy to store studio shot essentials that could come in handy at any moment.
If mobile tethering isn’t an option , do the next best thing and bring the tethering station to your camera. Look into laptop stands capable of attaching directly to tripods as a starting point.
✔ Draw up an inventory
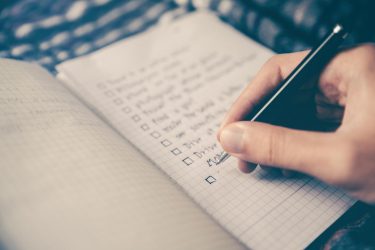
For seasoned photographers, keeping track of what tools you have on hand can be downright difficult. As the years go on, you’ll constantly find yourself switching up your gear. Inevitably, older pieces can begin to pile up. For this reason, keeping a physical list of what you have hiding in your studio can be incredibly helpful.
Be sure to include the quantity of a particular item that you have. After all, there’s a big difference between having two backup batteries available as oppose to having twelve. You may also want to include additional information about your inventory, such as the date it was purchased. Also consider making notes on any equipment that may be damaged or broken. Though the details may seem insignificant, having it all written down makes life a lot easier. Furthermore, knowing exactly what you have can be beneficial in making the best informed purchases you possibly can.
✔ Get the right travel gear
Last but not least, you’ll want to stay organized when you have to venture outside the comfort of your studio. One of the best ways to do so is by investing in a reliable carrying case.
Related Post: Best Camera Travel Bag
A popular go-to among image makers is the Pelican Case. With a practically impenetrable plastic exterior, a set of wheels, and a retractable handle, they often resemble luggage. However, the customizable interior of the case is lined with a thick layer of foam. This keeps any and all gear snuggly in place giving you a piece of mind on even the bumpiest rides. And because the design prevents gear from stacking on top of one another (or otherwise shifting in transit), everything you pack is going to be easy to access.
For those that prefer to travel a little lighter, there are plenty of messenger bags and backpacks to choose from. Try seeking out a model that includes foam inserts on the inside. This compartmentalizes each piece packed, preventing the possibility of delicate glass bumping up against something potentially harmful.