There’s one key edit that you should apply to every one of your photos:
Output sharpening.
But what is output sharpening? Why does it matter? And how do you do output sharpening for consistently great results – in a program such as Photoshop or Lightroom?
I’m going to show you everything you need to know about output sharpening so that you can display crisp, clear, sharp images on the web or by printing.
Output Sharpening in LR & PS:
What Is Output Sharpening?
Output sharpening refers to the sharpening you apply to an image while taking its output into account.
So if you’re about to export an image to Instagram, you’d apply output sharpening to make the shot look great for Instagram.
And if you’re about to export an image for printing, you’d apply output sharpening to make the final print look great.
Understanding the technical details of sharpening isn’t especially important. But you should know that sharpening makes your images crisper. It increases contrast between pixels, which makes photos look more realistic and just overall better.
Note that output sharpening isn’t the only type of sharpening you should apply to your images when editing.
Generally, photographers apply three levels of sharpening:
- Capture sharpening
- Local/creative sharpening
- And output sharpening
Capture sharpening is designed to compensate for a loss of sharpness caused by the image capture process.
Local sharpening is designed to enhance certain parts of your image, such as the eyes in a portrait photo or an animal’s head in a wildlife photo.
But output sharpening is generally the last level of sharpening that you’ll apply, and it’s designed to counteract the loss of sharpness that comes from either:
- The printing process, where the act of putting ink on paper slightly blurs your image
- The resizing process, where the act of resizing an image for the web slightly blurs your image
Generally, photographers – and post-processing programs – think about sharpening for the web and sharpening for print differently because prints tend to eat up a lot more sharpness than web resizing.
So, you’ll often want to sharpen far more for print than for internet display.
Related Post: Types of Photo Prints
Is Output Sharpening Important?
As you can probably guess:
Yes, output sharpening is important.
In fact, output sharpening is critical, and it’s a step that you should never, ever skip, unless you don’t care about your image looking crisp for later viewing.
As I explained above, output sharpening counteracts the loss of sharpness inherent in the display process.
So unless you apply output sharpening, the image you see on the screen while editing in Lightroom or Photoshop will not match the image you end up with.
Fortunately, output sharpening is so routine that Lightroom includes a couple of easy ways to do it. And in the next two sections, I’ll take you through output sharpening using Lightroom (though output sharpening in other programs, such as Luminar or Capture One, is relatively similar).
You’re also free to do output sharpening in Photoshop, and I’ve included a step-by-step sharpening process for those who prefer to sharpen this way.
But while Photoshop will give you a bit more control over your sharpening – and while there’s a number of additional Photoshop methods you can use for sharpening, if you’re so inclined – I highly recommend sharpening in Lightroom, simply because the program does a fantastic job of getting your images ready for web display and print.
Plus, it’s much easier to sharpen in Lightroom compared to Photoshop!
Getting Started
Before you do any sharpening at all, you should ask yourself:
What am I going to do with this image?
As I’ve emphasized above, the type of output is essential. If you’re going to sharpen for print, you’ll need to use different values compared to sharpening for the web.
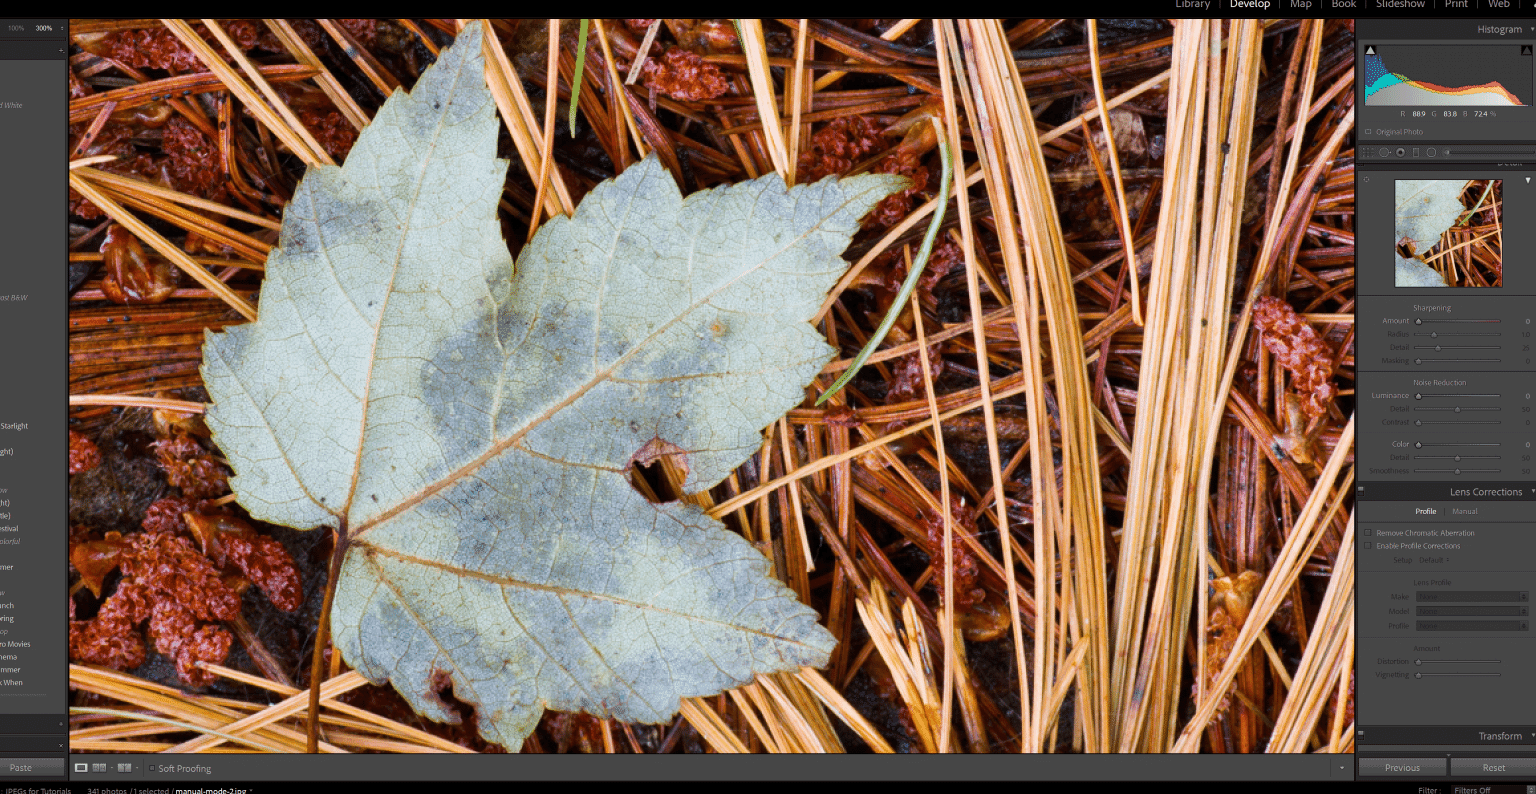
Sharpening in Lightroom: For the Web
Sharpening for web display via Lightroom is easy.
Once you’ve finished editing your image, head over to the Library module:
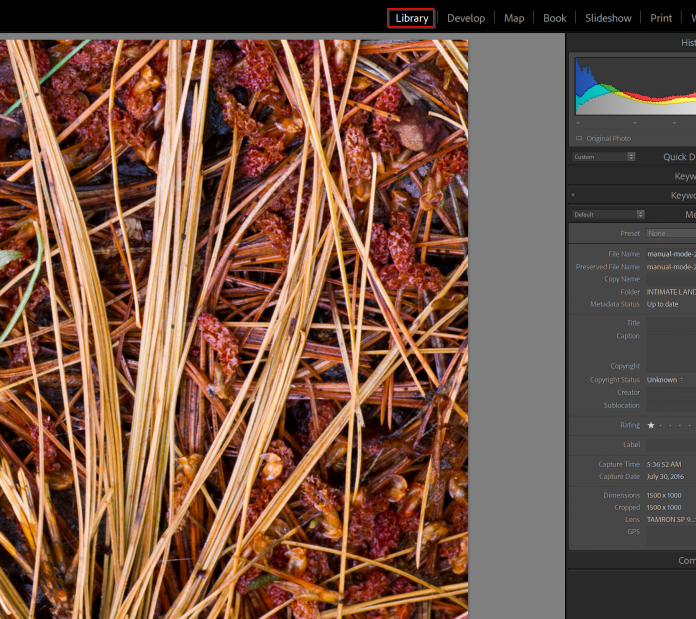
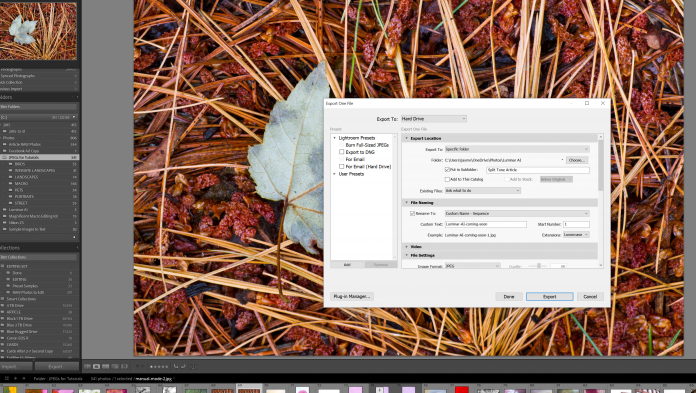
Then tap Export:
You’ll want to fill in the different options in the Export dialog, such as the export location and the file size.
You’ll find the Output Sharpening section toward the bottom, where you’ll want to check the Sharpen For box:
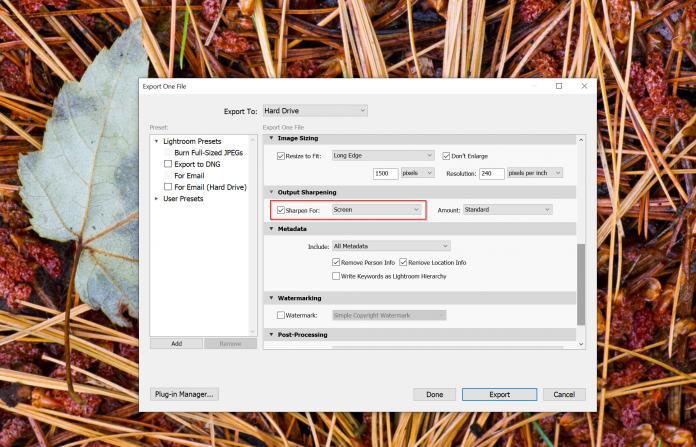
Then select Screen (since you’ll be displaying your image on the internet).
Finally, pick your Amount:
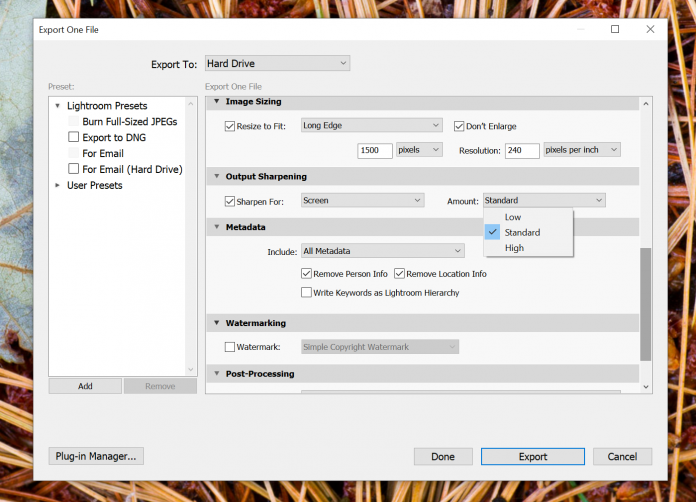
This is up to you, but I tend to use Standard for images that include a reasonable amount of detail, such as a landscape shot, and Low for images that aren’t meant to stay relatively soft, such as an abstract flower photo.
Really, I’d recommend testing out the different options to get a sense of what you prefer.
Although you can always go back and re-export the image if you’re not happy with the result so it’s not critical that you get this right from the beginning.
Then hit Export, and you’re done!
Sharpening in Lightroom: For Printing
There are two methods of sharpening for print in Lightroom.
The first follows the method I’ve outlined above – for web sharpening – exactly, like this:
First, head to the Library module and hit Export:
Next, fill out the export options, including the export location, the file type, and the file name.
Finally, select the Sharpen For checkbox, and change the dropdown item to either Matte Paper or Glossy Paper:
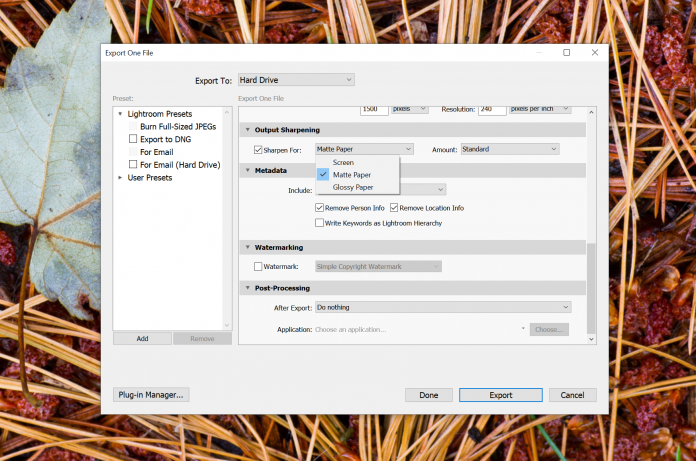
If your paper has a texture, you’ll want to select Matte Paper, whereas if your paper is smooth, go with Glossy Paper.
Related Post: Glossy vs Matte Photo Prints: Which Printing Finish Is Better?
As for the amount:
Again, this will be determined by your personal tastes. If possible, I’d start with Standard and do a few test prints, then switch to Low or High, depending on the result.
At this point, you’ll hit Export, then you’ll need to find your file and print it (either by sending it to your own printer, or submitting it to a printing lab).
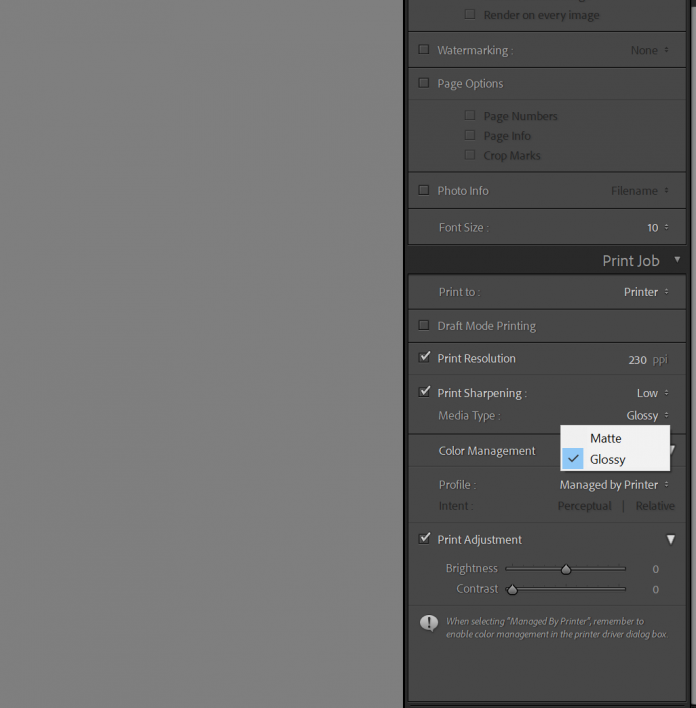
Your other method of output sharpening in Lightroom is designed for greater control when printing.
First, head to the Print module:
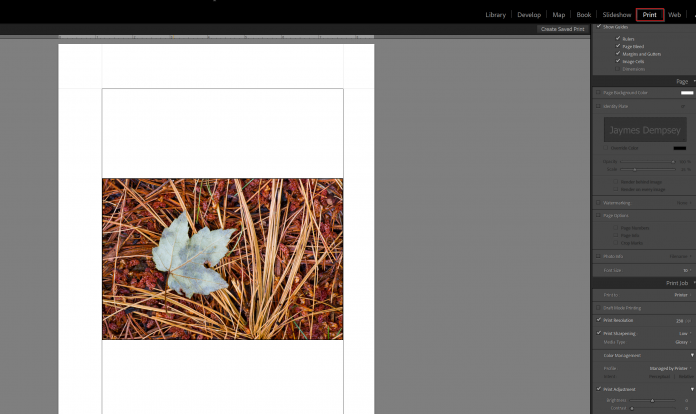
Then go through the standard printing process.
Finally, select the Print Sharpening checkbox, and set the Amount and Media Type depending on your desired output.
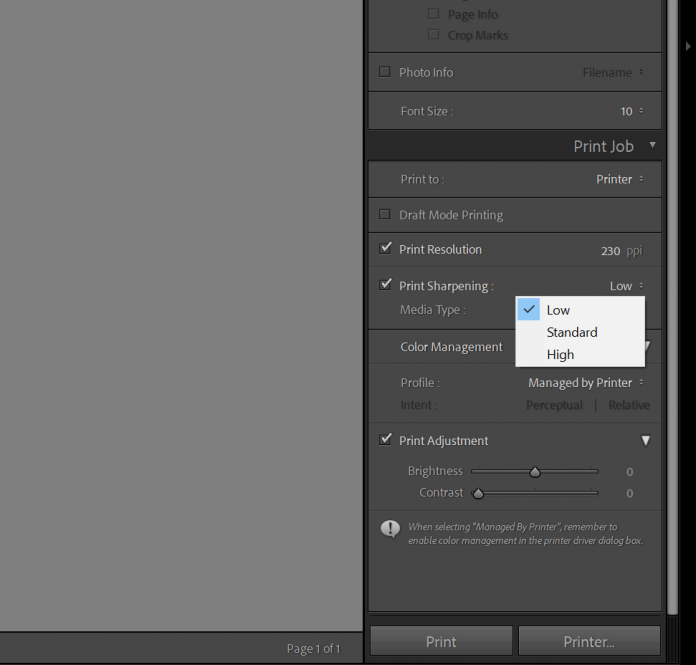
If you’ll be using textured paper, I’d recommend selecting the Matte option, whereas if you’re using smooth paper, go with Glossy.
And, as I explained above, you may want to experiment with different amounts of sharpening because different photos and different types of paper will require different sharpening values.
Related Post: Best Photo Paper in 2025
Sharpening in Photoshop: For Print and for the Web
Personally, I prefer Lightroom for sharpening for print.
However, Photoshop does offer several powerful methods of output sharpening, including high pass sharpening, which can be useful for both web sharpening and print sharpening.
In fact, high pass sharpening works well for sharpening for the web or sharpening for print; the difference is in the amount of sharpening you apply. Sharpening for the web requires less of an effect than sharpening for print.
Here’s how it works:
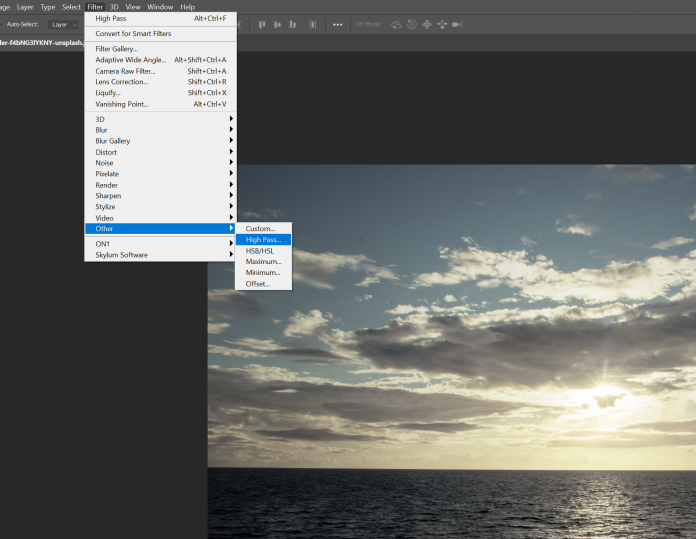
Open your image as a layer in Photoshop.
Then duplicate the layer (by right-clicking on the layer and selecting Duplicate Layer).

Next, with the duplicate layer selected, head to Filter>Other>High Pass:
Shift the Radius slider back and forth until the filter makes the important edges in the photo stand out:
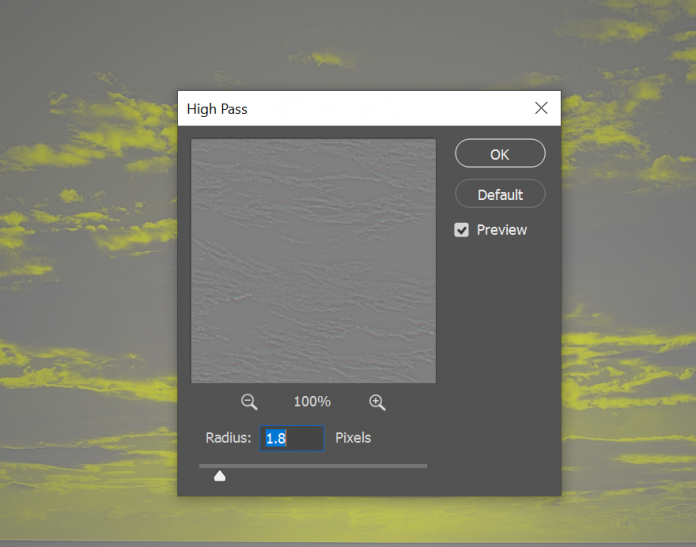
Then hit OK.
Set the blend mode to Overlay, Soft Light, Hard Light, or Vivid Light. Each of these blend modes will give you slightly different results, so feel free to experiment.
Last, if the effect is too strong, drop the layer Opacity until you like the result.
However, it’s important to note here that, when sharpening for print, you’ll generally need to oversharpen so that the image looks too crisp. That way, when the printing happens, the loss of sharpness will balance out with the oversharpened digital file.
This is also true when sharpening for the web, but you’ll want to scale the effect back somewhat.
Make sense?
Related Post: Printing in Photoshop (Step-By-Step Guide)
Avoid Oversharpening at All Costs!
It makes sense to “oversharpen” for a print when the oversharpening will be counterbalanced by the softness of a print.
But what you definitely don’t want to do is oversharpen for the web, or sharpen your prints to the point that they look bad.
In fact, oversharpening is one of the easiest ways to ruin an image because it’ll add unpleasant halos and a crunchy feeling across the image, plus it’ll enhance noise.
So make sure you inspect any files or prints for halos or other sharpening artifacts before showing them to people.
The Next Step
Now that you’ve finished this article, you should know all about output sharpening.
And you should be able to comfortably sharpen in Lightroom or Photoshop, depending on the result and level of control you’re after.
Just remember to test out different options. And don’t get discouraged if things don’t work out right away; you’ll become a skilled sharpener over time, I promise!
Do you need to do output sharpening?
I highly recommend you do output sharpening–but only if you’re exporting your image for display. You don’t need to do output sharpening if you’re planning to view your full-sized image simply on your monitor in an image-editing program!
When should you do output sharpening?
I recommend doing output sharpening as the last step of your photography workflow, after you’ve made all the other necessary adjustments to your images. In fact, some image editors will force you to do this because output sharpening will only be available in the export window.
Why is output sharpening important?
Output sharpening is important because it makes sure your image looks sharp, even after it’s gone through some sort of degrading process – such as resizing for the web or printing. You see, when you resize an image, you lose sharpness; the same is true of printing, where the process of putting ink on the page softens the image. That’s where output sharpening is helpful; by sharpening too much in advance, you can take a sharpening “hit” and up with the image you’re after.
What program should you use for output sharpening?
You can use pretty much any program for output sharpening. Lightroom has a very nice, easy output sharpening feature, which allows you to specify the type of sharpening you want to apply and simply add it when exporting your images. Photoshop’s sharpening methods are more complex, but you can really fine-tune your output sharpening through the Unsharp Mask filter or the High Pass filter. Of course, you don’t have to use either Photoshop or Lightroom–even programs such as Luminar, which don’t actually emphasize sharpening and exporting, include some type of output sharpening option!
Is image sharpening good?
Image sharpening can be good, especially because it counteracts the natural tendency of RAW files to be soft. Output sharpening is also essential because it ensures that your images remain sharp even as they’re printed, or as they’re resized for display on the web. In other words, sharpening is often important. However, you do have to be careful with sharpening because it’s easy to oversharpen and end up with a too-crisp, crunchy, unpleasant image, one with many unwanted halos.
Very helpful…Thank you.