If you’re looking for a quick and easy guide to photo editing for beginners, you’ve come to the right place.
In this article, I’m going to take you through everything you need to know about photo editing for beginners.
And by the time you finish, you’ll be able to confidently enhance your photos with a few quick clicks.
Sound good?
Let’s dive right in.
Photo Editing for Beginners:
What Is Photo Editing, and What Can It Do for Your Photos?
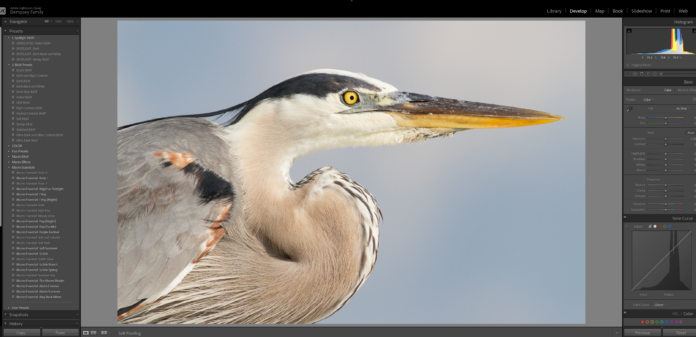
Photo editing refers to adjusting and enhancing your images after they’ve been taken, in order to create a more pleasing result.
This generally involves tweaks to the composition, to the brightness and contrast, and to the colors.
An experienced photo editor can generally take an image that looks mediocre, and–in only a few minutes–turn it into something that looks truly impressive.
That said, photo editing can’t fix a bad photo, especially if that photo used improper settings in the first place. Even the best photo editors cannot take a blurry photo and make them sharp, nor can they take an image that’s completely dark and turn it beautiful and bright.
You should also be aware that photo editing has consequences; some adjustments will subtly degrade your image, or come with tradeoffs that hurt images. So you don’t ever want to go overboard with your editing, and you also want to be aware of the drawbacks of each tool.
Make sense?
Note that photo editing differs from digital art. Digital art involves making significant manipulations to an image in order to create something that is fundamentally different from the original image, whereas photo editing is primarily about enhancing what is already there.
Is Photo Editing Really Necessary?
If you want to create beautiful, high-level images, then photo editing is required.
You see, cameras don’t produce images that look especially good right off the bat. Instead, the images need adjustments to become the best they can be; that’s where photo editing comes in.
If you’re looking to produce basic snapshots, then it’s always okay to bypass the editing stage, but just be aware that your images could look better.
Also, note that if you shoot in RAW, you simply cannot get away with skipping the edit. You must use a RAW editor to make the image accessible to others–because, with the exception of specialized programs, RAW images cannot be displayed.
While this may seem inconvenient, I highly recommend you shoot in RAW, as I’ll explain later on in this article.
Oh, and one last thing:
If you do choose to avoid shooting in RAW, and you instead use JPEG files, you don’t necessarily have to edit. And you’ll frequently find that your photos look decent straight out of camera.
But this is simply because your camera applies edits for you!
In other words:
It’s impossible to escape the editing phase.
Either you edit or your camera will edit.
And wouldn’t you much rather be the one in control?
What Is the Best Photo Editing Software for Beginners?
If you’re looking for the best beginner photo editing software, I recommend you check out this article, which gives an in-depth look at your different photo editing options:
However, I’ll briefly recommend a few of my favorite programs.
First, Skylum’s Luminar is inexpensive, it’s powerful, and it’s very beginner-friendly. I think it’s the absolute best post-processing option for beginners, and it’ll allow you to quickly get started editing your photos.

Another option is Adobe Lightroom Classic or Lightroom, which you can grab as part of an Adobe CC subscription.
Lightroom is great for photo organization, and the editor is very powerful. But the learning curve goes slightly beyond that of Luminar.
If you’re looking to just do some basic edits and you never plan to go beyond that, then Luminar is a good buy.
However, if you want to dive into editing headfirst and you eventually plan to learn Photoshop (which is the higher-level companion software to Lightroom), then start with Lightroom.
It’ll ensure you have a good RAW editing foundation, plus it integrates with Photoshop for a smoother workflow.
Getting Started With Photo Editing: Before Processing
Now that you’re familiar with the different photo editing options, let’s look at how you can prepare your images for editing.
Fortunately, there are only two simple steps:
Shoot in RAW, Not JPEG!
This is a big one.
Cameras generally offer two file formats:
RAW files contain all the original data from your images, which means that you’ll have lots to work with when editing your photos.
JPEGs, on the other hand, lack lots of key information. So while a JPEG will often look decent straight away (thanks to edits applied by your camera), you have far less editing flexibility. Which means that it’s often impossible to save a mediocre-looking or bad-looking JPEG–whereas a poor RAW file can often be salvaged.
Here’s what I recommend:
Shoot in RAW.
It’ll save you a lot of headache in the long run.
Related Post: Best RAW Converter Software
Create the Best Possible Exposure In-Camera
RAW files allow you to recover a lot of detail lost to badly-set exposures.
However, there’s a limit to what you can recover, even with RAW files.
If you capture a pitch-black image, there’s not going to be much you can do, no matter how good your editing technique.
So you’ve got to get the exposure right from the start (or at least nearly right).
This means mastering your exposure controls: the aperture, shutter speed, and ISO.
Ensure that they’re second-nature to you.
That way, you’ll be able to start off your editing with the best images!
Photo Editing for Beginners: The Editing Essentials (Step-By-Step)
In this section, I’m going to take you through a five-step plan for instantly enhancing your images.
Note that the adjustments I discuss are present in pretty much any photo editor, so you don’t have to worry about accessibility.
So without further ado, let’s get into the basic editing process for beginners:
Step 1: Straighten and Crop Your Image
As soon as you open your image, here’s where you start:
By straightening.
And then cropping.

These are extremely simple adjustments, but they can make a huge difference to your final photo.
You see, one of the easiest ways to ruin a good photo is with a crooked horizon–and you’d be surprised by how often horizons are crooked.
So do a quick horizon check. And do any necessary straightening.
Next, check your photo’s composition.
Ask yourself:
Are there any unnecessary elements? Any unwanted empty space? Any unpleasant distractions?
If so, crop these out!
Also, consider how your subject is positioned. It often helps to place your subject using the rule of thirds or the golden ratio. So consider possible crops that’ll allow you to use these compositional guidelines to the maximum extent.
Be careful with cropping, however.
Because while it might be tempting to crop all the way in until you’re left with only a few interesting details…
…this will degrade your image significantly, so that it’ll look terrible when printed, or even when displayed online at a large size.
So don’t be afraid to crop.
But crop with restraint.
Step 2: Adjust Your Exposure and Prevent Clipping
Once you’ve finished your straightening and cropping, it’s time to look at your exposure.
As I hinted at above, exposure refers to the overall brightness of your photo.
Generally speaking, you want a medium level of brightness; you don’t want an image that’s ultra-dark, and you don’t want one that’s blindingly bright, either.
You should also aim to prevent any loss of detail in the shadows (the dark parts) and the highlights) the bright parts. This is known as clipping, and it’s a key characteristic to avoid.
So here’s what you do:
Start by sizing up your image as a whole. How bright is it? Does it look good?
If your image seems too bright, go ahead and drop the exposure.
If your image seems too dark, boost the exposure.
Then take a look at the extremes of your image.
Is there any loss of detail in the highlights or shadows?
(Most post-processing programs offer a clipping warning that’ll show you areas that have zero detail, so it can be helpful to turn that on.)
If you find that you’re missing details, then try recovering the lost information by dropping the highlights and/or boosting the shadows. Especially if you’ve shot in RAW, there’s a good chance that the information is there, just hiding!
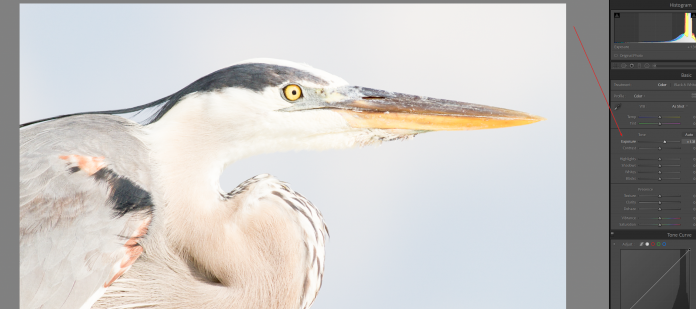
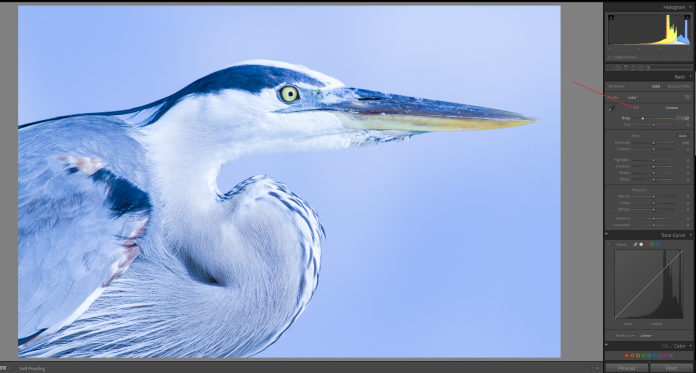
Step 3: Adjust the White Balance to Prevent Inaccurate Colors
White balance is designed to counteract color casts created by lighting.
So if you photograph under a warm (yellow) tungsten light, the white balance will apply a blue tone for an overall neutral look.
Make sense?
Now, your camera has an automatic white balance function. And it works pretty well.
(In fact, I recommend you leave your camera’s white balance set to Auto, especially if you’re shooting in RAW; you can always make corrections in post-processing.)
Occasionally, however, your camera’s automatic white balance may fail. Leaving you with a strangely-colored image.
That’s when post-processing white balance tools come in handy.
Most post-processing programs allow you to select a white balance dropper. Then click on an area of your photo that should be a neutral gray or white.
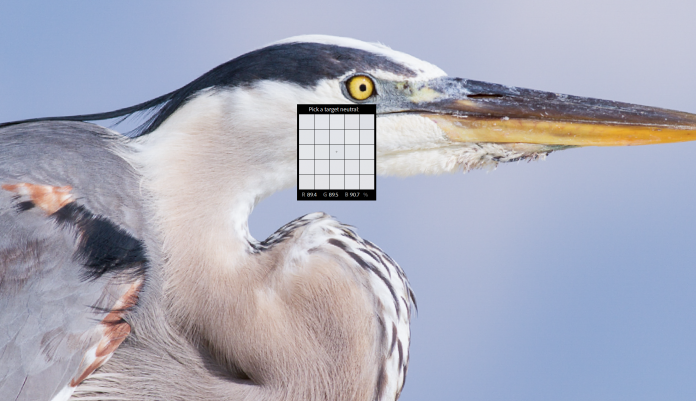
And–voila!–your whites will be balanced!
If this doesn’t appeal to you, doesn’t work, or isn’t an option, then you can always tweak the white balance sliders manually. You can add some blue into your image to cool it down, or add some yellow into the image to warm it up.
You can also adjust the tint, which can counteract green or magenta color casts in your photo.
Step 4: Boost Contrast and Saturation to Make Your Photo Pop
This step is somewhat optional. And it’ll depend on your particular photo.
But the truth is that most photos lack contrast. And they also lack vibrance.
That’s where the contrast slider and the saturation slider become insanely useful.
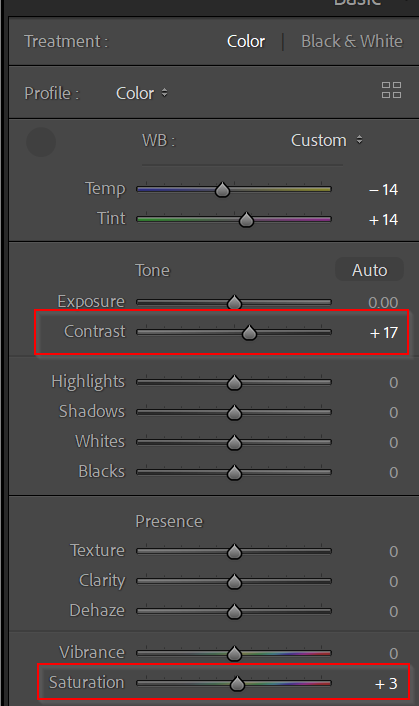
Give your contrast slider a boost, and you’ll get crisper highlights and shadows (which generally looks really, really good).
And give your saturation slider a boost, so you get colors that really pop.
Now, as I said, this step isn’t always a good idea. For instance, if you’ve captured a soft image on a misty morning, you may want to keep the contrast low for an ethereal, minimalistic shot.
But on the whole, contrast and saturation can do a great job of enhancing your images.
Because a little contrast and a bit of saturation can go a long way.
Step 5: Sharpen Your Image to Give Extra Crispness
Here’s the final beginner editing step I recommend:
Sharpening.
Sharpening can’t save a blurry photo.
But it’ll make your already-sharp images look nice and crisp.
Plus, you should always sharpen if you’re planning to display your image online, because your image editing program will reduce sharpening during the export process.
Because of these two benefits, I recommend you use a two-step sharpening technique.
First, give your photo a slight sharpening boost inside the post-processing program, especially if it’s full of tiny details that you want to enhance.
You can do this by way of a standard sharpening slider.

Second, as you export the image, select the Sharpen for Screen option (which should be offered by your editing program).
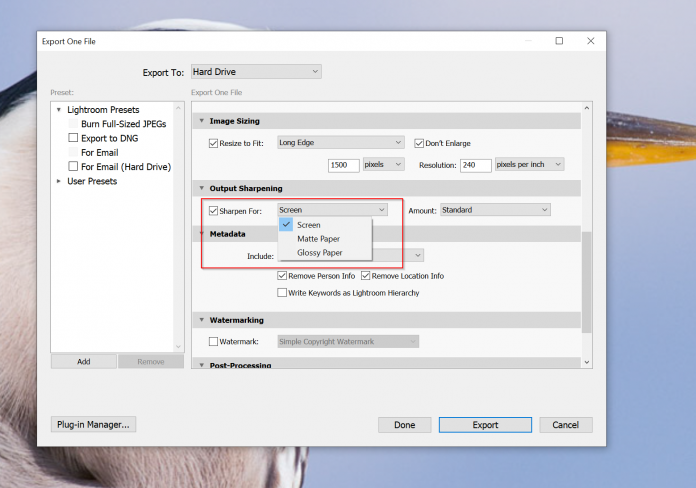
Your images will come out looking great!
Photo Editing for Beginners: What Next?
Now that you’re familiar with this simple, step-by-step editing process for beginners, you’ll be able to enhance your images in seconds.
And depending on the type of images you take and the look that you’re after, you may never need to progress beyond the edits I’ve suggested.
However…
There are plenty more edits to be made.
And there are ways to enhance your images beyond what I’ve discussed here.
So don’t be afraid to experiment with different editing options.
These days, post-processing software is unbelievably powerful–which means that the sky’s the limit!
What’s the best photo editing software for beginners?
I’d highly recommend grabbing either Adobe Lightroom Classic or Luminar 4. Both of these programs will give you a huge amount of editing power, and you’ll be able to create beautiful edits from the get-go, thanks to their overall user-friendliness. Plus, Lightroom and Luminar both offer a very deep set of tools, so that once you become more familiar with editing, you can stay inside the program and get truly professional results.
What do you need to know to start editing photos?
You don’t need to know much at all to get started! Just remember to think about your composition, the light, the colors, and the clarity. You can crop to improve the composition, you can adjust the light via exposure and contrast sliders, you can adjust the colors via saturation and white balance sliders, and you can adjust the clarity with sharpening, texture, and clarity sliders!
Is photo editing hard?
No, not at all! While it does take a lot of practice to become a true editing expert, you can start creating great results without much experience at all. Simply learn the basic editing sliders, then experiment–you’ll quickly notice adjustments you like and adjustments you dislike. From there, you can start making consistent changes to your photos that look good (and soon you’ll have your own editing style!).
What are the basics of photo editing?
There are four key aspects of photo editing that everyone should remember: composition, light, color, and clarity. In fact, if you can learn these four aspects of photo editing, then you’ll already be on your way to amazing editing results. Composition involves cropping and straightening your photos; light involves adjusting the exposure and the contrast; color involves tweaking the saturation and the white balance; and clarity involves sharpening and adding texture to your photos.
Which free photo editing software is best for beginners?
Unfortunately, no free photo editing software offers a user-friendly and powerful solution. If you don’t mind editing on your smartphone, then the free Lightroom app, the free Snapseed app, and some of the other free Adobe apps are useful–but these don’t allow you to get up close and personal with your photos on a monitor. Darktable is a free RAW editor, but it’s not very beginner-friendly, and has far too many features for my liking. Really, I’d recommend you purchase Adobe Lightroom or Luminar 4; while both of these options are paid, they offer a great experience and are very easy for beginners to get started creating beautiful edits.
This is a great article! So clearly written, easy to follow, and wise. I’ll be passing it on to all the members of our camera club.
One thing I’m wondering about: Rather than use the Contrast slider in Lightroom, I use the Whites and Blacks sliders to set the clipping points at both ends of the histogram. I’ve learned this is a better way to get the desired contrast, but you seem to disagree. Care to comment?