If you’re looking to print in Lightroom, you may be feeling confused or even a little overwhelmed.
But here’s the thing:
Printing in Lightroom is easy. In fact, it’s positively fast, once you get the hang of it.

And that’s what this article is designed to do.
I’m going to give you a step-by-step rundown of the Lightroom printing process. I’ll take you through everything you need to know, from selecting paper to output sharpening to sizing your print.
By the time you’re done, you’ll be able to print photos from Lightroom like an expert.
Sound good?
Let’s get started.
How to Print in Lightroom:
Should You Use Lightroom to Print Your Photos?
If you’ve never printed your photos before, you might be wondering:
Does it even make sense to use Lightroom for printing? Or should you print in some other program, such as Photoshop, or dedicated printing software?
The truth is that Lightroom isn’t the most powerful printing program out there.
But it’s really, really good. Lightroom will allow you to satisfy nearly all of your printing needs–especially if you’re a beginner. And it’ll let you print quickly via a carefully designed user interface that’s easy to work with.
So I highly recommend printing in Lightroom, especially when you’re starting out.
If you eventually reach a point where you need to take your printing options to the next level, then you can consider other software.
Printing in Lightroom: How to Get Started
To print in Lightroom, you need three things.
First, you need a photo printer, and you need it to be connected to your computer. Lightroom does give you the option to print to your computer desktop (i.e., print a file), which is useful if you’re planning to submit a JPEG to a printing lab.
But if you’re looking to print directly from Lightroom, then a printer is required.
Second, you need photo paper. There are quite a few options here, and you’ll want to make sure the paper is compatible with your printer.
Third, you need an edited image.
Bear in mind that image blemishes are far more obvious in print, so if you’re planning to print large, you’ll need to carefully go over your image file before starting. If you’ve done any cloning or compositing, zoom in to 100% and check your entire image for mistakes.
Also note that images look different when printed compared to displayed on a computer monitor. This has to do with a few factors, including the printer, your monitor, and the type of printer paper you use. Lightroom does allow you to preview possible printer paper–and adjust your image accordingly–so if that appeals to you, check out our tutorial on Lightroom soft-proofing.
When it comes to monitors, yours should ideally be calibrated. If it’s not, prepare for some potentially frustrating results (though if you’re willing to do some test prints, you can make even an uncalibrated monitor work).
Generally, you’ll want to edit your image knowing it’s destined for your printer. That way, you can make sure the image is bright enough, saturated enough, and more (and you’ll get better at making these corrections after you’ve done a few prints).
But there’s one post-processing aspect that you’ll need to do as part of your Lightroom printing process, and that’s output sharpening, which I’ll take you through later on in this article.
Now let’s take a look at how to print from Lightroom:
How to Print From Lightroom: Your Step-By-Step Plan
Once you have your edited image, here’s where to start…
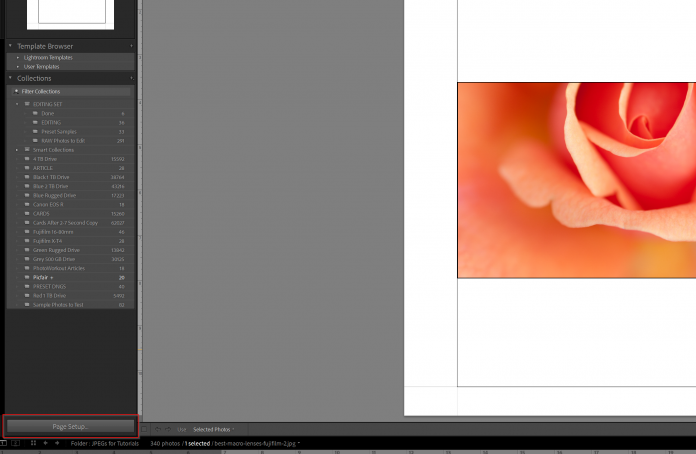
Step 1: Head Into the Lightroom Print Module and Select Your Printer and Paper
First, you’ll want to select your edited image. Then click on the Lightroom Print module:

This will open up Lightroom’s dedicated printing area, which is where you’ll do all of your printing preparation:
In the center of the window, you should see the image you’re aiming to print. (If it’s not displayed, then make sure you select it from the filmstrip across the bottom of the screen.)
Next, click on the Page Setup:
Then select the name of your printer from the dropdown menu:

As well as the size of your paper:
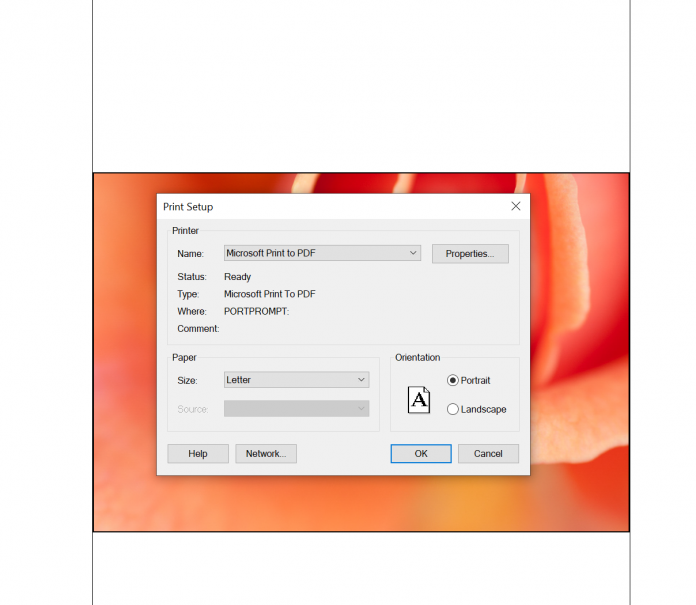
(Note that you need to get the size of your paper right; this will affect the rest of the process!)
Hit OK.
Step 2: Select Your Layout Style and Image Settings
Head over to the Layout Style panel on the right-hand side and pick a layout option:
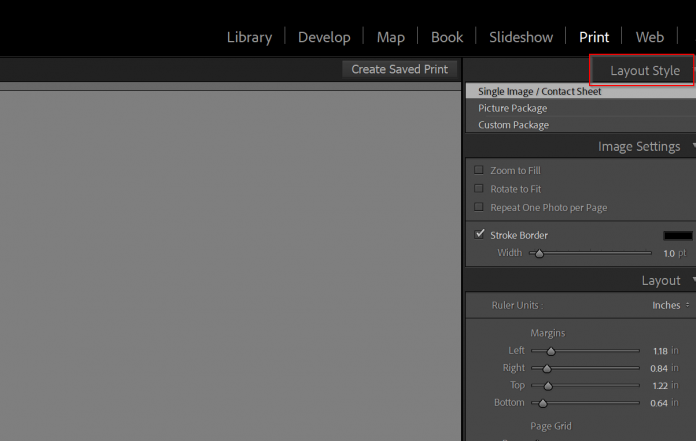
If you’re just printing a single image, the Single Image/Contact Sheet option is fine. If you’re aiming to print multiple images with different styles, the other options will be a better fit.
(For the sake of this tutorial, I’m going to assume you’re printing a single photo.)
Now, if you look at the center of the Lightroom interface, you should see a representation of your print. The white area around the image is empty paper.
You should also see gridlines on the screen that represent an Image Cell, within which your photo will sit.
Much of the Lightroom printing process simply involves achieving the perfect fit between your paper and your print. For instance, if your aim is to print off a photo that fills the entire piece of paper, you’ll want to set things up one way. But if you want to cover only part of the paper with your print, then you’ll need to arrange the print differently.
So ask yourself now:
How do I want my print to look? Do I want it to take up the entire sheet of paper? Or do I want borders of some sort?
If you’re planning on matting your image, you’ll likely want a slight border along all the edges, because otherwise the matting material will cover the edge of your composition.
But if you’re planning on free-hanging your image, or you don’t mind the edges being covered up, you can fill the entire paper with your shot.
Within the Image Settings box, check Zoom to Fill only if you want your image to take up the entire image cell.
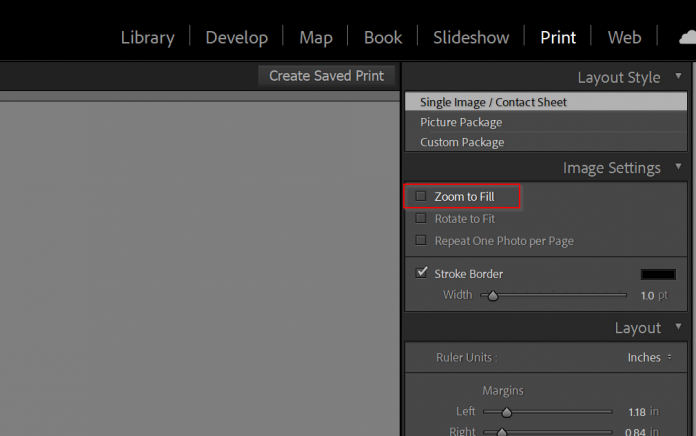
Note that the cell is distinct from the paper size. If you do check Zoom to Fill, your image will immediately enlarge to fill the cell, while disregarding its original crop.
However, if you don’t like your image aspect ratio, I’d really recommend just heading back into the Develop module and cropping your image to fit your desired size (which should be pretty closely aligned with the paper size!).
You can check Rotate to Fit if you like, and this will make sure that your image remains as large as possible within the cell, without cropping or otherwise distorting it.
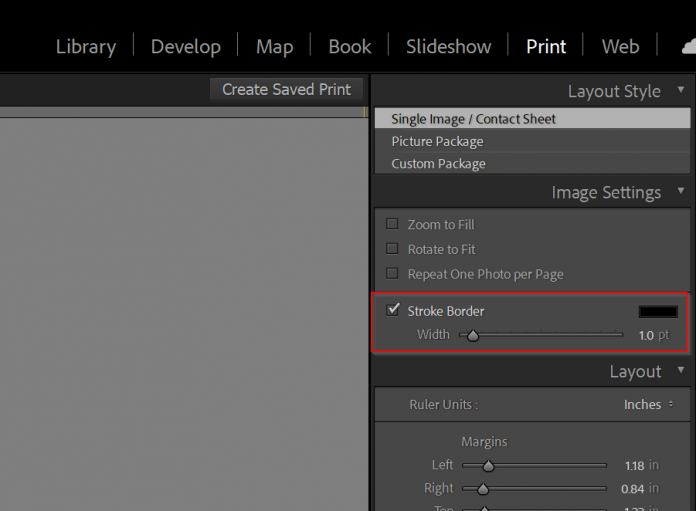
And if you want a border, you can add this via the Stroke Border option.
Just check the box, then adjust the color and width.
Step 3: Set Your Photo Size
Now head down to the Layout panel. This is where you’ll make sure your photo is the right size in reference to the printer paper.
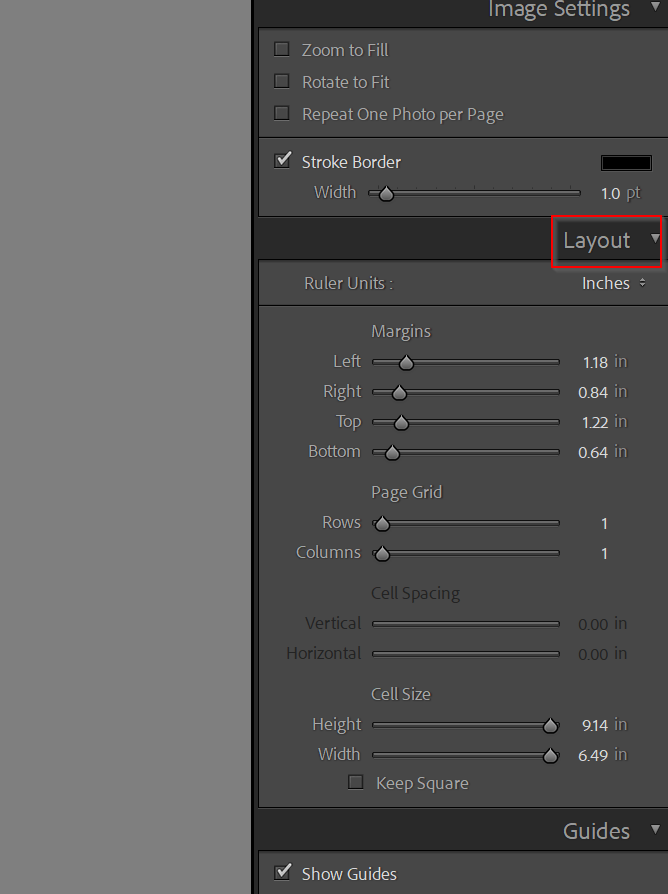
Change your Ruler Units to the measurement you’re most comfortable with:

Then start adjusting the margins until you get the result you’re after. If you’re aiming to fill the paper with your shot, you don’t need to add a margin, but if you’re leaving space for matting or signature purposes, then you’ll want to add a small margin.
As for Cell Size:
This is where you need to make sure your image takes up the correct amount of space. Zoom the Height and Width slider all the way out to ensure your image occupies the entire area of the printing paper, but be aware that any margins you’ve added will decrease the overall image size, here.

As I discussed in the last section, it’s important to make sure that your image is cropped to the right aspect ratio from the start. Don’t try to force a 4:5 image onto a 16×9 piece of paper and expect it to come out without any extra space. Instead, if your goal is to print on 16×9 paper, make sure your image is already cropped to the 16×9 aspect ratio before bringing it into the printing module.
When I’m printing from Lightroom, I set my white border space using the margins, then zoom the Cell Size sliders all the way out, so that the cell takes up as much of the image as possible.
If I see unwanted white space on any of the sides, it’s a sign that I didn’t use the right aspect ratio, at which point I’ll head back to the Develop module to get this fixed.
Step 4: Set Any Necessary Page Aspects
Head down to the Page panel:
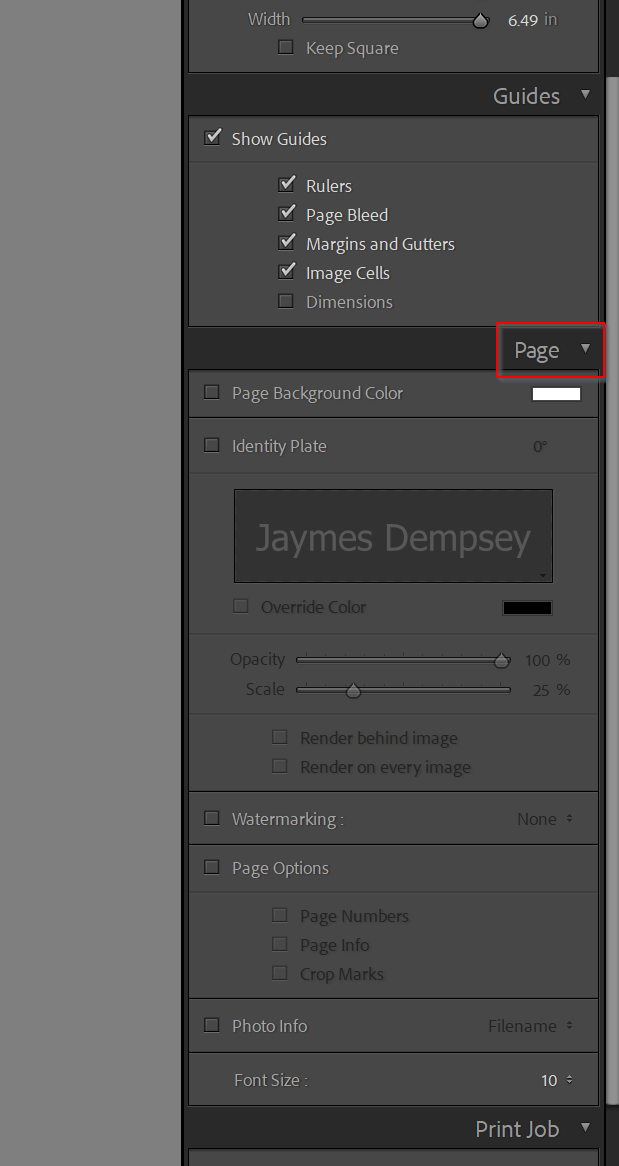
If you’d like to add a watermark to your printed image, you can use the Watermarking option.
Just hit the Checkbox and select your watermark.
Otherwise, you’re probably not going to have much interest in this section.
Step 5: Tweak Your Image Quality
Prints require output sharpening.
That’s why I always recommend you select the Print Sharpening checkbox in the Print Job panel, and select a sharpening value of at least Low, though you’ll want to experiment with Standard and High as well.
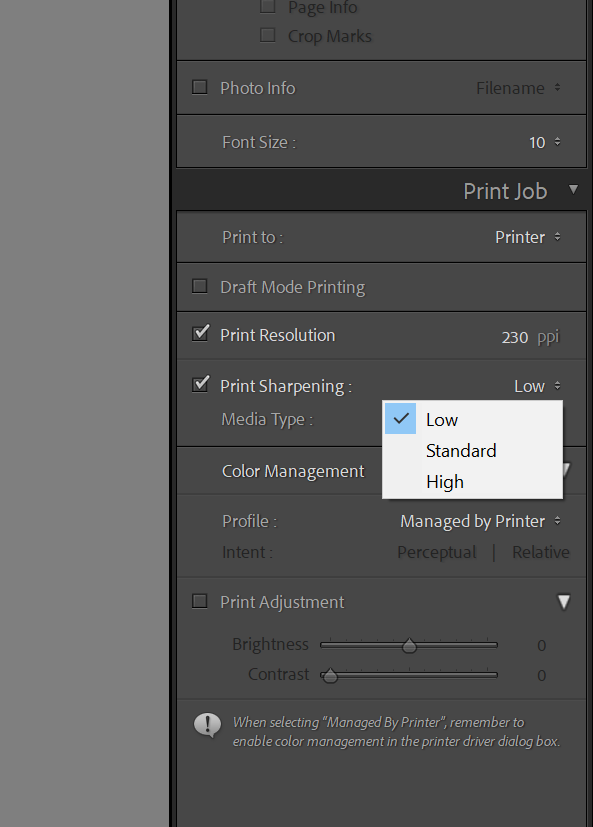
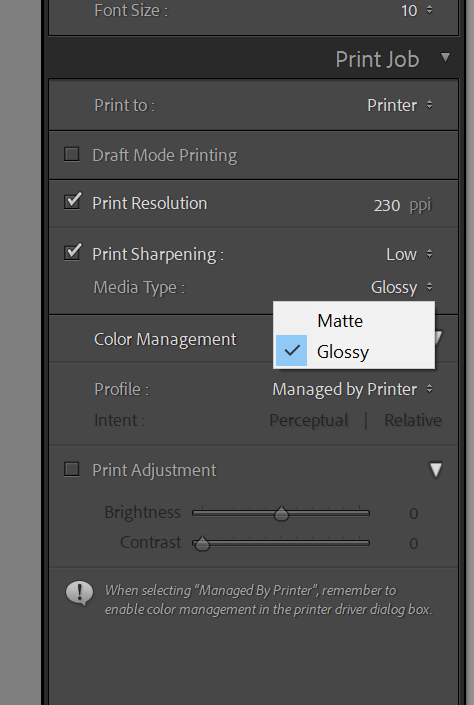
And select the Media Type that corresponds to your printing paper:
Note that this sharpening process is all about counteracting any softening due to printing onto paper. The goal isn’t really to add sharpness; instead, it’s to keep your image looking as good as it does on the screen.
You’ll also want to select the Print Resolution sent by Lightroom to your printer.
Here, I’d recommend selecting 300 PPI (or pixels-per-inch) unless you have a reason to choose a different option, though can test out different resolutions to see what you prefer.
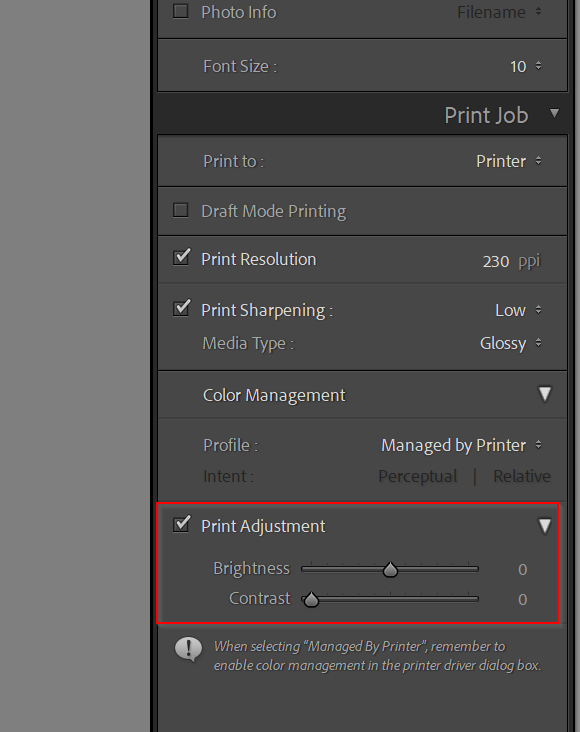
Step 6: Take Care of Color Management and Any Print Adjustments
Next, go to the Color Management dropdown and choose a Profile.
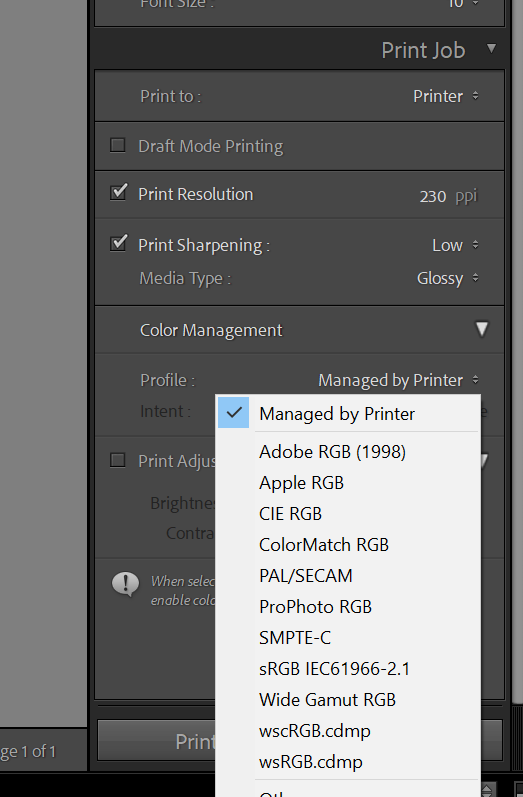
If you’re just starting out, just select Managed by Printer. If you don’t like the results, you can always delve more deeply into the other options, which can be accessed via the Profile dropdown.
If you’ve done this before, you may know of specific changes you’d like to make to the file before printing, so you can adjust the Brightness and Contrast in the Print Adjustment box:
Step 7: Select Printer and Make Sure Everything Is Correct
Before you go ahead and actually print, you’ll probably want to hit the Printer button:
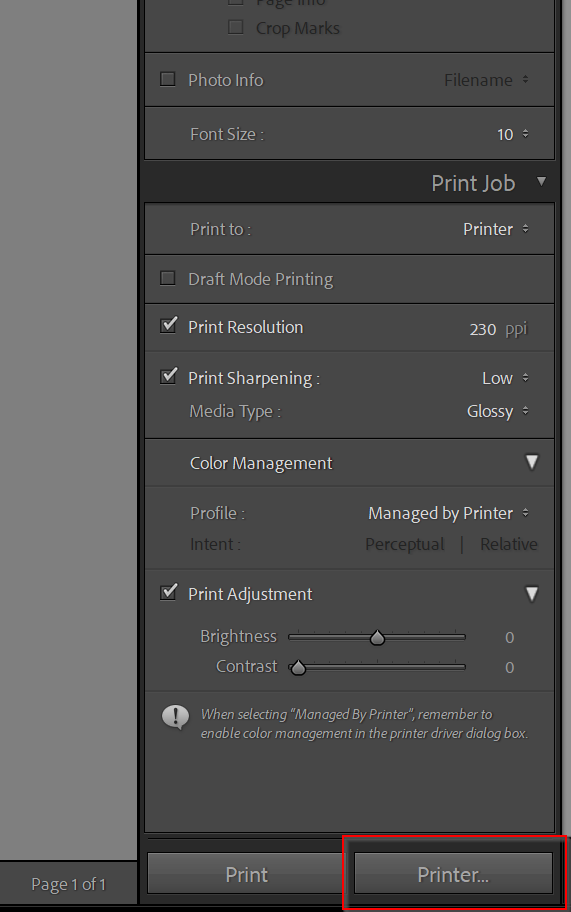
And make sure that everything looks right. You can also choose to print multiple copies of your photo here:

Then hit OK.
Step 8: Click Print!
Finally, if everything has gone well, then hit the Print button.
And that’s it! You’re done!
You should have a beautiful print, straight from Lightroom.
Print in Lightroom: The Next Step
Printing for the first time in Lightroom can seem difficult.
But if you follow the instructions I’ve given…
…you should be creating some beautiful prints in no time at all!
Can you print from Lightroom?
Yes, you can absolutely print from Lightroom! In fact, Lightroom offers one of the best printing modules available for beginners and intermediate users; it’s streamlined, it’s powerful, and it’ll help you get the job done. Even professionals use Lightroom to print their photos. It’s just that good!
Where is the Print module in Lightroom?
The Lightroom Print module can be accessed from the top of the Lightroom window. It’s sandwiched between Web and Slideshow . By clicking on the Print module, you’ll instantly have access to all of Lightroom’s printing options, including image size, color management, and more.
Is it better to print from Lightroom or Photoshop?
That depends on your needs! Lightroom is very streamlined and intuitive. So if you’re looking to print from home for the first time, or if you’re looking to prepare your files for the lab but you don’t have much experience, then Lightroom is a great option. In fact, you can continue to use Lightroom for all your printing needs and you probably won’t miss much! That said, Photoshop does give you more control, so if you’re an advanced printer or you’re looking to create graphics or complex borders, then you might want to check out Photoshop, instead.
Can Lightroom do color management for printing?
Yes! Lightroom offers lots of nice color management options. You’re able to select different profiles, and you can make sure that you get the look that you’re after. You can also soft proof in Lightroom, which allows you to simulate your expected print (and then adjust that print to get the perfect results).
Can you do soft proofing in Lightroom?
Yes, you can! In fact, Lightroom offers one of the most intuitive soft proofing interfaces, which allows you to compare a soft proof side-by-side with the original file. Then you can make adjustments to the soft proof until you have an image identical to the original–which is how soft proofing ideally should work!
No mention of nozzle check?
Where and how to do it?
Hi Jane,
Thanks for reading! I don’t believe you can do a nozzle check in Lightroom – the specifics will depend on your printer (and you can most likely do a check directly from the printer controls). If you’re not sure how to do it, I’d recommend referring to your printer’s manual, which should have detailed instructions.
Hope that helps!
Jaymes
I have followed what you said. Everything looks ok on screen. So I hit the print button and the image is printed small in the top left corner.
Do you know why?
David Atkinson
Hi David,
This one could be an issue with your printer settings – if you’re still having an issue, could you email me (jaymesdempsey@gmail.com) a screenshot of your Lightroom settings as well as a screenshot of your print dialog?
Best,
Jaymes
I’m new to lightroom and do not see where or how to “open the print module” I’ve actually googled this and searched the adobe site and see no direction on this. There is no print button or tab when I open lightroom. Can you please tell me how to or where to find this tab?
Hi Lorene,
You should see a “Print” option in the upper right-hand corner (near “Library” and “Develop”). If it’s not appearing, then you’re likely using the cloud-based version of Lightroom rather than Lightroom Classic. Unfortunately, only Lightroom Classic offers the Print module.
Hope that helps!
Jaymes
Don’t think this works in CC. Do not see a Print module.
Hi Steve,
I’m afraid you’re right – Lightroom CC doesn’t offer a Print module. To print, you’ll need to head into Lightroom Classic (or use another program, such as Adobe Photoshop).
Best,
Jaymes
Hello, why does it says “Microsoft Print to PDF”? Can’t I print to jpeg, or tiff? Or does that require another type of software? Thank you!
Hi Pedro,
When you hit the “Page Setup” button in Step 1, your main printer will generally be selected by default (and will display in place of “Microsoft Print to PDF”). However, if you do wish to choose a different printer, you can certainly use the dropdown menu to change it. You can check this again at the end of the workflow by selecting the “Printer” button (Step 7).
Alternatively, you can output a JPEG for printing; for that, you’ll need to select “Print to: JPEG File” instead of “Print to: Printer” in the Print Job panel on the bottom right-hand side. Note that printing to a JPEG will not actually print the image but will instead export a JPEG file with your created layout (which you can then print later on). The same is true of PDFs; if you select “Microsoft Print to PDF,” your image will be exported as a PDF and can be printed down the line.
Unfortunately, Lightroom doesn’t offer the ability to export print layouts as TIFFs. This is a feature that has been requested by other users, but it hasn’t yet been implemented by Adobe. If you do want to create a custom layout for printing to be exported as a TIFF, I’d recommend using Photoshop. (That said, in almost every case, you won’t be able to notice a difference between a high-quality JPEG and a TIFF, so I wouldn’t worry too much!)
One more note: Even if you want to print directly from Lightroom, it can be helpful to first choose the “Print to PDF” option that you mentioned. That way, you can quickly preview the file to be sure it looks right.
I hope that answers your question, and do let me know if you need any of those points explained in greater depth!
Jaymes
Great summary! It was very helpful. Thank you!
Thanks so much, Mike – I’m glad you found it helpful!
Thank you for the guidance which is excellent. Yet I’m afraid it will only seem to print black and white (not colour) on A3 paper (A4 works fine in colour). Suggestions please!
Bob
Hi Bob,
Thanks so much! If you’re still struggling to print A3 in color, my recommendation would be to remove the printer driver and then reinstall it (making sure that you’re using the most up-to-date version). I’ve not experienced that issue personally, but I have heard of it happening, and a driver reset can usually fix it!
Best,
Jaymes
Hi Jaymes, I am printing greeting cards in LR and I have for sometime now, but, today the black print for the Idenity plate for the back of the card is not showing up. I can hear the printer printing, but no color or very very faint. I always use black. Do you have any suggestions for me.
Thank You
Judy
Hi Judy,
That sounds like it could be an ink problem – you may need to replace your cartridge. I’d start by checking the ink levels, and if they’re low, go ahead and install a new cartridge. Hopefully, that’ll fix the issue!
Best,
Jaymes
why did the lower corner say print to file and not just print. Just started today
Hi Kay,
Great question! If the lower corner is saying “Print to File” rather than “Print,” then look in the Print Job panel (just above the “Print to File” button). Find the “Print to:” option, and change “JPEG File” to “Printer.” That should take care of the issue!
Best,
Jaymes
Hi there, what version of Lightroom are you using? I have 6.2 and cannot find the print module. thank you!
Hi Leanna,
I’d recommend using the latest version of Lightroom Classic (version 12.5, which was released in mid-August 2023 and does include the Print module).
I suspect you’re using Adobe Lightroom, formerly known as Adobe Lightroom CC, rather than Lightroom Classic (it’s confusing, I know!); it’s currently on version 6.5 and unfortunately does not include a Print module.
However, your Adobe plan may include access to Lightroom Classic – I would check the Creative Cloud app and see if it’s included!
Hope that helps, and feel free to reach out if you have any more questions!
Jaymes
What print module? I can’t see one.
Hi Jasmine,
If you’re not seeing a Print module, it’s likely that you’re using the cloud-based version of Lightroom rather than Lightroom Classic. Unfortunately, that version doesn’t include a Print module, but if you do want to print, you may be able to download Lightroom Classic for free in the Creative Cloud app!
If you open the Creative Cloud app and don’t see Lightroom Classic under the “Available in your plan” label, then you’re likely a subscriber of the Lightroom (1 TB) plan, which only offers the cloud-based Lightroom software. In that case, you might consider switching to the Adobe Photography (20 GB) plan; it costs the same as the Adobe Lightroom (1 TB) plan but includes Lightroom, Lightroom Classic, and Photoshop. The drawback is that it only offers 20 GB of cloud storage (rather than the 1 TB of cloud storage offered by the Lightroom plan). Whether the extra cloud storage is worth it will depend on your workflow!
Let me know if you have any other questions, and I’m happy to explain in greater detail if it helps.
Jaymes
I’d like to print a single image photo package that includes different sizes which would require using 2 different printers at once. Can you tell me how to do that from LR?
Hi Jennifer,
Happy to help here – just a few questions so I can better understand:
1. Do you mean that you’d like to print the same image in multiple different sizes? What would the sizes be?
2. You note that you’ll have to use two different printers at once – can you explain that in greater detail? Why would that be necessary?
Best,
Jaymes