Want to know the secrets to successfully selling Lightroom presets?
In this article, I share the basic, step-by-step process for creating and marketing Lightroom presets, including the ins and outs of preset export, packaging, and delivery. Then I offer up some advanced preset-making tips, perfect for photographers looking to increase preset interest, revenue, and happy customers.
So whether you’re looking to create your first preset pack or you’re a longtime preset-seller after some helpful tips, you’re bound to learn something new.
How to Sell Lightroom Presets:
When you buy through links on our site, we may earn a commission at no cost to you. We evaluate products independently. Commissions do not affect our evaluations.
How to Sell Lightroom Presets: Step-By-Step Guide
Creating and selling presets in Lightroom can be a somewhat involved process, but it’s probably easier than you think. If you’re willing to put in the work, you can come away with some great results.
Here’s the exact step-by-step process you need to get a preset business up and running:
Step 1: Edit a Series of Photos in Lightroom
Preset creation always begins with Lightroom editing; after all, you can’t create presets if you don’t have any edits worth selling.
But don’t just pull up a batch of photos and start editing at random. Instead, before touching a Lightroom slider, try to identify the feeling or mood that you’d like to offer with your preset pack. Carefully approach a series of photos with that theme in mind.
For instance, if you want to create dark and moody presets, you might open a set of 10 to 40 images. Then proceed through the shots, attempting to achieve that dramatic, moody look by dropping exposure, crushing the blacks, adding vignettes, and so on. It’s completely okay to experiment, and the goal here is not to produce a series of identical edits – instead, it’s to produce a series of cohesive edits, edits that all fit around a theme.
If you’re struggling to come up with a preset theme, you can always skim through photography you like. Think about what makes it special. Try to channel that magic into your own editing.
Another option is to look back through previous edits you’ve done. Does anything stand out to you? Are there any themes you could expand into a full preset pack?
Once you’re finished editing, you should have at least 10 edits you like (and I’d recommend going for 20 or 25, if possible).
Step 2: Create Presets in Lightroom
Make sure all your preset-creation images (edited in the previous step) are in a Lightroom Collection together.
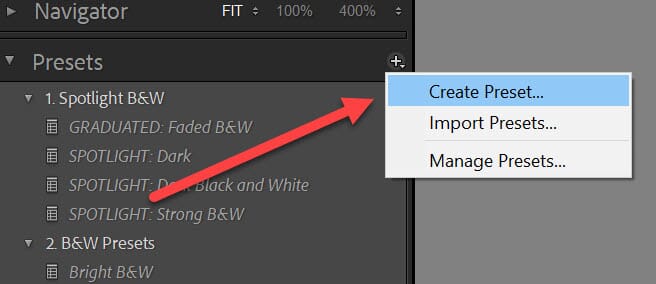
Then click on each image, select the + icon, and choose Create Preset:
Give your preset a name, and tap Check All:
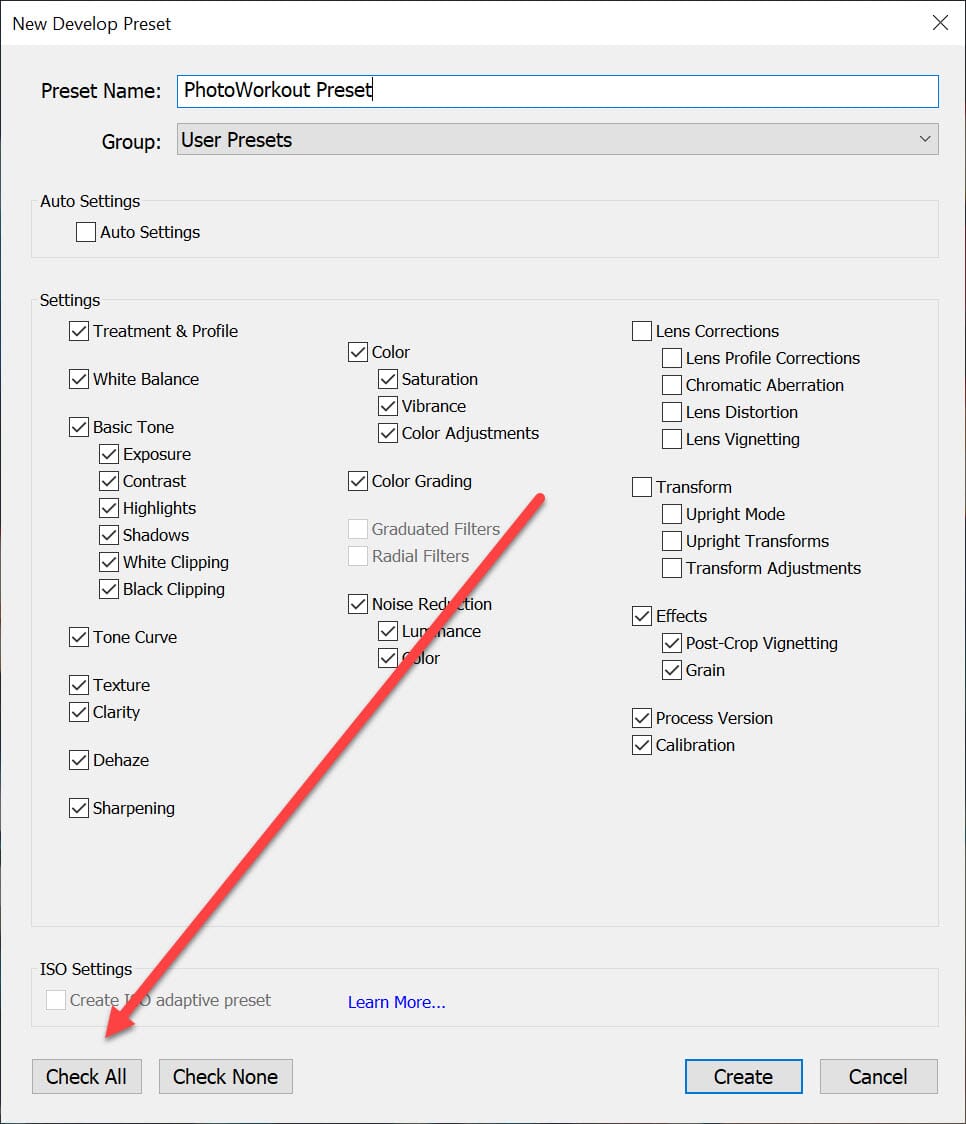
Finally, hit Create.
At this point, you should see your presets show up in the Lightroom Presets panel under User Presets.
Related Post: How to Create Lightroom Presets
Step 3: Find Your Preset Folder
You’ve created your presets – now you just need to find them on your desktop and prepare them for packaging.
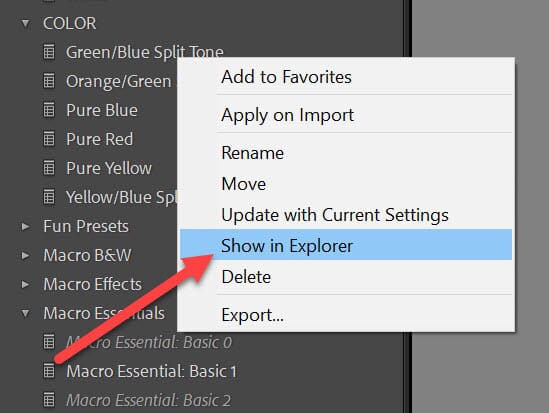
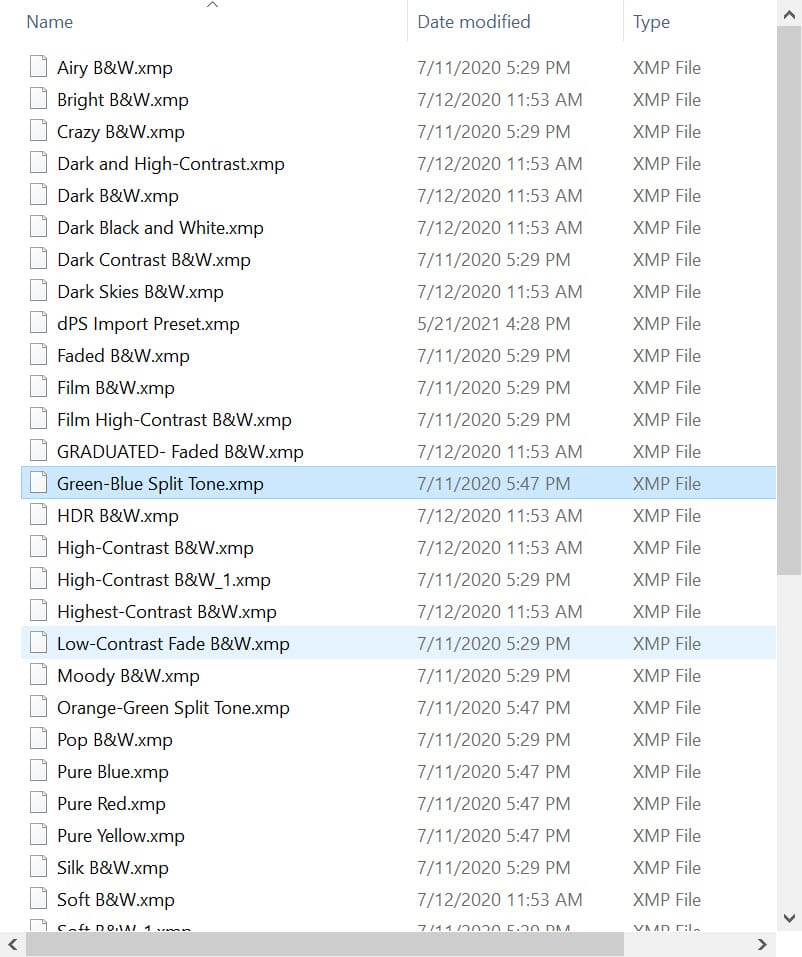
So right-click on your first preset, then select Show in Explorer (or Show in Finder on a Mac):
A window should pop up, displaying your selected preset along with all additional user presets:
If any presets are missing, they could be stored in a neighboring folder, so go up one level and check your other preset options.
And if you still can’t find all your presets, you can always right-click on the missing presets in Lightroom and locate each one individually.
Step 4: Package the Presets in a ZIP File
Find all your user presets, highlight the set, right-click, and select Send To > Compressed (zipped) folder:
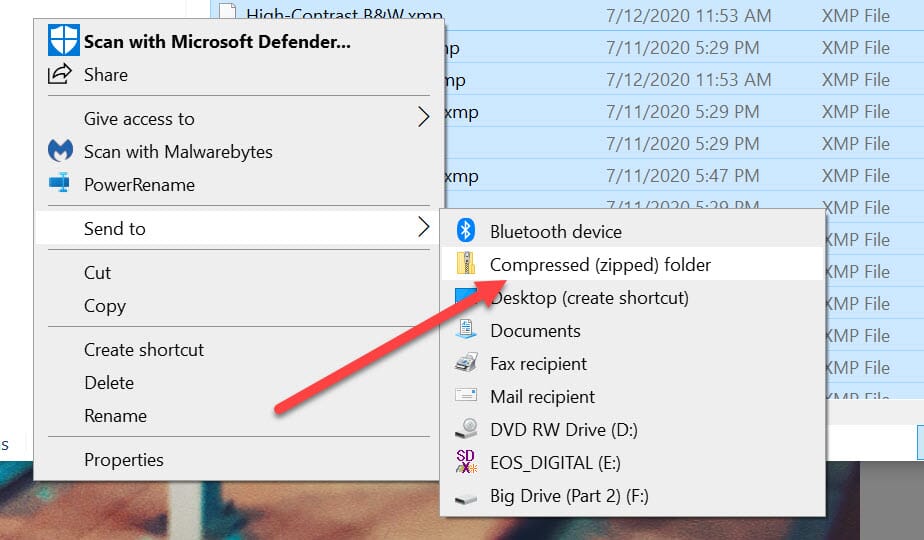
On a Mac, you’ll right-click and select Compress (folder X), where “folder X” is replaced by the name of your folder.
Your computer will produce a folder, so go ahead and give it a descriptive label that your customers will understand (e.g. Jaymes’s Moody Presets). This will be the true “Preset Pack” you send upon purchase.
Step 5: Put Your Presets Up for Sale
Now it’s time for the marketing work to begin! You can sell your presets in a few different places – such as online stores like Etsy – but I highly recommend you use a website of your own. That way, you don’t lose a cut of the preset revenue to the marketplace, and/or you don’t pay to list your presets in the first place.
If you don’t yet have a website, you can get started with WordPress for cheap. To take credit cards and/or PayPal, you’ll need to add a WooCommerce plugin, but it’s free and easy to install.
(You also have the option to create an online store using a website package like Squarespace or Shopify, though these tend to be less flexible and potentially limiting if you decide to expand to other projects later on. Yes, they’re an easy way to get started, and they can be great for beginners, but carefully weigh the pros and cons before going this route.)
Put your preset pack up on your website, and make sure to add a catchy title, a description, and some examples of the presets in action. You’ll also need to give your presets a price (if you’re struggling, see the tip section below, where I tackle preset pricing in depth).
Finally, leverage all your social media and contact channels to generate preset interest. Photographers love advertising presets on Instagram, and you can do this, too – simply put a link to your presets in your Instagram bio, then mention them on each new post (you might even include a few before/after posts, so your followers see what the presets can do.
Other marketing options include Facebook, Twitter, Tumblr, a blog, and an email list (and I discuss the latter two options in detail below).
Step 6: When a Preset Pack Sells, Send It to the Customer!
With any luck, you’ll soon have a customer or two hit the “Buy” button. You must deliver your presets both promptly and exactly as promised – otherwise, you’ll end up with refunds and frustrated customers all around.
You have two basic options for delivering presets:
- Include a download link right after checkout.
- Send the presets in an automated email triggered by the checkout process.
Personally, I’m a fan of the second option – it’s more personal, and it lets you use the preset purchase as a jumping off point for further emails. But it does take some time to set up and requires email autoresponder software.
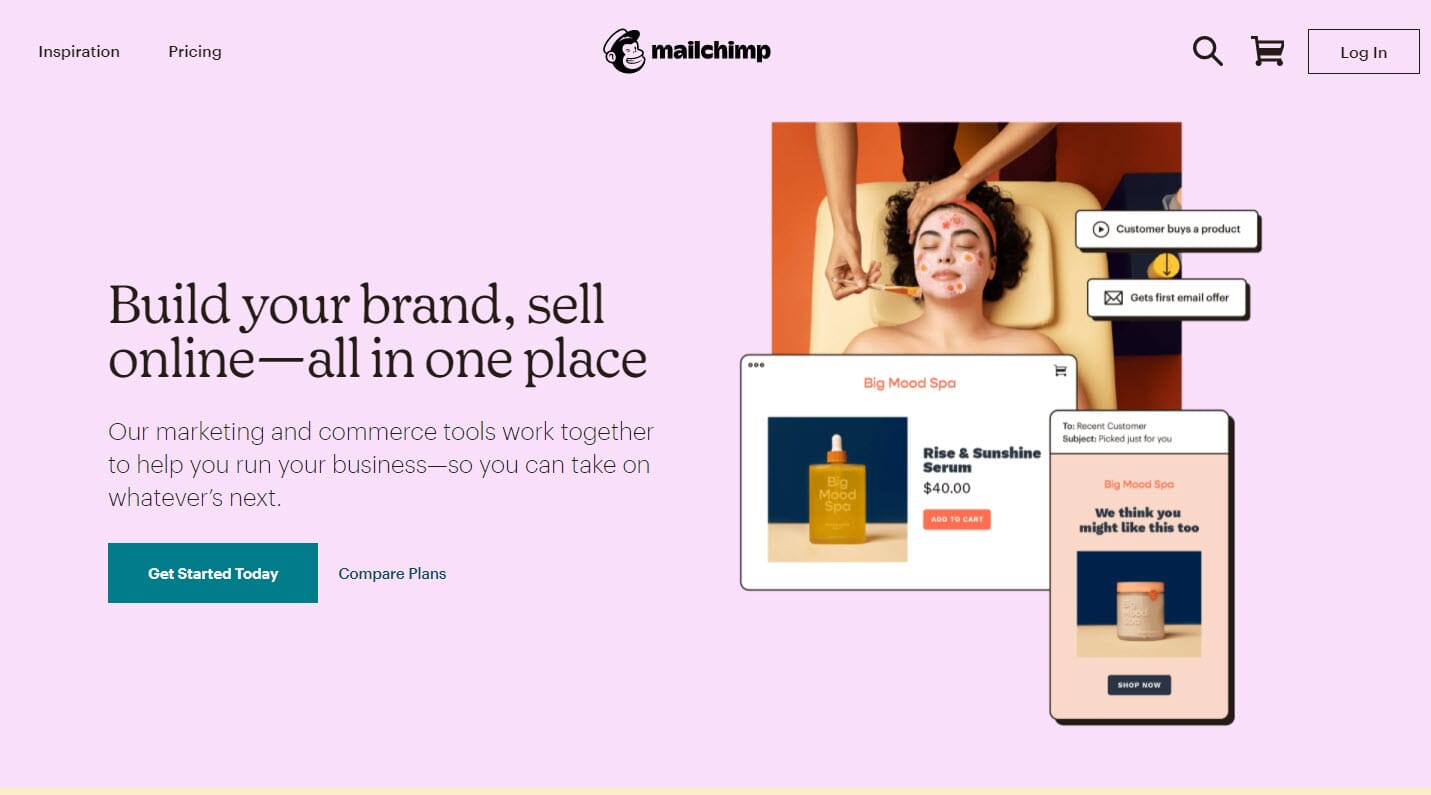
(If you do decide to go with the email route, check out Mailchimp, which offers a powerful free plan plus WooCommerce integration.)
Most importantly, however, is that you give easy access to your presets. Provide a smooth delivery experience, and your customers will be more likely to refer you to their friends, plus they’ll be first in line when you put out Preset Pack Number 2, 3, and 4.
Oh, and if you get customer service emails asking for help, respond immediately. Buyers can get impatient very quickly, and complaints (or refund requests) are the last thing you want to deal with.
Tips for Selling Lightroom Presets
Now that you’re familiar with the preset selling basics, I’ll share some tips and tricks for improving both preset quality and preset sales.
1. Test Your Checkout Process as Soon as Possible
While eCommerce systems are more powerful than ever, they’re also annoyingly complicated – and one small mistake can lead to serious issues, such as every customer’s order getting discarded.
So before your preset packs go live (or as soon as they go live, at the very latest), make sure you go through the checkout process at least a couple of times. And check everything – putting in credit card information, heading through to PayPal, receiving the preset delivery following a purchase – whatever could stall the selling process, you should test, test, and test again.
By the way, most selling platforms should have an option for adding in a fake credit card, so no need to worry about purchasing presets from yourself, sending yourself refunds, etc.
2. Keep Your Presets Targeted
As I mentioned in the how-to section above, it’s important you keep your presets cohesive; ideally, all presets should cluster around a single theme (e.g., a feeling, an atmosphere, or a season).
But you should also try to target your presets as much as possible. In other words, don’t attempt to create presets for every photographer on the planet, but instead offer presets for, say, portrait photographers, landscape photographers, or macro photographers. That way, a customer will feel more confident that the preset pack will work for them (and will be inclined to choose your preset pack over a one-size-fits-all alternative).
In general, targeting based on genre is the way to go, but you might also consider other methods of targeting – by season, for instance (autumn presets are quite popular), or even by style (photographers love vintage presets!).
3. Be Careful With Selective Adjustments
When creating your presets, you can make any adjustments you like, including white balance, exposure, color grading, sharpening, and more.
But while selective adjustments using the Adjustment Brush, Radial Filter, and Graduated Filter can certainly be incorporated into a preset, I’d caution you against it.
Why?
Imagine a portrait photography preset where you applied a slight exposure adjustment to the subject’s eyes using a Radial Filter. Sure, it works on the original photo. But apply it to a second photo, and the adjustment will probably miss the subject’s eyes and brighten up the ears or the nose or something else entirely, which looks super weird and is bound to confuse the viewer.
Related Posts
Now, this type of location-based adjustment can work, but you must clarify it for your customers what you’re doing and what’s required of them. When applying the preset, they’ll need to activate the Radial Filter, then position each individual Filter over the subject’s eyes. Make sense?
4. Spread the Word (Especially Among Your Fans)
As soon as your preset pack goes live, you must market it. A “Build it and they shall come” mentality is bound to fail (after all, how will photographers know where to look?).
While social media can work for preset marketing, I’d highly recommend you take steps to create an email list (here, Mailchimp will be a big help!). Then, once your presets are ready, you can shoot out an email or three to your fans, and they’ll (hopefully) flock to your presets and buy them right up.
How do you create an email list?
The easiest way to start is with a blog. Create a simple WordPress site, write about topics your ideal followers care about – most likely photography and photo editing – and generate some traffic. If you put a sign-up form on your blog, you’ll start to see subscribers, who will in turn open your emails, buy your presets, and even recommend you to their friends.
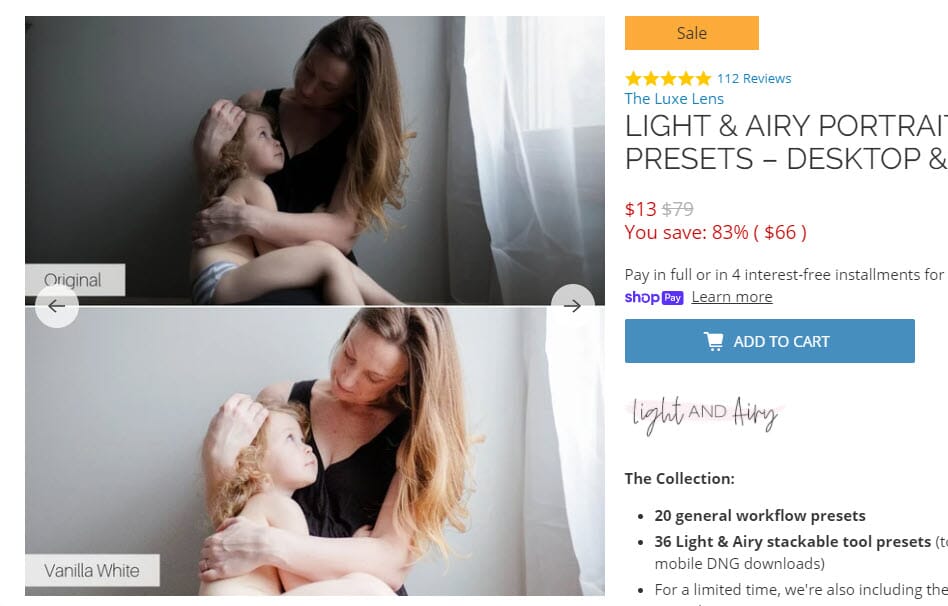
5. Include Plenty of Before/After Images
Presets are visual products. So while you can certainly market them with helpful descriptions, don’t neglect visual advertising – specifically before and after comparisons that really show what your presets can do.
I’d recommend including before and after comparisons for at least five presets, maybe more. Fortunately, this isn’t hard – just export JPEGs of images before preset editing, then export a second set after preset editing. You can combine these in Photoshop, or (if you want to get fancy!), you can use a plugin that’ll let your viewers slide between before and after views.
6. Don’t Try to Undercut the Competition on Price
Photographers often struggle to price their presets, which is understandable – after all, if you look at the competition, you’ll see some presets for dozens (or even hundreds) of dollars and some presets for free.
And while I can’t say exactly how much you should price your presets, I’d like to highlight the importance of valuing your presets. You might be tempted to offer your presets for pennies, but I recommend against this; instead, if you’ve put genuine effort into your presets, put them up for at least $10 USD, and possibly much more.
Plus, if you do price them too high and no one bites, you can always drop the price for a sale later on.
7. Give Your Customers an Instruction Sheet
Downloading and setting up presets can be confusing, so don’t leave your customers stumbling around in the dark.
Instead, include an instruction sheet alongside your presets. You can explain the absolute basics (how to extract files from the ZIP folder and install your presets in Lightroom), but you can also add on additional tips (such as how to use the presets for the best results).
Selling Lightroom Presets: Conclusion
Well, there you have it:
A simple guide on how to sell Lightroom presets successfully. Hopefully, you can now confidently make (and market!) your presets, so give it a try.
And good luck!
Hi, really helpful article, thank you for the information but for the life of me I can’t find a simple guide on how to upload a Lightroom preset onto etsy to then sell!!! Is there a simple explanation on this? Simply… how to save the file as a preset in Lightroom > how to upload it to Esty ready to sell for anyone to download to their mobile or desktop etc?
Much appreciated,
Nick.
Thanx for this simple explanation
I just want to say, Thank you so much for this blog post and step by step process. You are a GEM! Thank you for creating value.