Are you looking to understand short lighting? Do you want to use short lighting in your photograph for great results?
That’s what this article is all about.
I’m going to explain everything you need to know about short lighting.
And then I’m going to show you how you can use short lighting for gorgeous, dramatic portraits, with just a single light source (though I’ll also be sure to get into more advanced short lighting methods!).
Let’s dive right in.
Short Lighting in Portrait Photography Explained:
What Is Short Lighting?
Most lighting patterns rely on positioning lights at different angles.
So if you position the light at 90 degrees from your subject, you’ll get one result; if you position the light at 45 degrees, you’ll get another result; if you position the light directly above your subject, you’ll get a third result.
But short lighting is different.
You see, while short lighting does rely somewhat on the position of the lights…
…it relies much more heavily on the position of your camera–and the angle of your camera to the subject.
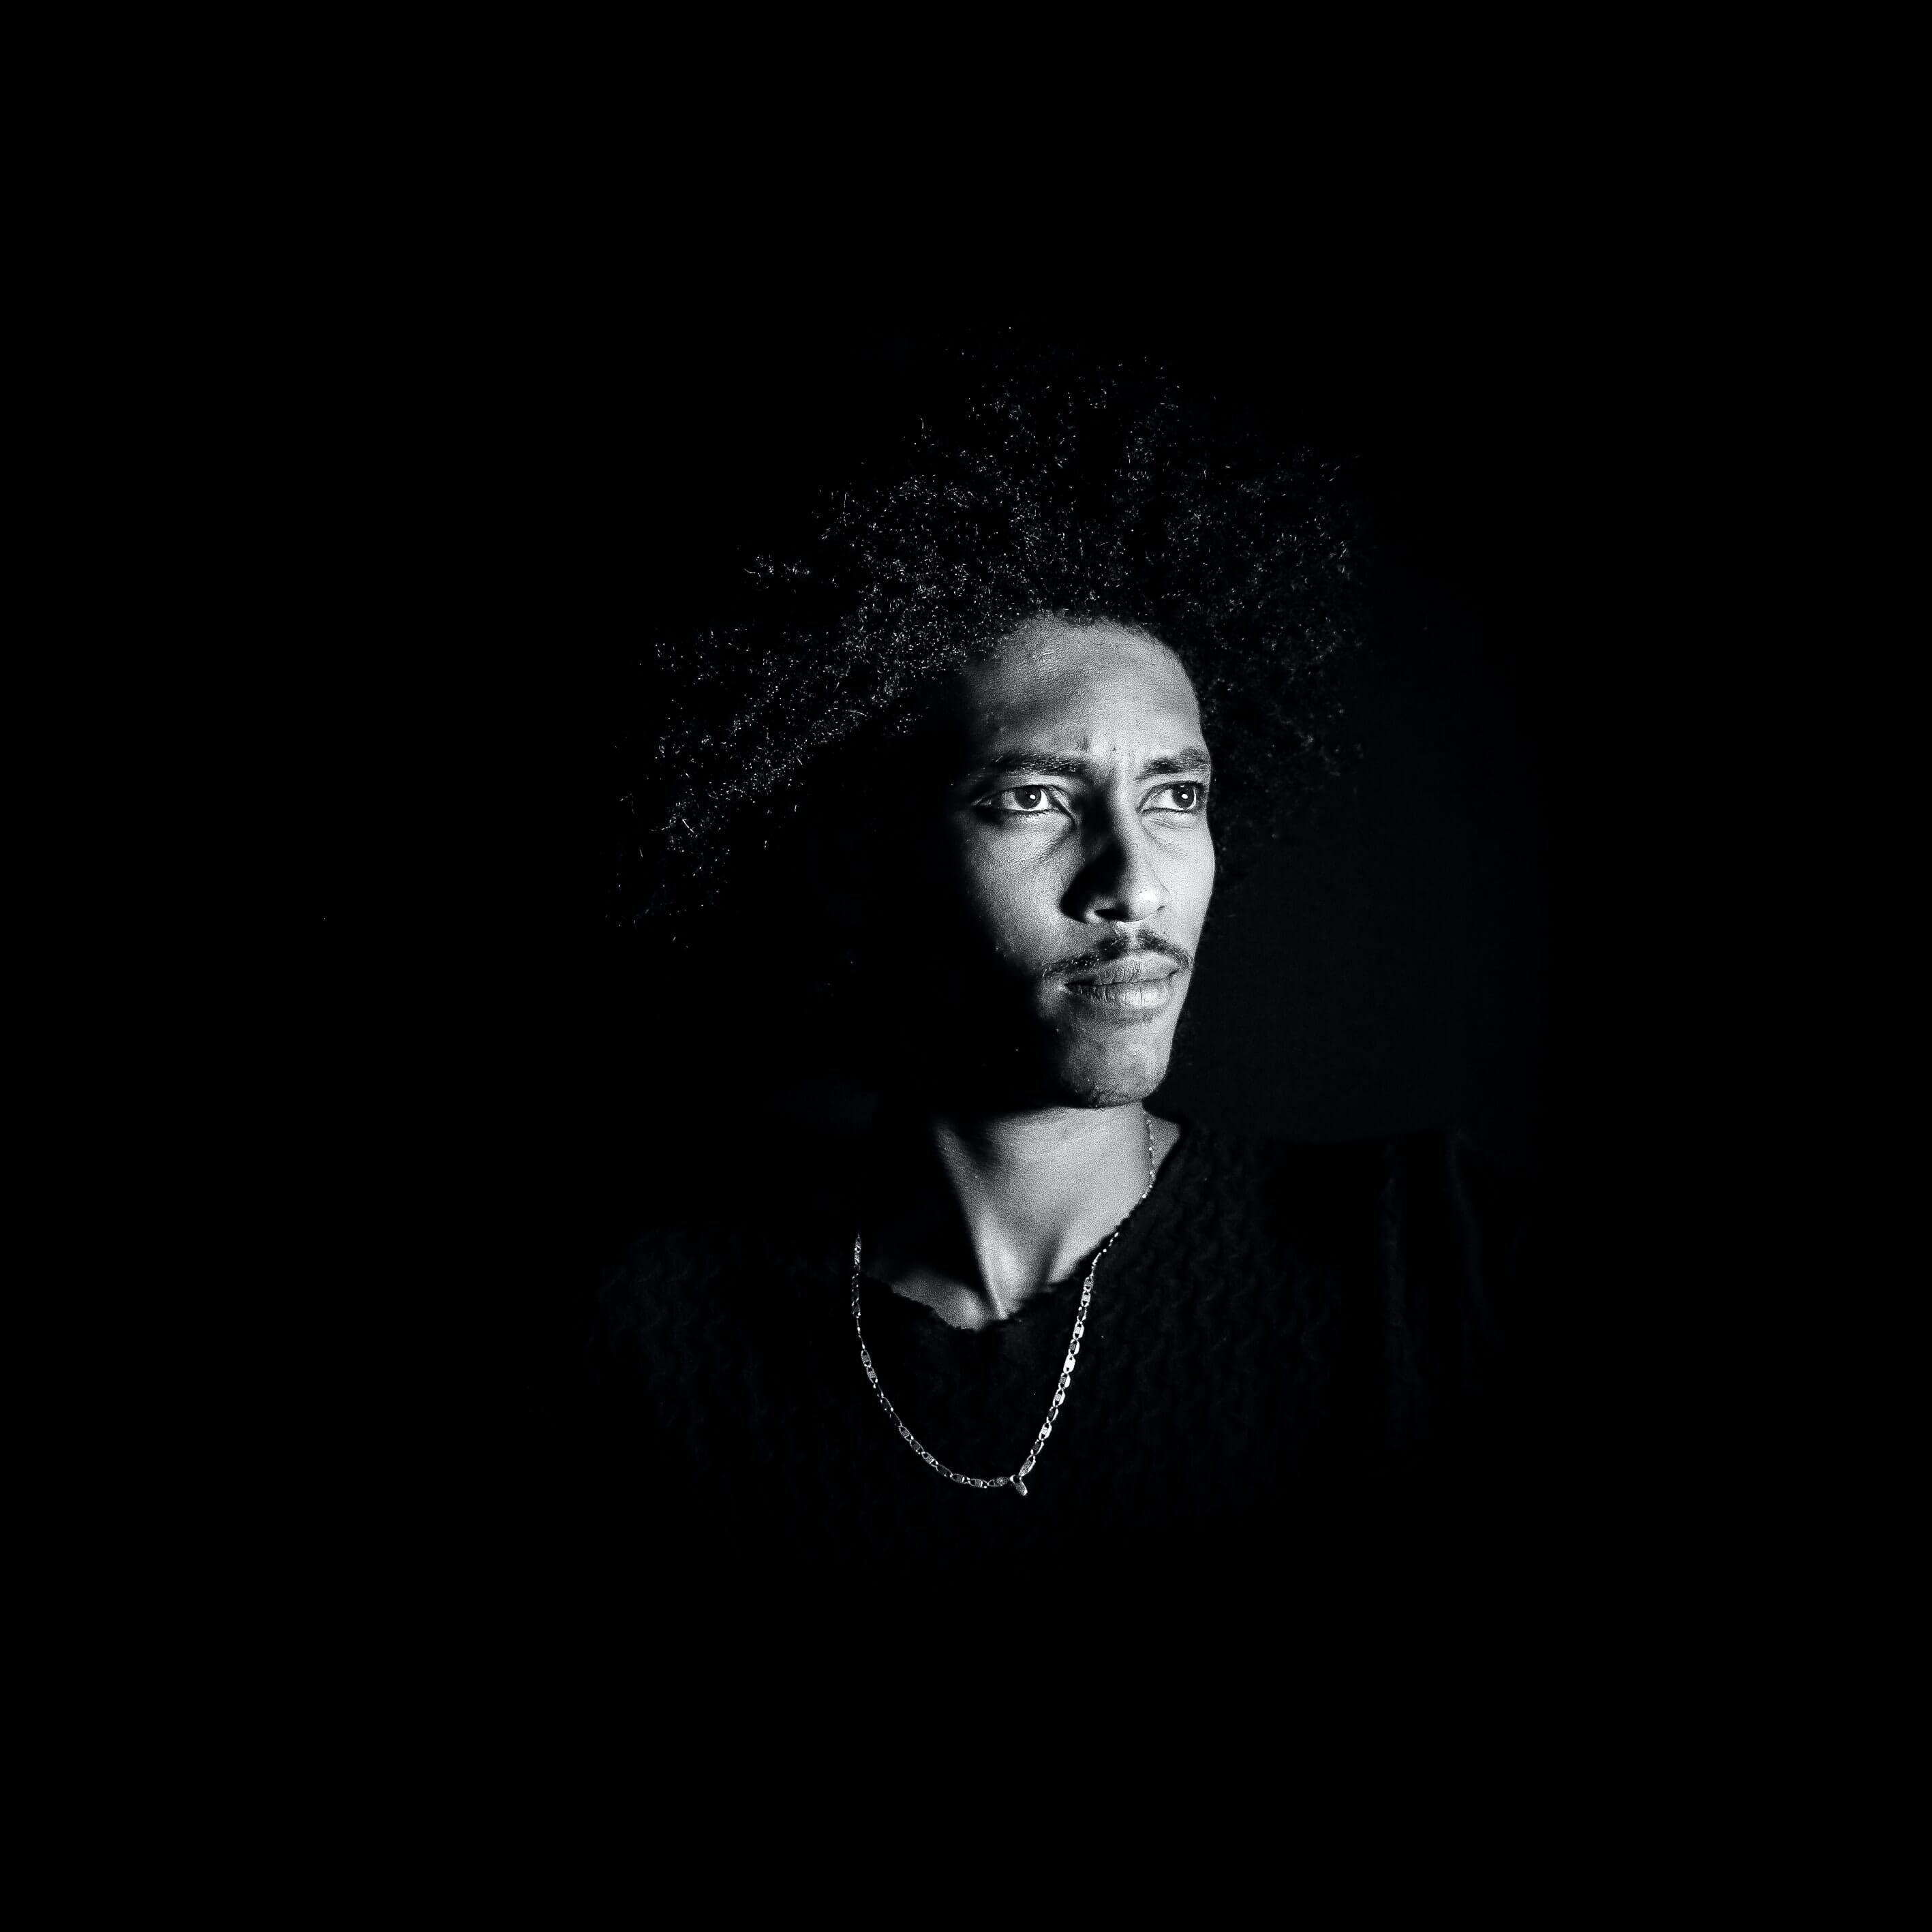
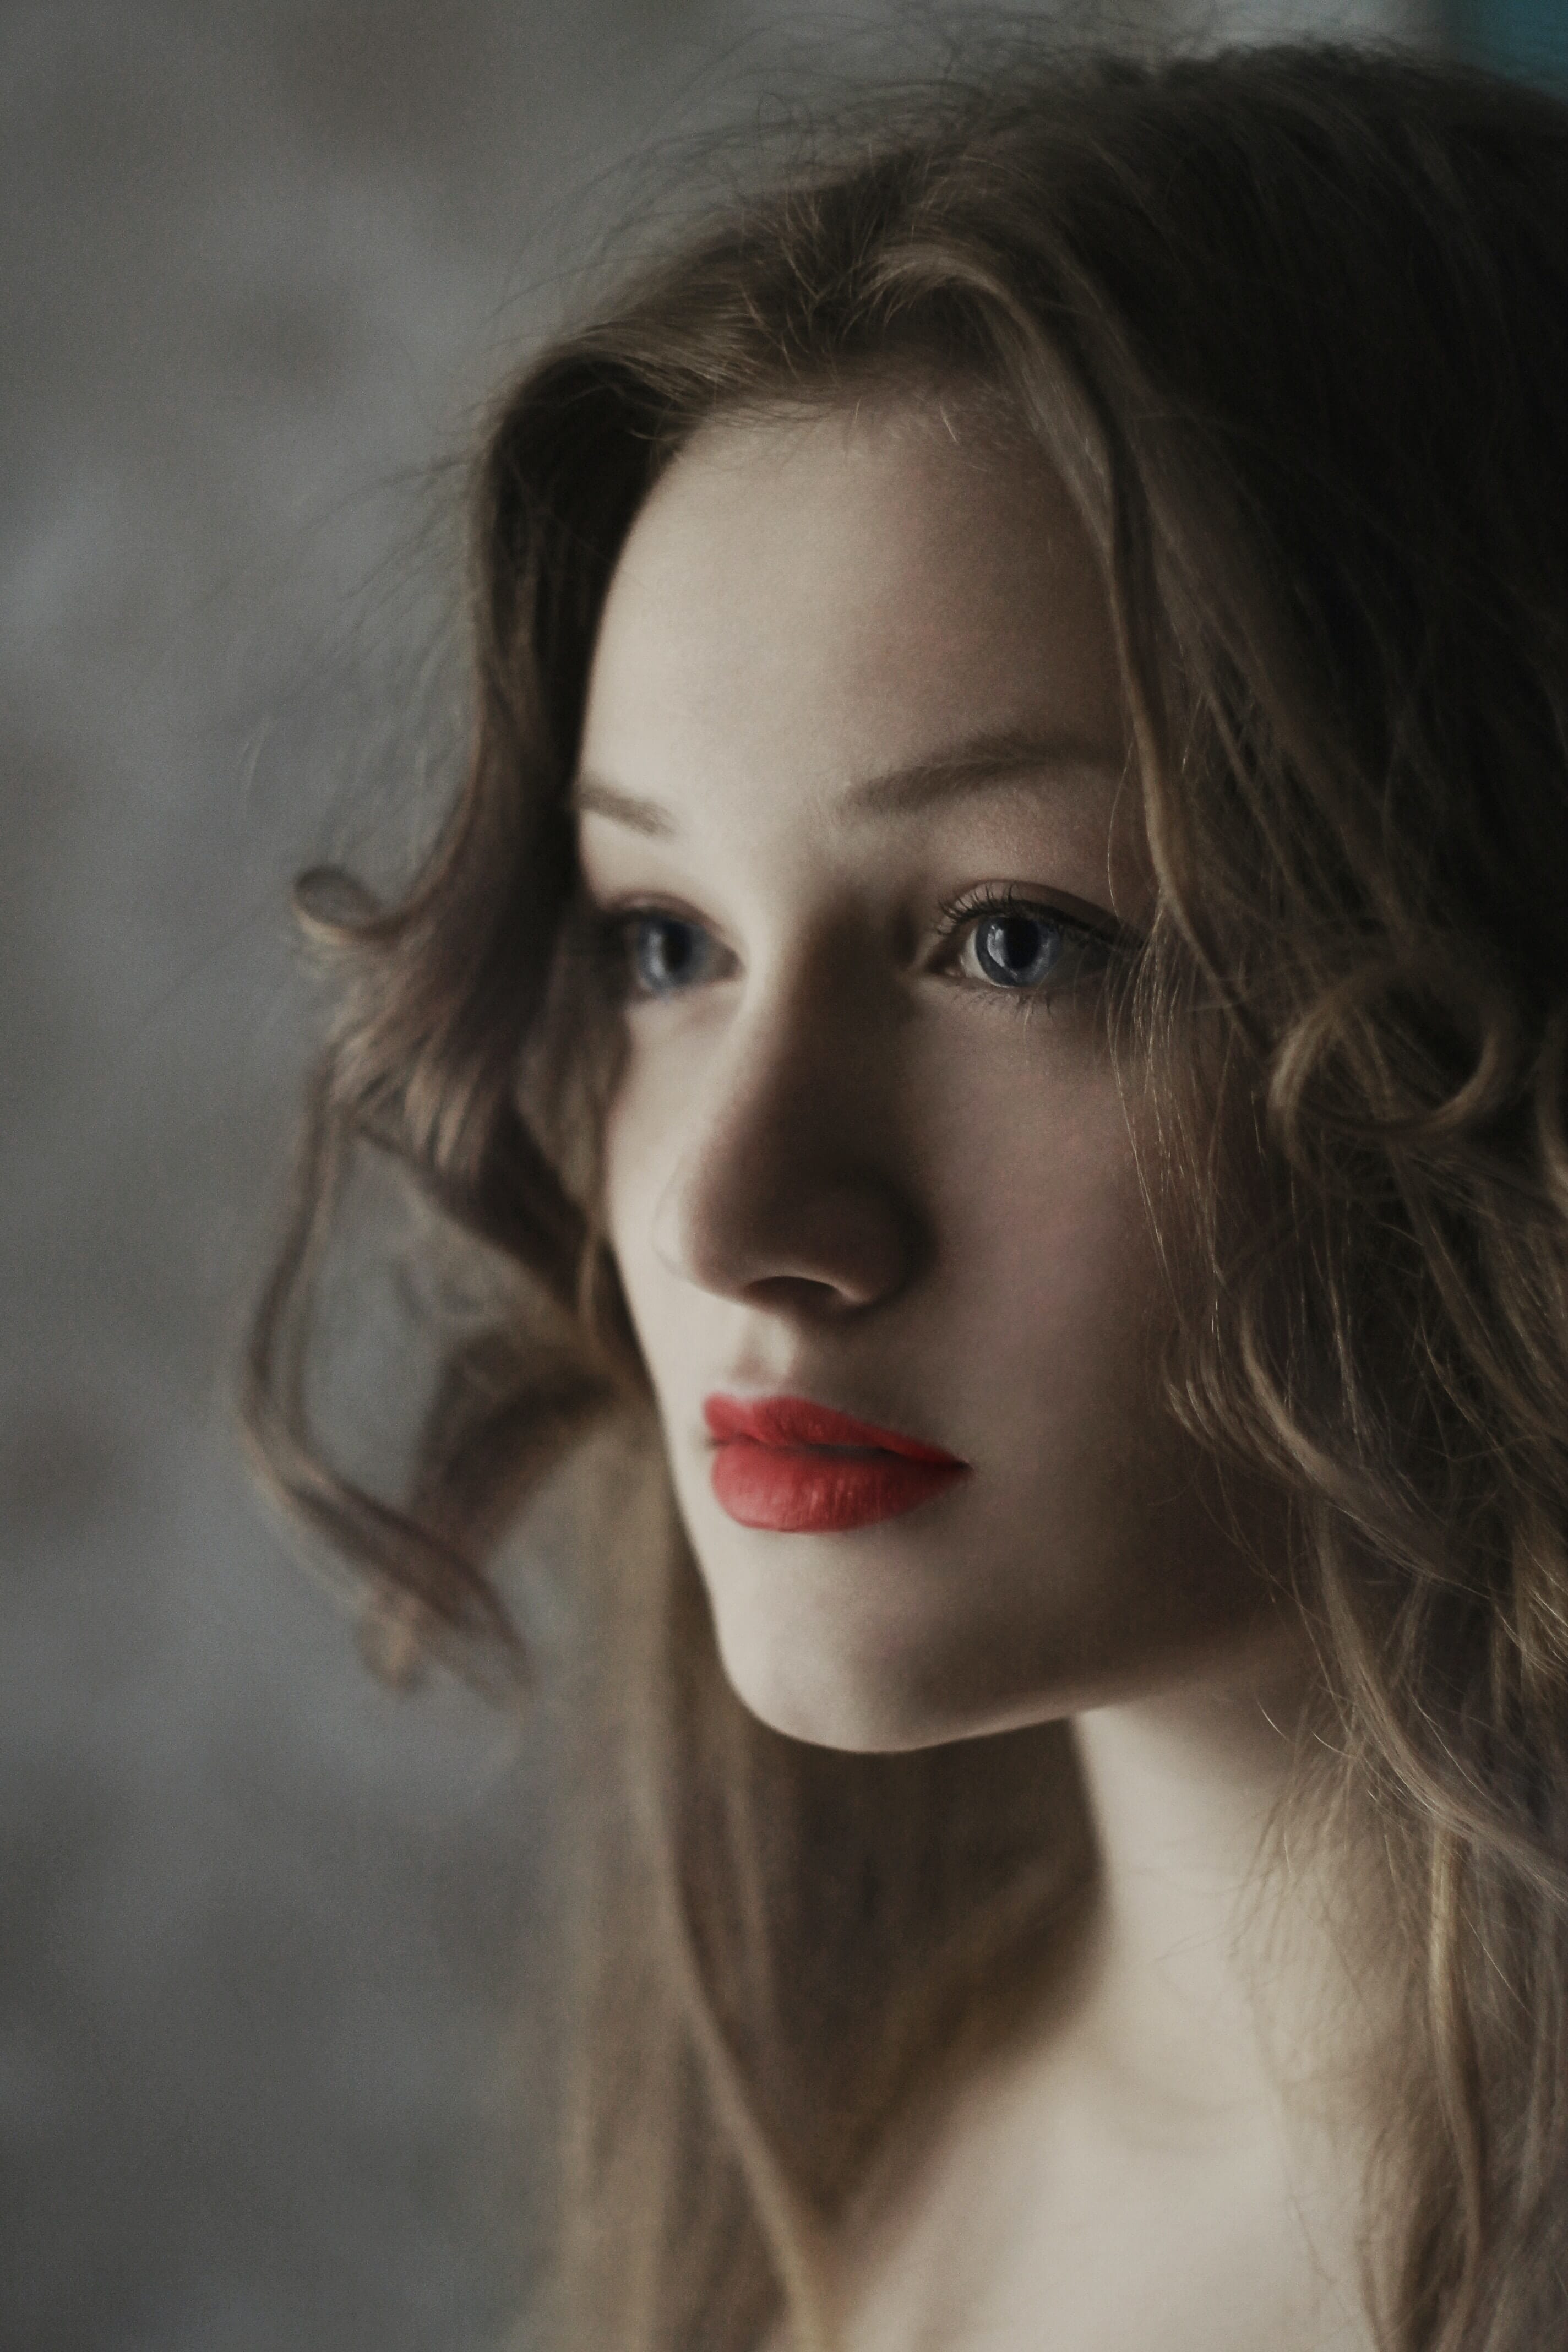
Short lighting refers to a lighting pattern where the camera is angled toward the shadowed portion of a subject’s face.
Like this:
Do you see how the dominant portion of the face, the part that’s angled toward the camera, is completely shrouded in shadow?
That’s short lighting.
And it can work with several types of standard lighting patterns, such as Rembrandt lighting and split lighting, because it’s not so much about the position of the lights, it’s about how you compose the shot to capture the subject.
Make sense?
Short Lighting Vs Broad Lighting
Briefly, it’s important to recognize the difference between short lighting and broad lighting.
Why?
Because these two lighting patterns are perfect opposites.
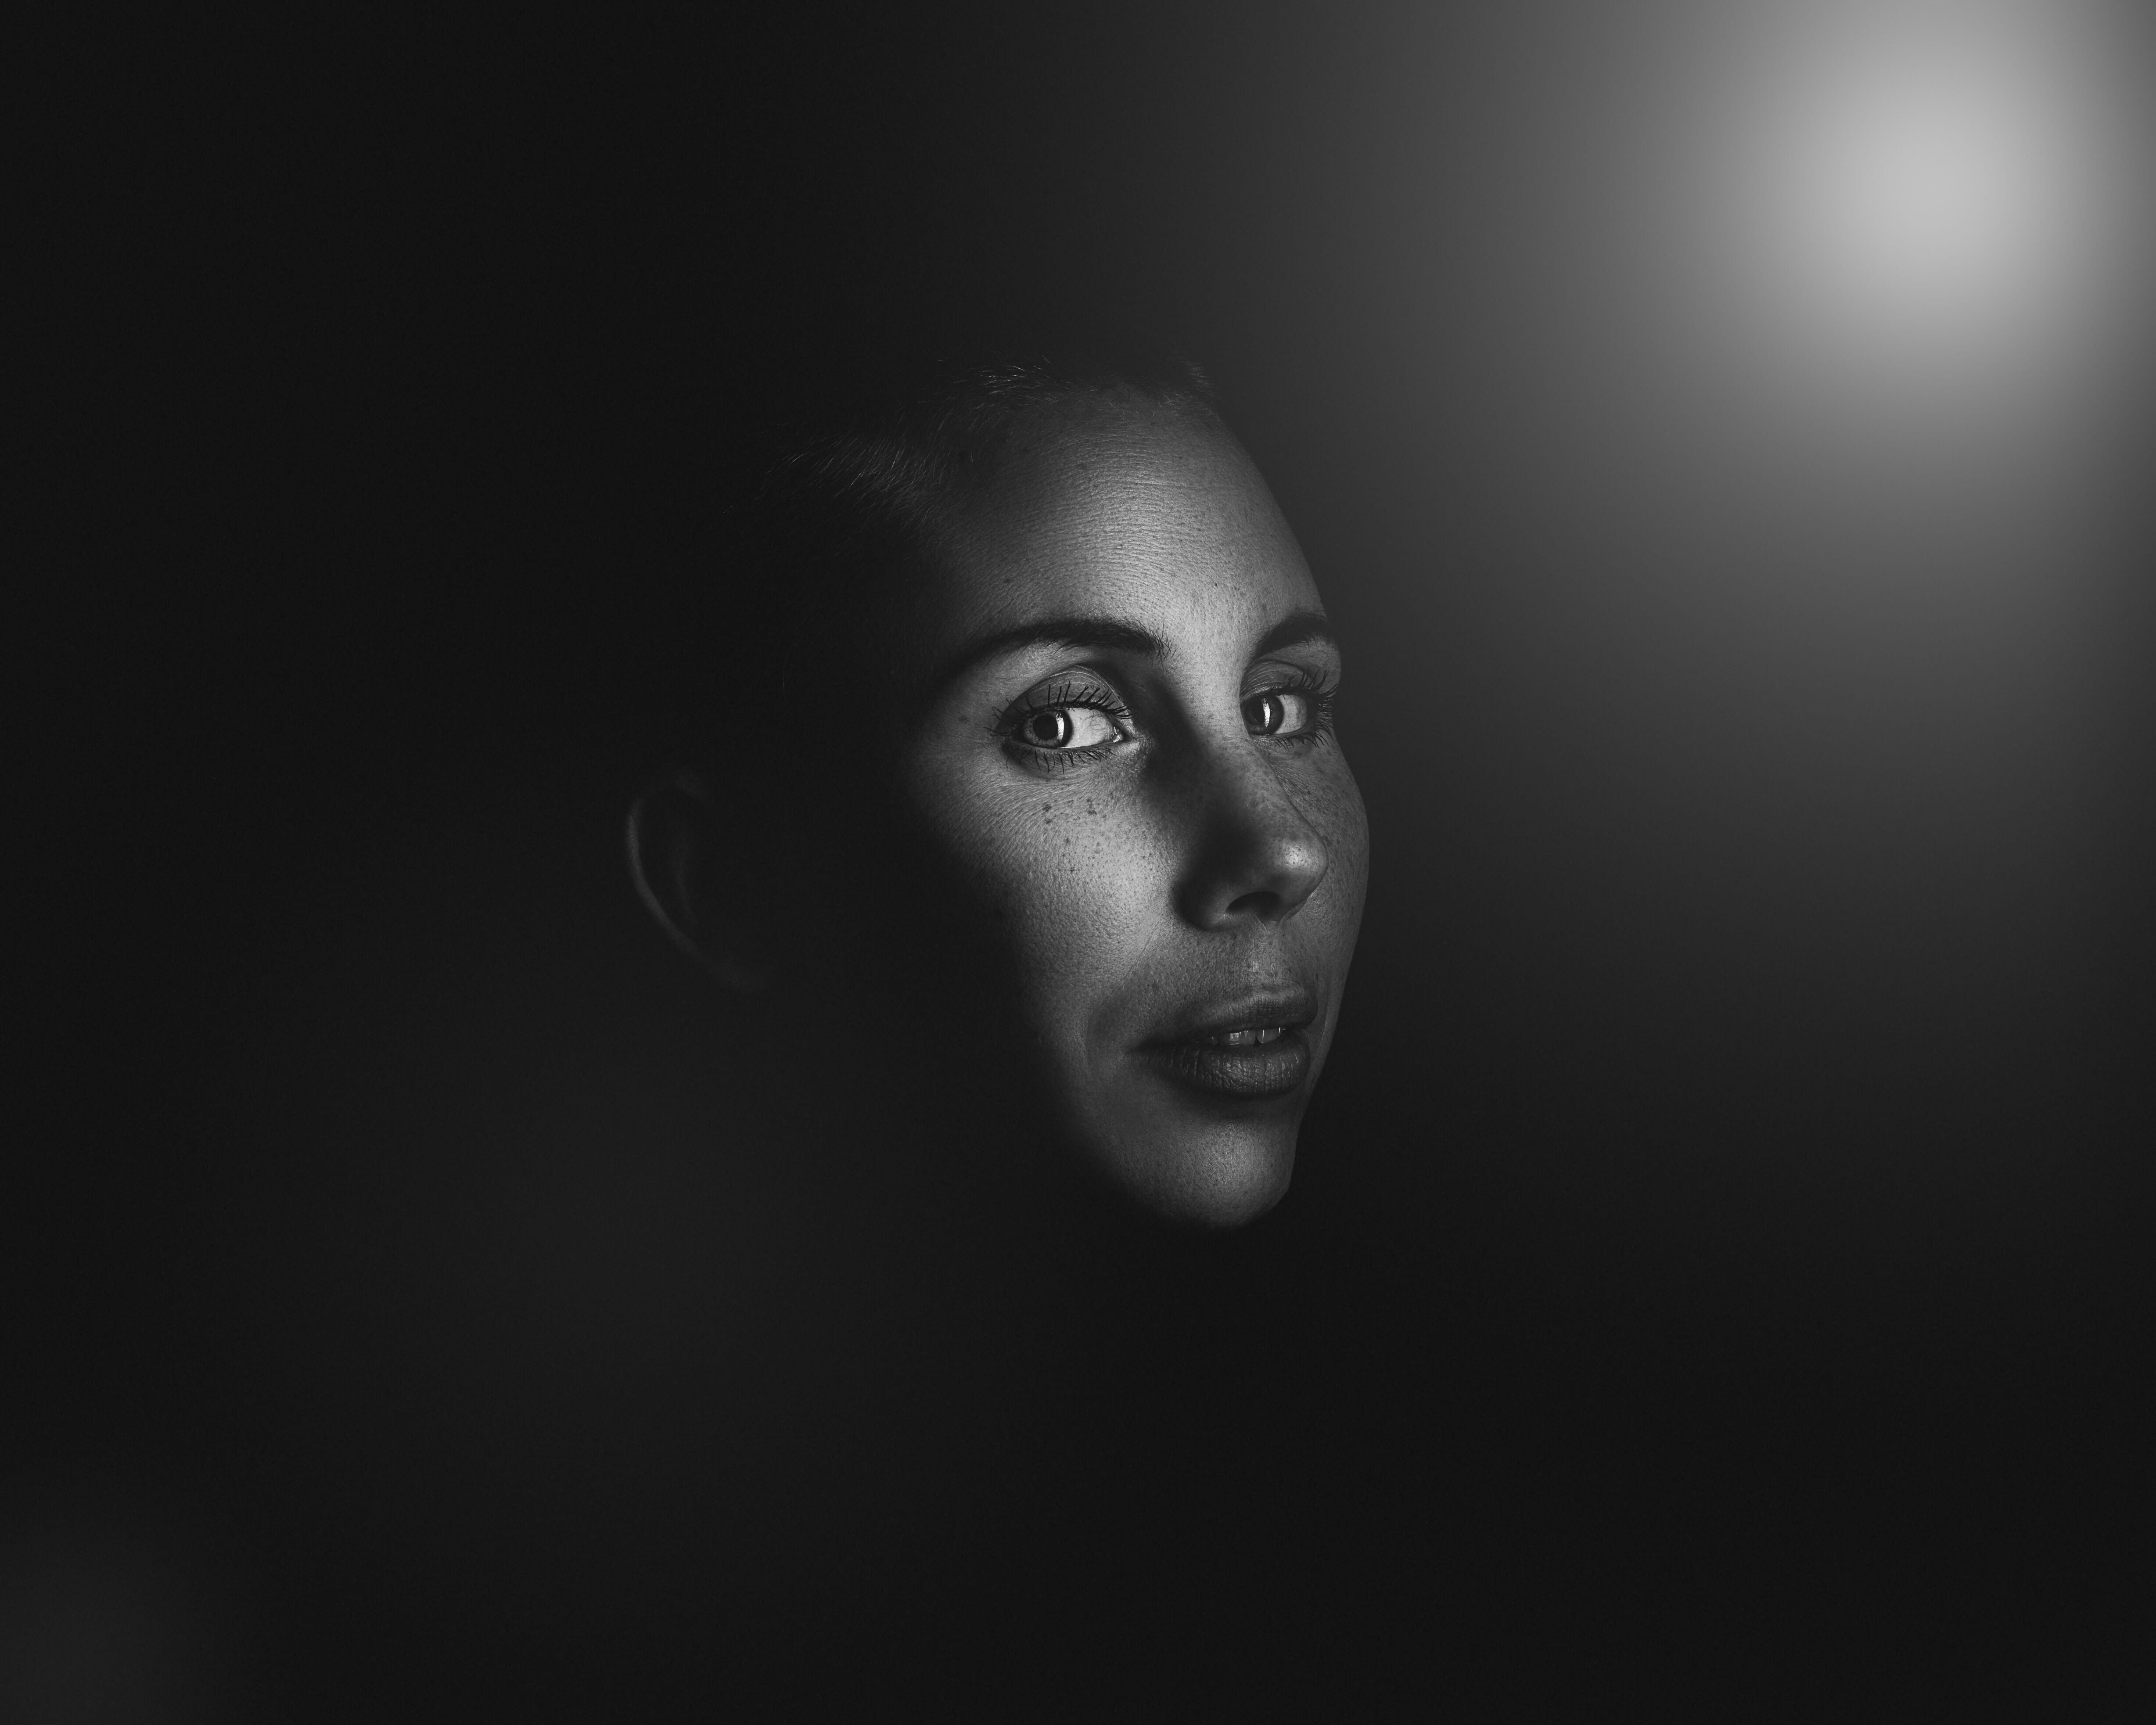
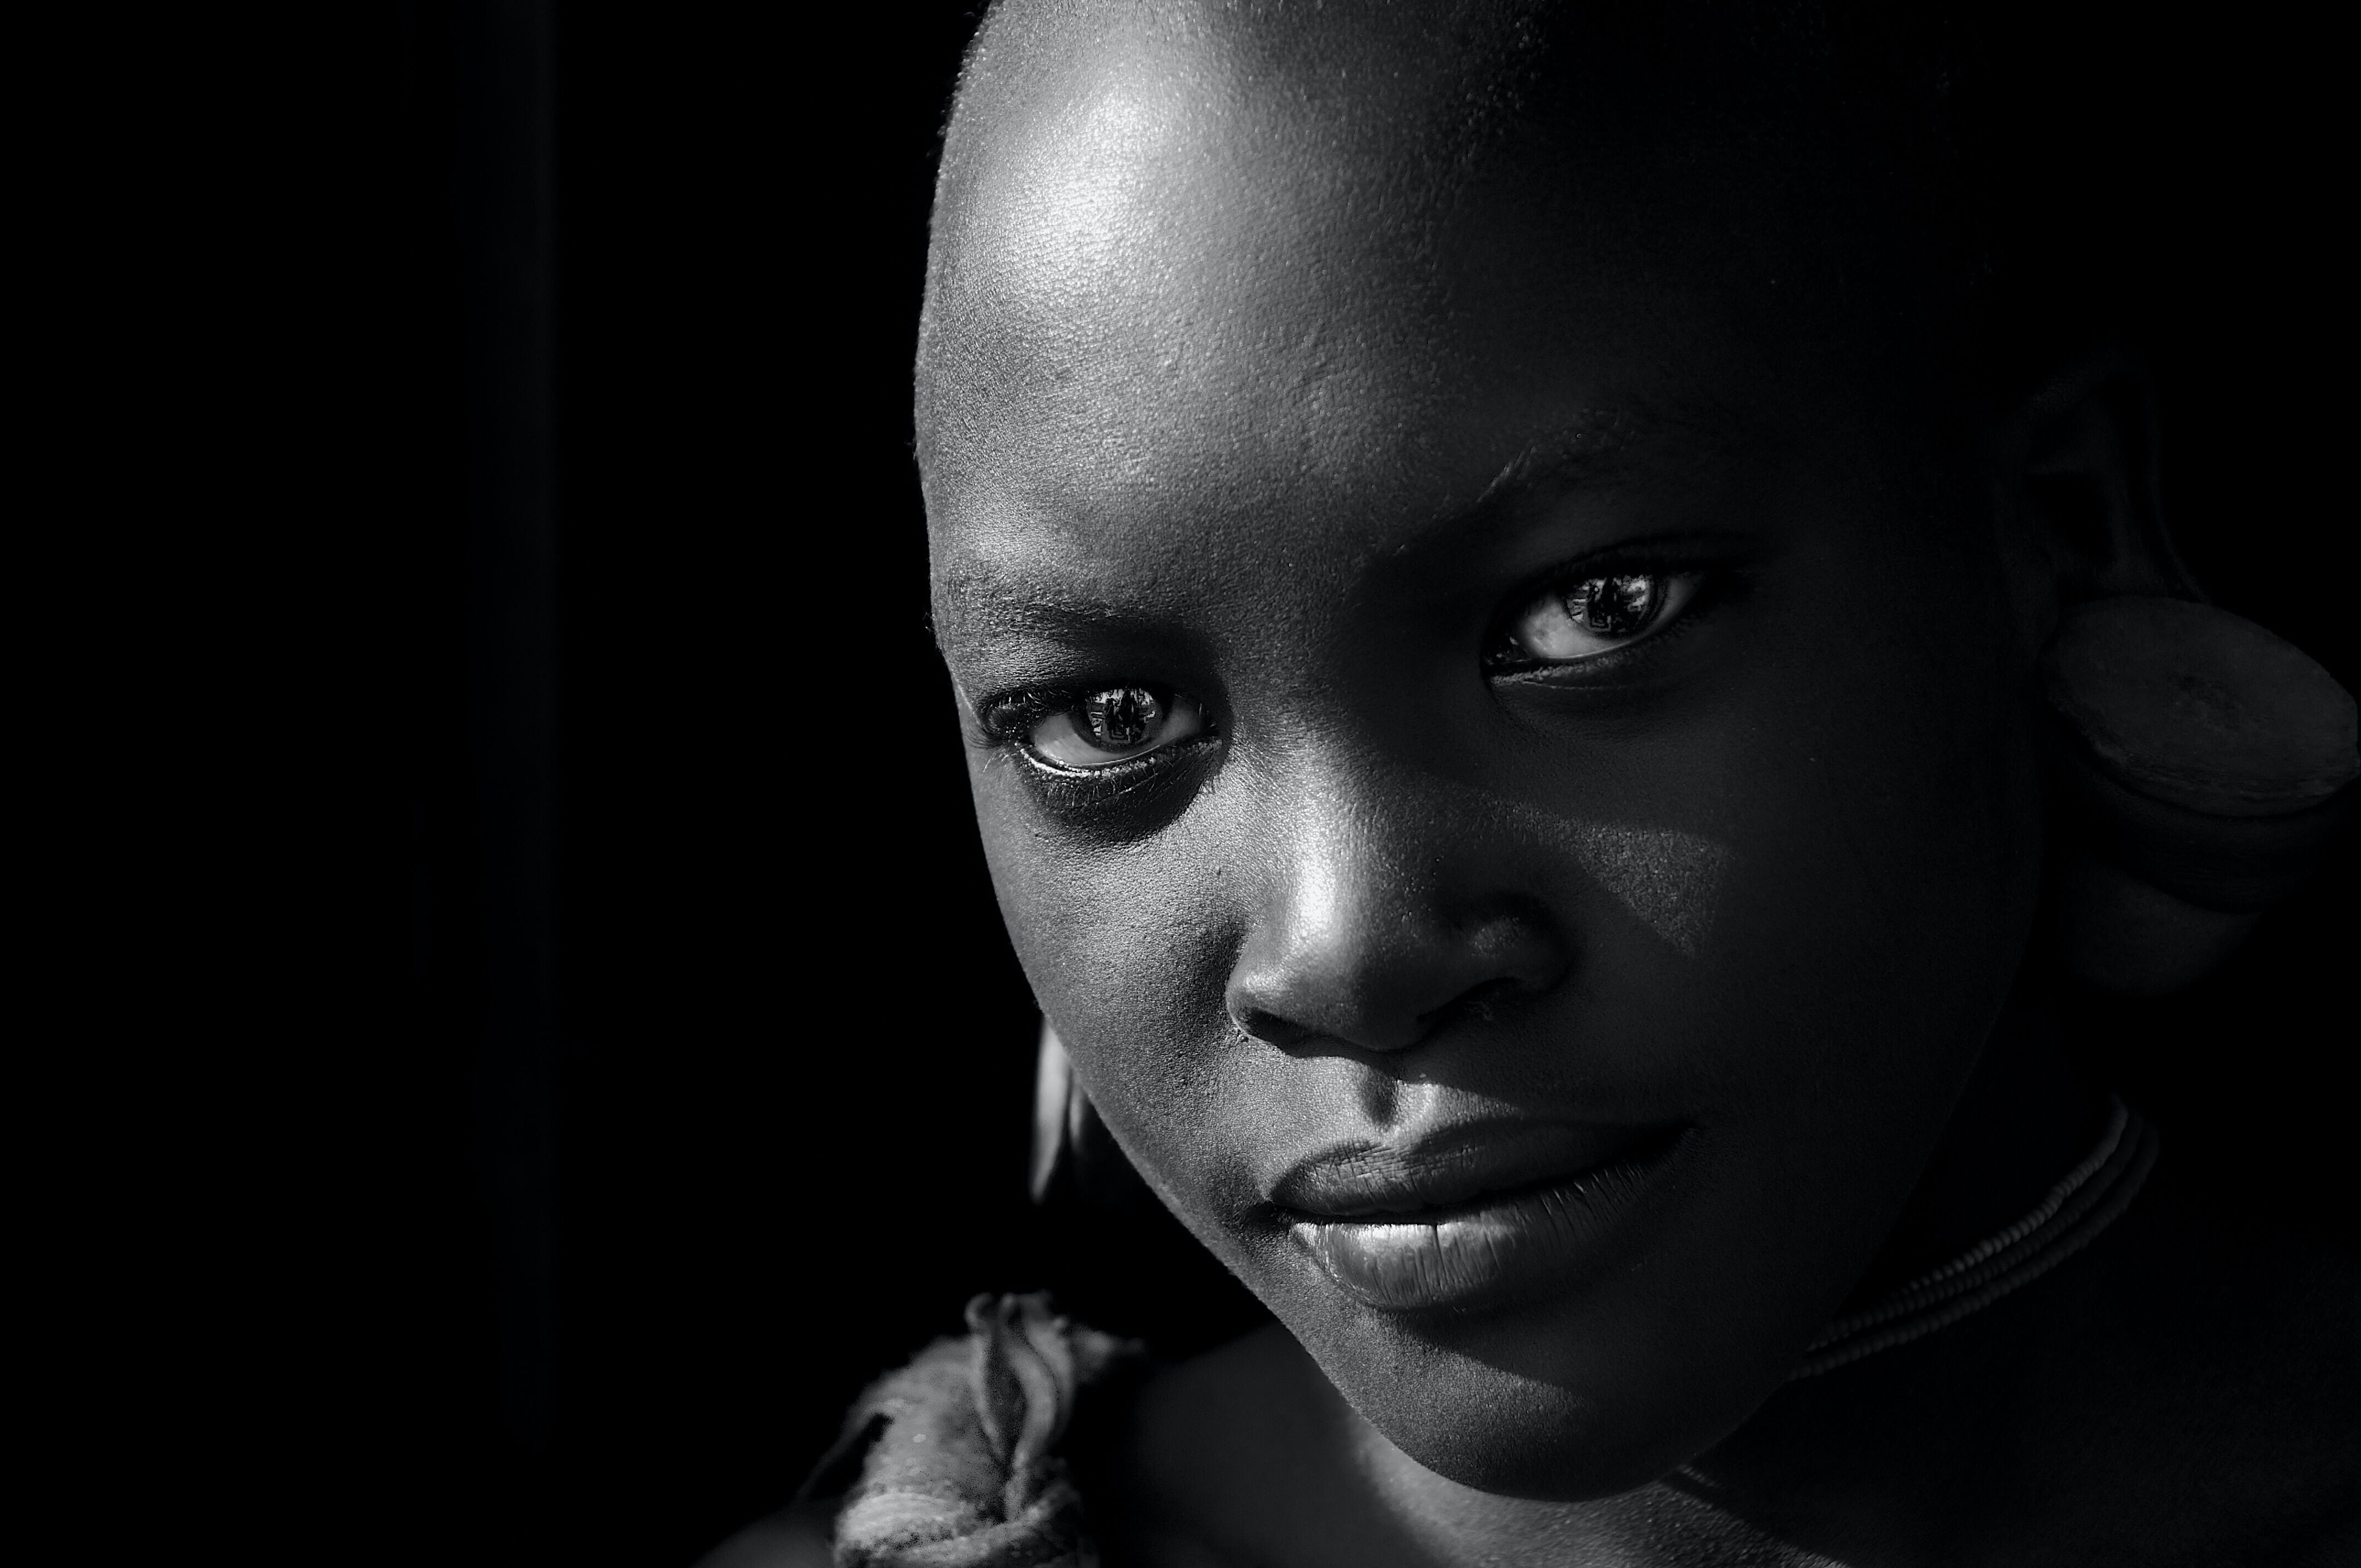
Short lighting involves capturing the shadowy portion of the face.
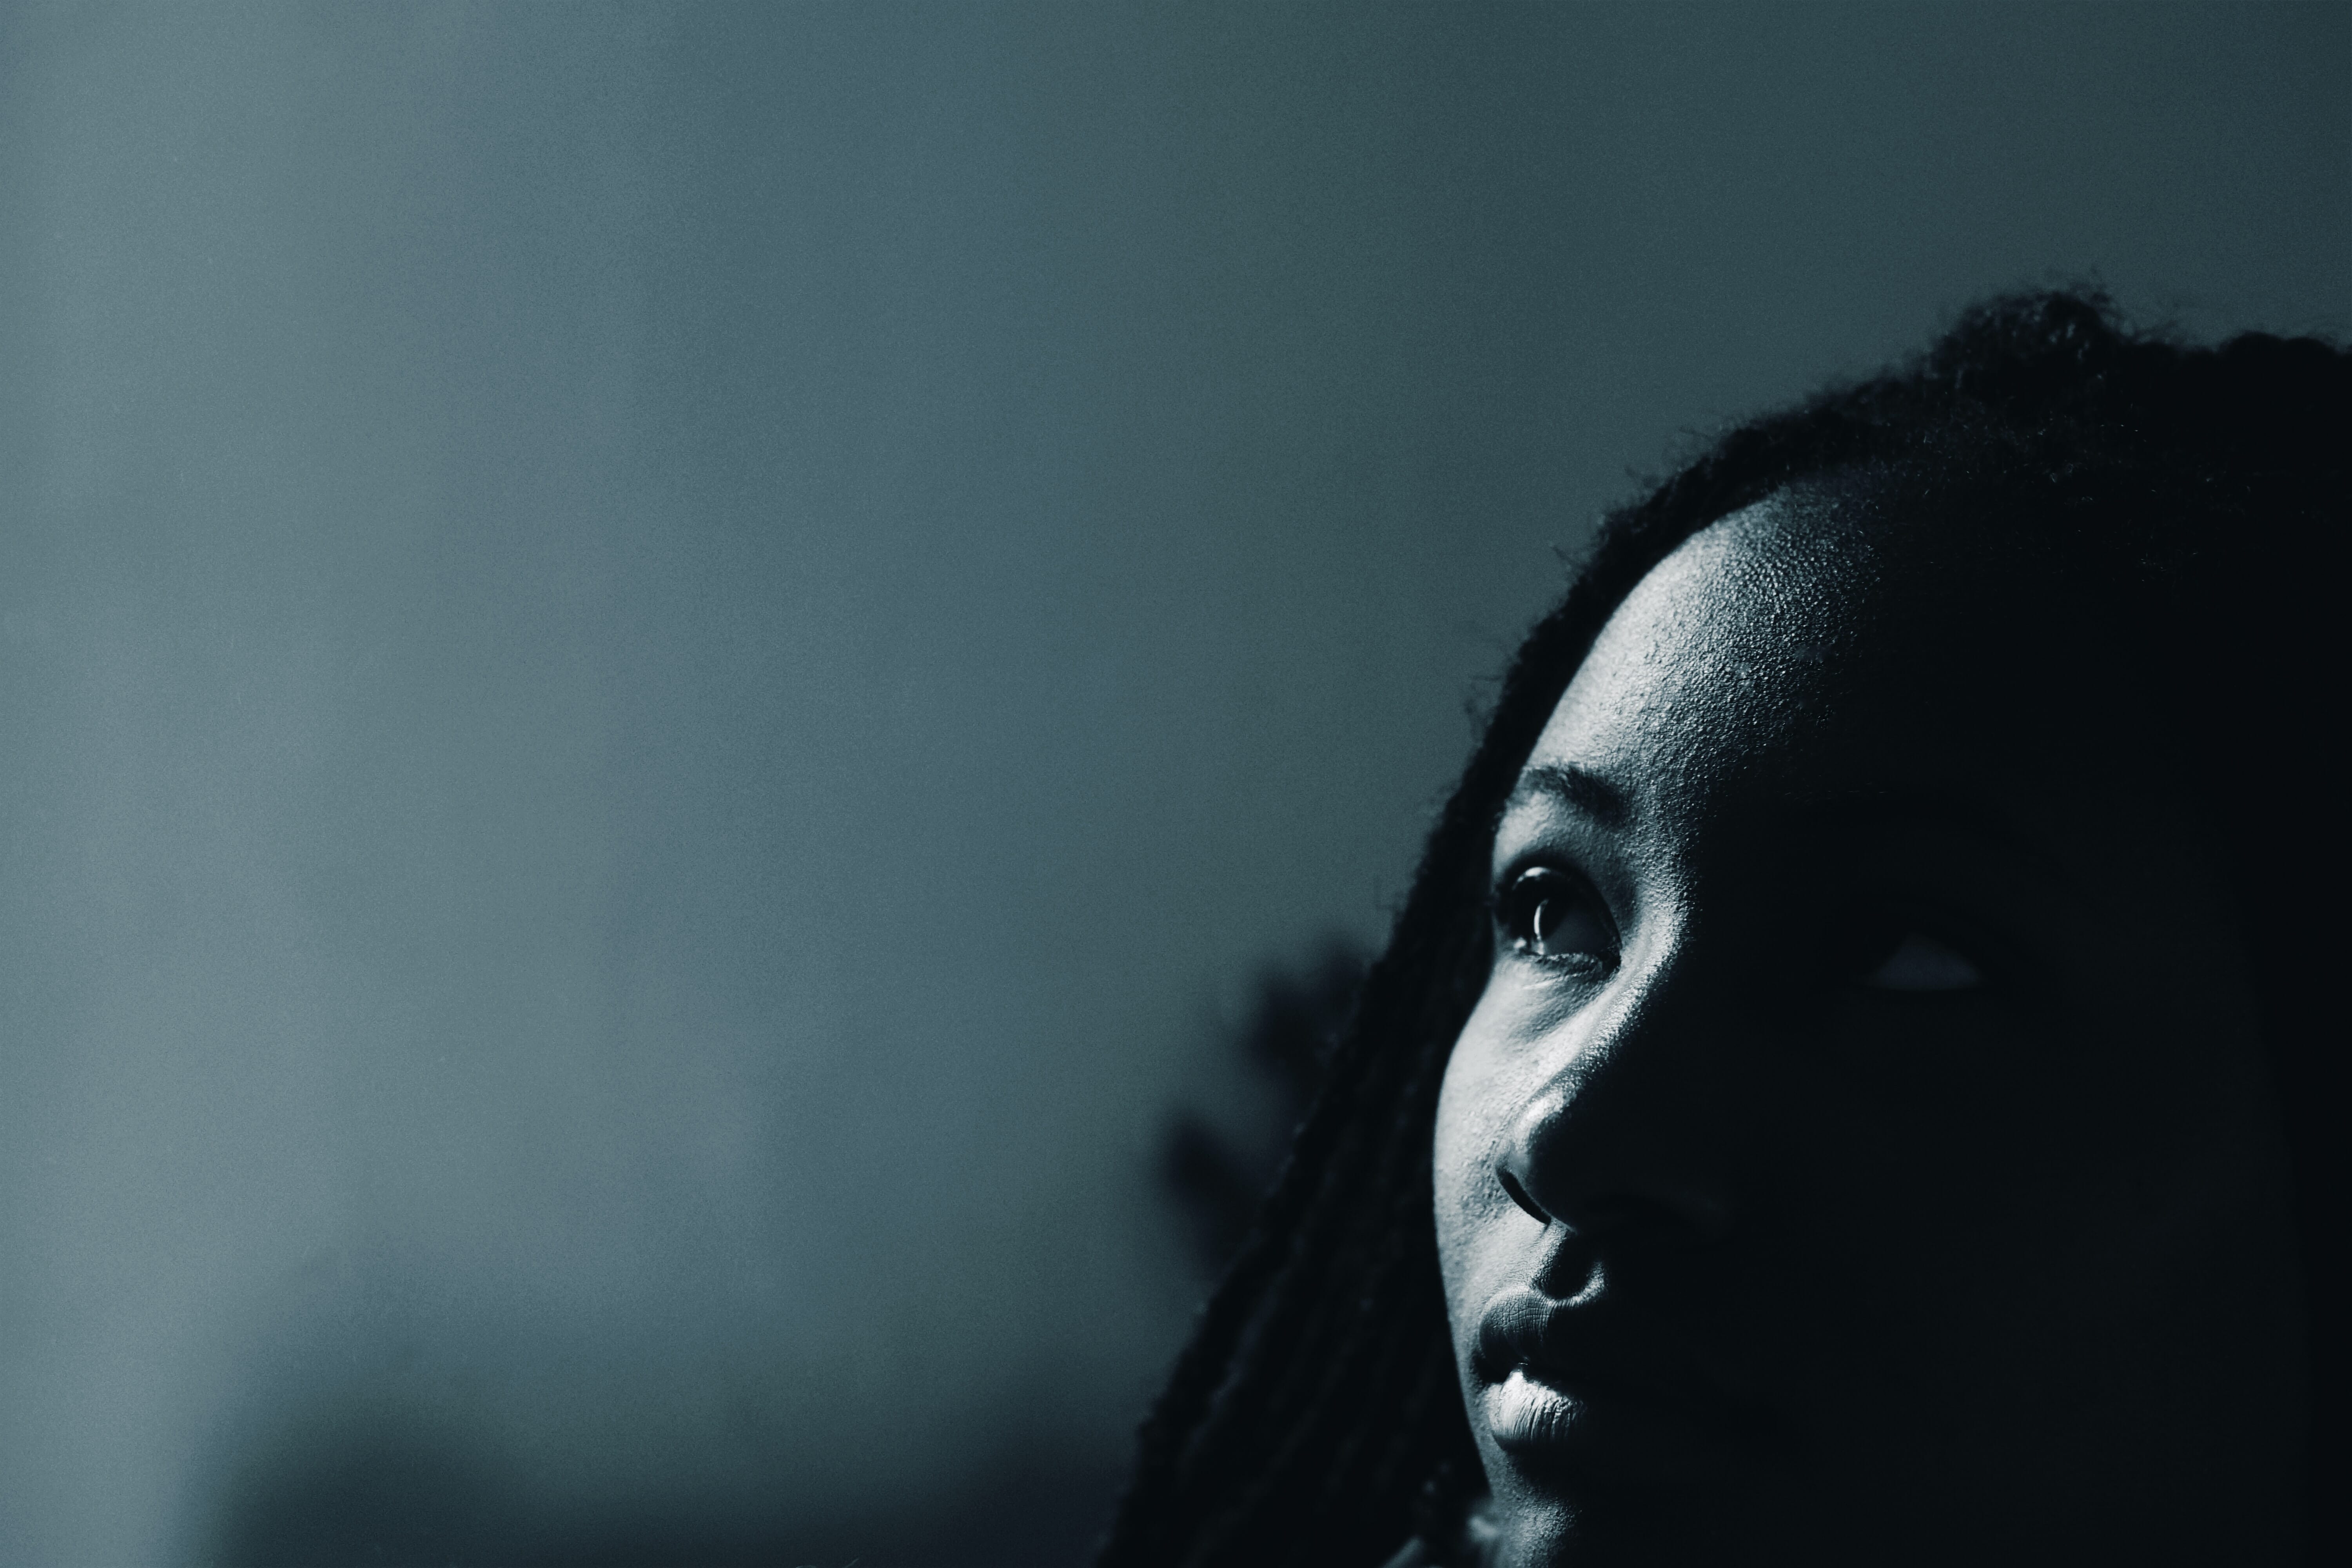
Broad lighting involves capturing the well-lit portion of the face.
They result in completely different effects, as you can see from this short-lit photo:
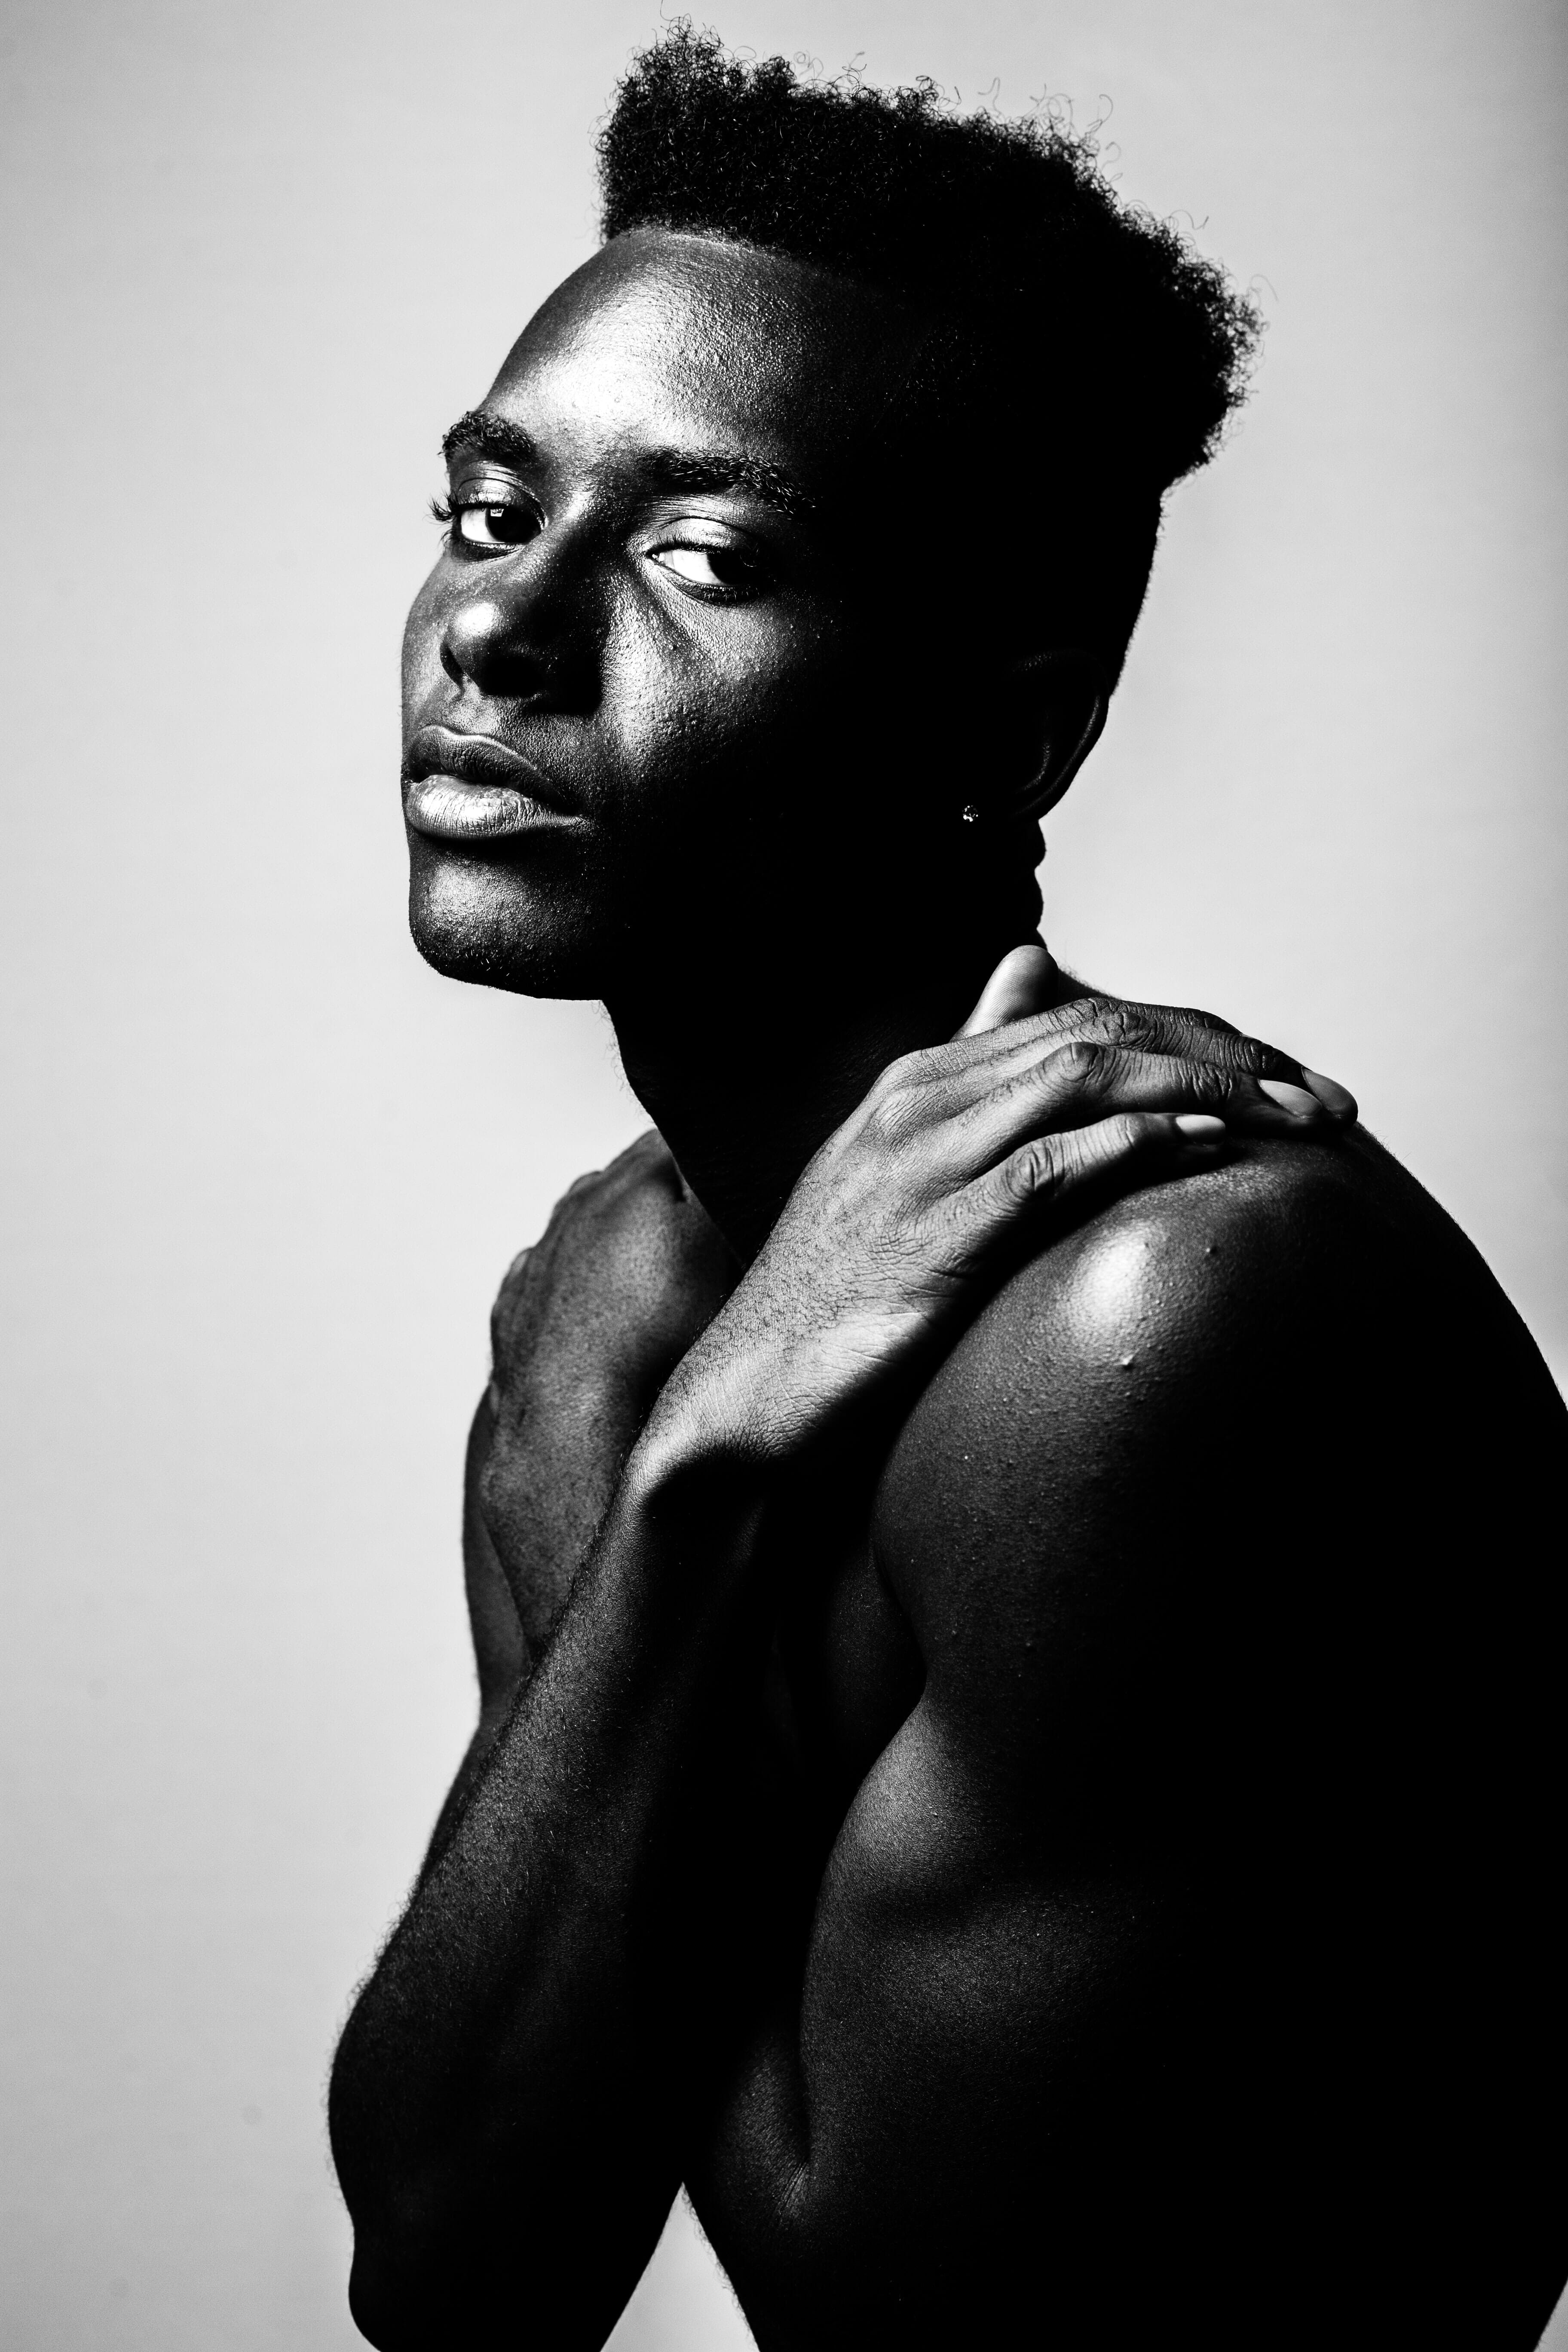
And this broad lit photo:
While both short lighting and broad lighting give beautifully three-dimensional subjects (thanks to the combination of light and shadow), short lighting will help you achieve more dramatic results, thanks to how it emphasizes shadows over highlights.
Why Should You Use Short Lighting?
Short lighting has a few key applications–which is why it’s a very popular portrait lighting pattern, one used frequently by studio portrait shooters, in particular.
First of all, as I mentioned above, short lighting is very dramatic. The darker portion of the face is angled toward the camera, which adds depth and dimension, but also an element of mystery.
Second, short lighting is also useful when working with round-faced subjects. This is because short lighting narrows the face and makes subjects appear slimmer.
(On the other hand, when your subject has a very narrow face, broad lighting is probably the better option, because it will widen the face instead of slim it down.)
Third, short lighting is great for situations where you want a completely black background and a well-defined subject. Short lighting emphasizes shadow, so that a dark background will nicely complement the subject, creating a stunning, dramatic portrait.
How to Set Up Short Lighting: A Step-By-Step
Short lighting is fairly easy to create–so in this section, I’ll walk you through both simple and more complex short lighting setups.
Equipment
Short lighting requires at least one light source (either natural light, such as a window, or artificial light, such as a strobe or a flash). If you do use an artificial light source here, you’ll need a modifier, such as an umbrella or a softbox.
I also recommend using a reflector, which will alleviate the shadows somewhat; this will help to create a well-defined subject without overpowering the viewer with darkness.
And if you’re looking to create more complex short lighting setups, you’ll want a second light, and potentially a third light, depending on how much you wish to separate the subject from the background (more on that later!).
The Basics of Short Lighting
You can pull off short lighting with a number of different common lighting techniques.
In other words, you have a lot of flexibility.
And while I’ll discuss these techniques in great detail later on, here’s the key to perfect short lighting:
Position the light source so that it’s off to the side of your subject, somewhere between the 90 degree and the 45 degree mark.
Note that you can create more shadow by positioning the light toward the 90 degree mark, and less shadow by positioning the light toward the 45 degree mark. This is your choice, and depends on the level of drama that you’re going for, with more shadows equalling more drama.
Then position yourself (that is, your camera!) so that you’re on the opposite side of the subject, and compose your shot so that it captures primarily the dark side of the face.
Again, you have some options here. By moving more toward the side of your subject (so that you’re more opposite the light source), you’ll be able to focus on the darker portion of your subject’s face, and you’ll achieve a dramatic result. But by moving back toward the 0 degree mark, you’ll capture more of the well-lit portion of the subject’s face, which offers less of a dramatic effect, and will slim down the subject less.
Ultimately, the lighting angle and the camera angle that you use is up to you! Just remember that you have a lot of options, and don’t be afraid to experiment.
That said, I recommend that you start with a few common lighting angles:
Rembrandt Lighting Plus Short Lighting
Rembrandt lighting is a classic, and is distinguished by the triangle of light under your subject’s eye, like this:
It can work very well with short lighting, as long as you’re willing to accept an ultra-dramatic result.
Simply position the light at around a 30 degree angle from the side of your subject (though you’ll want to shift the light back and forth, or have your subject turn their head slightly to fine-tune this).
Put the light up a few degrees, so that it’s above the subject’s head.
Then look for that triangle under your subject’s eye, and angle your camera so that you capture the darker portion of the face.
You’ll get a very cool result!
Split Lighting Plus Short Lighting
If you’re after an even more dramatically short-lit portrait, then look no further than split lighting.
Split lighting literally splits the face in two, with one half brightly lit, and the other half in shadow. Like this:
Note that split lighting is very easy to achieve. Simply position the light at a 90 degree angle from your subject.
Then angle your camera so that you’re photographing the darker side of the subject’s face (to achieve the short lighting effect).
Depending on how much of the well-lit portion of the face you capture, you’ll end up with an ultra-dark, dramatic image–or an even darker, even more dramatic image!
Adding a Reflector
As I’ve repeatedly emphasized above, short lighting can be very, very dramatic, especially when combined with a low key (i.e., black) background.
But you’re not always after an ultra-dramatic result. Sometimes, you want drama, but you also want to sculpt the face, and include some gradual transitions from dark to light.
That’s where a reflector comes in. By placing a reflector on the dark side of the subject’s face, you can push light back into the shot, and avoid complete shadow. This looks more natural, and while the final image will still be dramatic, it’ll also have a more refined feel.
Adding a Second or Third Light
You can easily achieve short lighting with just one light source.
But if you want to add back a lot of light to the dark side of the face, instead of using a reflector, you can go for a second light.
Set it at low power, and aim it at the shadowy portion of the face. You can play with the angle, but it’s often good to start at 90 degrees and work your way in toward the zero degree mark.
As for a third light, you can always aim to illuminate the background (by placing a light behind the subject and pointed at the backdrop), though this will eliminate that nice low-key look, so make sure that it’s what you’re after before you use it.
You can also put a rim light behind the subject, pointed at the back of the subject’s face. This will help separate the subject and the background by creating a slight halo effect.
Short Lighting: Conclusion
Short lighting is a great way to create more dramatic photos.
So make sure you’re aware of all your different short lighting options–and, by experimenting with different lighting angles and camera angles, you’ll get some fantastic results.
What is short lighting?
Short lighting is a type of lighting/composition technique, in which you focus your camera on the unlit portion of a subject’s face (so that the well-lit portion of the face is turned away from you). This results in a very dramatic look, and will slim down your subject’s face.
Is short light a flattering form of lighting?
Short lighting slims down wider faces, which can be flattering. But the images tend to be very dramatic, so make sure you know what you’re doing before you try it out on a family portrait!
What’s the difference between short light and Rembrandt light?
Actually, it’s possible to photograph a subject using both short light and Rembrandt light. You see, short lighting isn’t a lighting pattern in the traditional sense of the word; instead, it has to do with the angle of the face and the camera’s position, rather than the position of the lights themselves. So you can capture a short-lit photo with Rembrandt lighting, loop lighting, or split lighting–any form of sidelight, really.
Very good information and easy to understand. Thank you